@Connector(name="myconnector", schemaVersion="1.0", friendlyName="Connector")
public class MyConnector
{
    @ConnectionStrategy
    private ConnectionManagementStrategy strategy;

    public void setMyProperty(ConnectionManagementStrategy strategy)
    {
        this.strategy = strategy;
    }

    public ConnectionManagementStrategy getStrategy()
    {
        return this.strategy;
    }
        ...
}Connector Connection Strategies
| DevKit is compatible only with Studio 6 and Mule 3. To build Mule 4 connectors, see the Mule SDK documentation. |
Since Devkit 3.6, connections are no longer supported at the @Connector level (excluding OAuth V1), but now are defined in another component and injected to the @Connector by annotating a field with @ConnectionStrategy. This provides a better environment for developing a connector and the easiest way to create multiple authentication types.
Note: OAuth V1 is not supported as a @ConnectionStrategy.
Prerequisites
This document assumes you are familiar with the Anypoint Connector DevKit and you are ready to implement authentication on your connector. You should also be familiar with authentication methods.
Adding a @ConnectionStrategy to a @Connector
To add a @ConnectionStrategy:
-
Create a new Java class for the connection strategy.
-
Annotate the class with the one of the DevKit authentication methods. In the example we are using
@ConnectionManagement. -
Develop your authentication logic or connection management.
-
Finally, set
@Connectorto reference the connection strategy class by creating a@ConnectionStrategyfield with the reference to the new strategy. The@Connectoris then detached from how it connects with the service.
Examples
The following example shows the @Connector and @ConnectionStrategy blocks in a connector:
The next example declares the Connection Management block in a connector:
@ConnectionManagement(friendlyName="Connection Management", configElementName="demo-config")
public class ConnectionManagementStrategy
{
   Private Service service;
   @Connect
   public void connect(@ConnectionKey String username, @Password String password)
       throws ConnectionException {
         service = new Service(username);
       try{
         service.connect(password);
       }catch(Exception){
       throw new ConnectionException(...);
       }
   }

   @Disconnect
   public void disconnect() {
       service.disconnect();
   }

   @ValidateConnection
   public boolean isConnected() {
       return service.connectionStatus();
   }

   @ConnectionIdentifier
   public String connectionId() {
       return service.getConnectionId();
   }
}
Supporting Multiple Authentication Models in One Connector
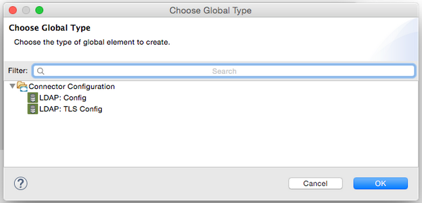
Anypoint DevKit supports multiple authentication models in the same connector. The LDAP connector illustrates how to structure the connector code to support this feature.
public class LDAPConnector
{ ... @Config AbstractConfig config; ... }
public abstract class AbstractConfig
{ ... }

@ConnectionManagement(friendlyName = "Configuration", configElementName = "config")
public class LDAPCacheConfig extends AbstractConfig { ... }
@ConnectionManagement(friendlyName = "TLS Configuration", configElementName = "tls-config")
public class LDAPTlsConfig extends AbstractConfig
{ ... }
Users can declare an abstract base class or interface using different Connection Strategies that share as child classes and implement the authentication logic and connection management if applicable.
Supporting both OAuth and Basic Authentication in the same connector means having two config elements in the same XML namespace. To enable this, you can use the parameter configElementName of the Connection Strategies annotations.
For example in the LDAP connector, the LDAPTlsConnection class sets the configElementName to tls-config , rather than the default value, config, on the other hand the LDAPCacheConnection uses the default value for configElementName. As a result, in XML,
use either ldap:tls-config or ldap:config to pick the needed version of the connector. Anypoint Studio renders this when configuring the connector displaying this screen:


