DotNet Connector
Standard
The DotNet Connector allows you to call .NET code from a Mule flow.
Before You Begin
To complete this tutorial, you need the following components installed on your machine:
-
Anypoint Studio, the graphical interface to Mule ESB. See Download and Launch Anypoint Studio for details
Installing the DotNet Connector in Anypoint Studio
To install the DotNet connector in Anypoint Studio, follow these steps.
-
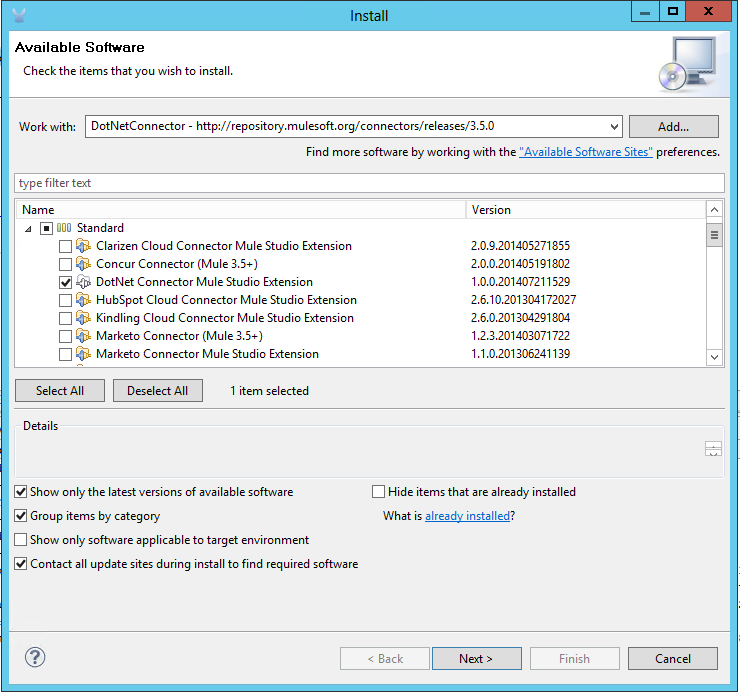
Select Help, then Install New Software.
-
Next to the Work with field, click the drop-down and select
Anypoint Connectors Update Siteorhttp://repository.mulesoft.org/connectors/releases/3.5.0 -
Open the Standard category and check the box next to the DotNet Connector Mule Studio Extension.
-
Review the details of the item you’ve selected, then click Next.
-
Accept the license agreement, then click Finish. Studio installs the extension, which may take a few minutes.
-
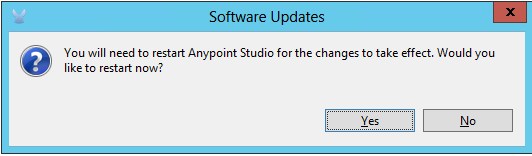
After installation is complete, click Restart to restart Studio.
After Studio restarts, you can find the DotNet connector in the Palette, under Connectors.
Example Use Case
This example introduces the DotNet Connector and shows you how to configure it to execute a method in a .NET assembly.
The example uses the following Mule message processors:
| Component | Description |
|---|---|
DotNet Connector |
Execute Microsoft .NET code from inside a Mule flow. |
Enables the example application to receive and send HTTP requests. |
|
The expression filter evaluates a range of expressions. It supports expression types such as header, payload (payload type), regex, and wildcards. |
|
The set payload transformer sets the payload to whatever you define. The payload can be a literal string or a Mule Expression. |
Creating a .NET Component
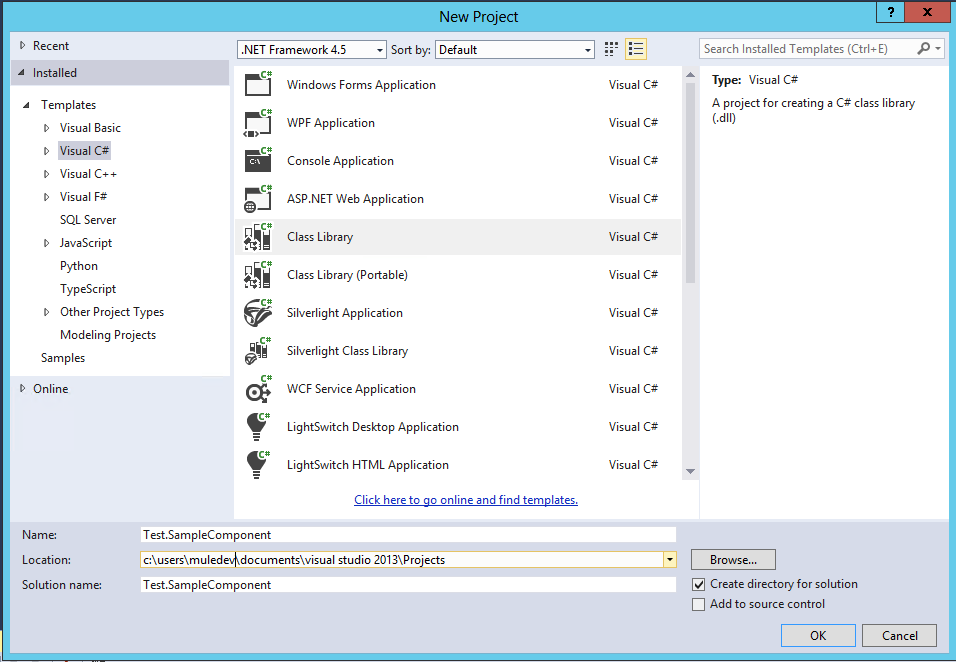
To create the .NET component that will be called from Mule, start Visual Studio and create a new C# Class Library project.
To create a new project:
-
Select File > New > Project.
-
In the New Project dialog, select the Class Library template under Visual C#. Name the Project “Test.SampleComponent”.
-
Create a class named
Samplewith the following code:namespace Test.SampleComponent { public class Sample { public object ExecuteComplex(Person person) { person.Name += "updated from .net"; person.MyRide.Brand = person.MyRide.Brand.Replace("GM", "Chevrolet"); person.MyRide.Model = person.MyRide.Model + " - " + "400x"; person.MyRide.ExteriorColor.Name += "ISH"; person.MyRide.ExteriorColor.RGB = "no clue"; return person; } }} -
Compile the project to create the
Test.SampleComponent.dllassembly. -
Copy the .dll file to the
C:\Sampledirectory.
Creating a New Anypoint Studio Project
To begin building this application, start Anypoint Studio and create a new project.
-
Select File > New > Mule Project.
-
In the New Mule Project configuration menu, provide a name for this project:
dotnet_demo. -
Click Finish.
A new project opens with a blank canvas for building the flow, and the palette with Message Processors to the right.
Creating a DotNet Global Element
A Mule Global Element allows you to define connector parameters once, then reference the same set of parameters from any number of individual connectors in your application. In this example, we create a DotNet global element which is referenced by the DotNet connector in our application’s flow.
To create and configure a DotNet global element, follow these steps:
-
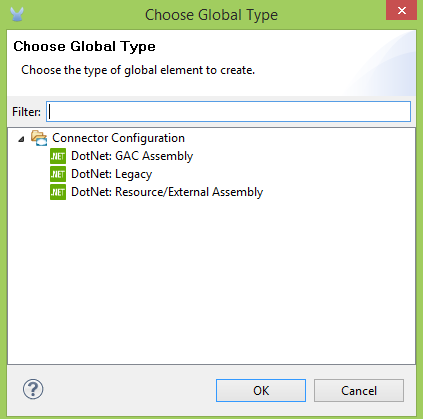
Click the Global Elements tab at the base of the canvas, then click Create.
-
Use DotNet Connector as filter to locate, then select the Global Type:
-
Click OK.
There are three global types available for the DotNet Connector. Studio displays the Global Element Properties window. Complete the required parameters as shown below.
-
GAC Assemble: Use to select an assembly installed in the GAC (http://msdn.microsoft.com/en-us/library/yf1d93sz(v=vs.110).aspx). Fill the necessary fields as shown below:
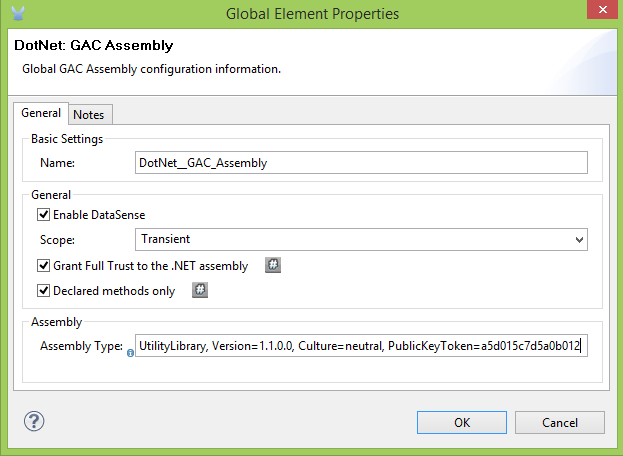
Field Value Name
Dot_Net_GAC_Connector
Enable DataSense
True (check)
Scope
Transient
Grant Full Trust to the .NET assembly
True (Check)
Declared Methods Only
True (Check)
Assembly Type
Use the Assembly Fully Qualified Name (http://msdn.microsoft.com/en-us/library/2exyydhb(v=vs.110).aspx).
-
Legacy: Use for backwards compatibility. Fill the necessary fields as shown below:
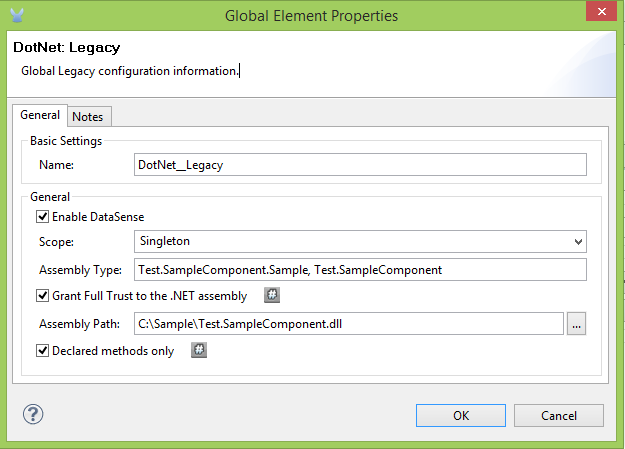
Field Value Name
DotNet_Legacy
Enable DataSense
True (Check)
Scope
Singleton
Assembly Type
Test.SampleComponent.Sample, Test.SampleComponent
Grant Full Trust to the .Net assembly
True (Check)
Assembly Path
Path to the Test.SampleComponent.dll file
Declared Methods Only
True (Check)
-
Resource/External Assembly: Use to select an assembly embedded as a resource or an assembly external to the application. Fill the necessary fields as shown below:
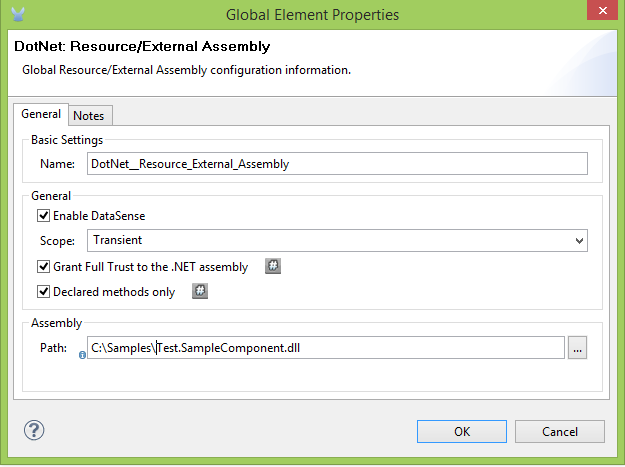
Field Value Name
Dot_Net_Resource_External_AssemblyEnable DataSense
True (Check)
Scope
Transient
Grant Full Trust to the .Net assembly
True (Check)
Declared methods only
True (Check)
Assembly Path
Path to the Test.SampleComponent.dll file
You will reference this global element when configuring the DotNet connector.
Creating the demo Flow
The first element in the flow is an HTTP connector. This connector accepts inbound requests at the URL you choose when deploying the project.
-
Drag an HTTP endpoint into the canvas, then select it to open the properties editor console.
-
Configure the following HTTP parameters as follows:
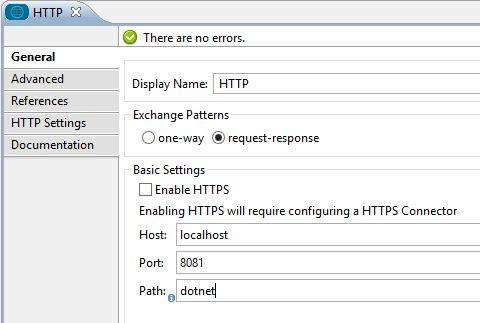
| Field | Value |
|---|---|
Display Name |
HTTP (or any other name you prefer) |
Exchange Patterns |
request-response |
Host |
localhost |
Port |
8081 |
Path |
dotnet |
In the XML Editor, enter:
<http:inbound-endpoint exchange-pattern="request-response" host="localhost" port="8081" doc:name="HTTP"/>
Set Payload Transformer
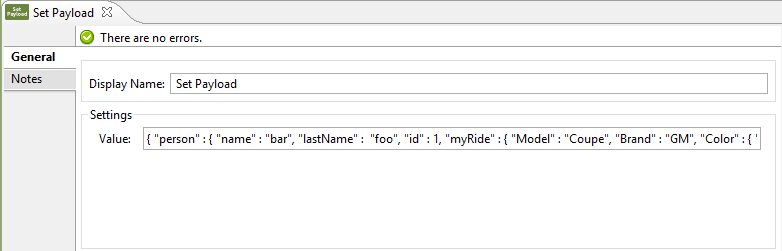
Drag a set payload transformer from the palette, and place it into the canvas after the expression filter. Configure the transformer as shown below.
-
Drag a set payload transformer into the canvas, then select it to open the properties editor console.
-
Configure the required filter parameters as follows:
| Field | Value |
|---|---|
Display Name |
Set Payload (or any other name you prefer) |
Value |
\{ "name" : "bar", "lastName" : "foo", "id" : 1, "myRide" : \{ "Model" : "Coupe", "Brand" : "GM", "Color" : \{ "Name" : "red", "RGB" : "123,220,213" } } }} |
The string you enter in the Value field represents a serialized JSON object for a Person class:
namespace Test.SampleComponent
{
  public class Person
    {
        public string Name {
          get; set;
        }
        public int Id {
          get; set;
        }
        public string LastName {
          get; set;
        }
        public Car MyRide {
          get; set;
        }
    }
    public class Car
    {
       public string Model {
         get; set;
       }
       public string Brand {
         get; set;
       }
       public Color ExteriorColor {
         get; set;
       }
    }
}
In the XML Editor, enter:
<set-payload value="{"name":"#[message.inboundProperties["name"]]","age":#[message.inboundProperties["age"]]}" doc:name="Set Payload"/>DataMapper
Drag a DataMapper from the palette, and place it into the canvas after the Set Payload transformer.
-
Drag a DataMapper into the canvas, then select it to open the properties editor console.
-
Configure the parameters as follows:
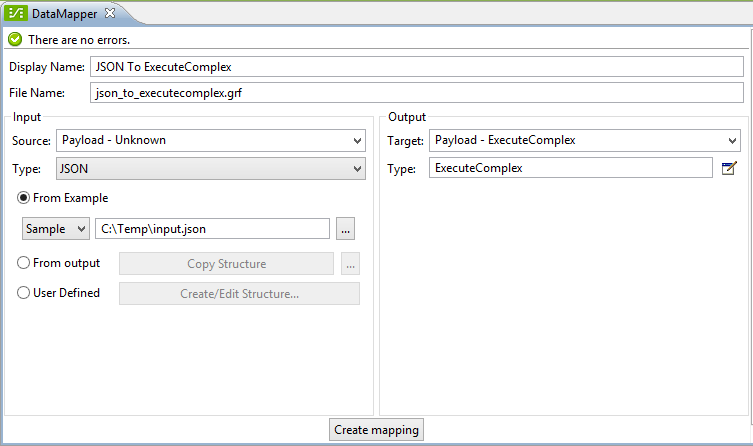
Field Value Display Name
JSON to ExecuteComplex (or any other name you prefer)
Input
Type
JSON
From Example
True (Check)
Sample
Enter the path to the input.json sample file.
Before you run this application, create a JSON sample file named input.json and copy the following content into it:
"person" : \{ "name" : "bar", "lastName" : "foo", "id" : 1, "myRide" : \{ "Model" : "Coupe", "Brand" : "GM", "Color" : \{ "Name" : "red", "RGB" : "123,220,213" } } }} -
Click Create Mapping.
In the XML Editor, enter:
<data-mapper:transform config-ref="JSON_To_ExecuteComplex"
doc:name="JSON To ExecuteComplex" path="dotnet"/>
<dotnet:execute config-ref="DotNet__Resource_External_Assembly"
methodName="Test.SampleComponent.Sample, Test.SampleComponent,
Version=1.0.0.0, Culture=neutral, PublicKeyToken=null |
ExecuteComplex(Test.SampleComponent.Person person) ->
System.Object" doc:name="DotNet"/>DotNet Connector
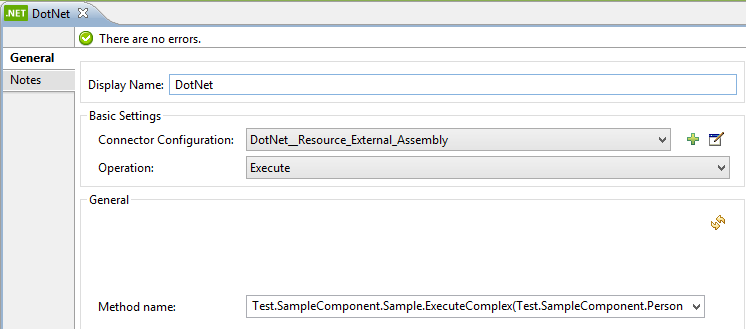
Drag the DotNet connector in the Palette, then place it into the canvas after the set payload transformer. Configure the DotNet connector as shown below.
-
Drag the DotNet connector from the Palette, then place it into the canvas after the set payload transformer. Configure the connector as shown below.
| Field | Value |
|---|---|
Display Name |
DotNet Connector (or any other name you prefer) |
Config Reference |
Dot_Net_Resource_External_Assembly |
Operation |
Execute |
Method name |
Test.SampleComponent.Sample.ExecuteComplex(Test.SampleComponent.Person person) |
In the XML Editor, enter:
<dotnet:execute config-ref="DotNet_Connector" methodName="Execute" doc:name="DotNet Connector"/>Example Code
<mule xmlns:tracking="http://www.mulesoft.org/schema/mule/ee/tracking"
xmlns:data-mapper="http://www.mulesoft.org/schema/mule/ee/data-mapper"
xmlns:http="http://www.mulesoft.org/schema/mule/http"
xmlns:dotnet="http://www.mulesoft.org/schema/mule/dotnet"
xmlns="http://www.mulesoft.org/schema/mule/core"
xmlns:doc="http://www.mulesoft.org/schema/mule/documentation" xmlns:spring="http://www.springframework.org/schema/beans"
xmlns:xsi="http://www.w3.org/2001/XMLSchema-instance" xsi:schemaLocation="http://www.springframework.org/schema/beans
http://www.springframework.org/schema/beans/spring-beans-current.xsd
http://www.mulesoft.org/schema/mule/core
http://www.mulesoft.org/schema/mule/core/current/mule.xsd
http://www.mulesoft.org/schema/mule/http
http://www.mulesoft.org/schema/mule/http/current/mule-http.xsd
http://www.mulesoft.org/schema/mule/dotnet
http://www.mulesoft.org/schema/mule/dotnet/current/mule-dotnet.xsd
http://www.mulesoft.org/schema/mule/ee/data-mapper
http://www.mulesoft.org/schema/mule/ee/data-mapper/current/mule-data-mapper.xsd
http://www.mulesoft.org/schema/mule/ee/tracking
http://www.mulesoft.org/schema/mule/ee/tracking/current/mule-tracking-ee.xsd">
<dotnet:externalConfig name="DotNet__Resource_External_Assembly"
scope="Transient" path="C:\Samples\Test.SampleComponent.dll"
doc:name="DotNet: Resource/External Assembly"/>
<http:connector name="HTTP_HTTPS"
cookieSpec="netscape" validateConnections="true"
sendBufferSize="0" receiveBufferSize="0"
receiveBacklog="0" clientSoTimeout="10000"
serverSoTimeout="10000" socketSoLinger="0"
doc:name="HTTP-HTTPS"/>
<data-mapper:config name="JSON_To_ExecuteComplex"
transformationGraphPath="json_to_executecomplex.grf"
doc:name="JSON_To_ExecuteComplex"/>
<flow name="dotnet-demoFlow1"
doc:name="dotnet-demoFlow1">
<http:inbound-endpoint exchange-pattern="request-response"
host="localhost" port="8081"
doc:name="HTTP" connector-ref="HTTP_HTTPS"/>
<data-mapper:transform config-ref="JSON_To_ExecuteComplex"
doc:name="JSON To ExecuteComplex" path="dotnet"/>
<dotnet:execute config-ref="DotNet__Resource_External_Assembly"
methodName="Test.SampleComponent.Sample, Test.SampleComponent,
Version=1.0.0.0, Culture=neutral, PublicKeyToken=null |
ExecuteComplex(Test.SampleComponent.Person person) ->
System.Object" doc:name="DotNet"/>
</flow>
</mule>Running the Application
You are now ready to run the project! First, you can test run the application from Studio:
-
Right-click your application in the Package Explorer pane.
-
Select Run As > Mule Application.
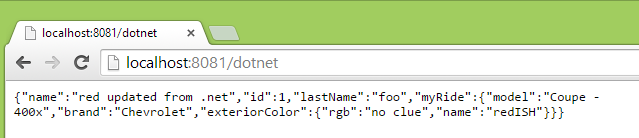
Then, fire up a browser and go to http://localhost:8081/dotnet/?name=foo&age=10 to see the results.
Conclusion
The flow you built in Anypoint Studio contains message processors – including the HTTP Connector, Data Mapper, Set Payload Transformer and the DotNet Connector — and it is the "Mule messages" that carry data between these message processors.
A Mule message contains the following components:
-
Payload: The actual data contained in the message
-
Properties: Message metadata, which can include user-defined parameters
In this example, we can see the DotNet connector was able to receive parameters from Mule, and to create and return a new message payload that was routed by Mule back to the caller. The DotNet Connector allows .NET components to be used to provide custom logic to Mule flows.