Installing the Management Console
|
If you have downloaded MuleSoft’s bundled runtime download – ESB with Mule Management Console (MMC) – it is appropriate for use only as an evaluation tool and is not considered production-ready. To use MMC for stress testing or in a production environment, download the .war file from MuleSoft’s customer portal and deploy the MMC on an application server, such as Tomcat. Contact MuleSoft Support with any questions about downloading and deploying Mule Management Console. |
The management console is a webapp (contained in the mmc.war WAR file) that runs in an application server or container, such as Tcat Server or Apache Tomcat. The mmc:Platform Certification section describes the supported application servers and platforms, and subsequent sections detail where to download the required files from and how to install or deploy these files in different environments.
| Because the procedure for deploying webapps varies by container, you should refer to your container’s documentation for complete information on deploying webapps. |
The management console communicates with the Mule ESB server via the Mule Management Console (MMC) agent application. The MMC agent must be installed in the Mule server instance. If the Mule server instance is running standalone, deploy the MMC agent to the server as an application, using either the agent zip .zip or tarball tar.gz archive file. However, if the Mule server is embedded in a WAR file application running in an application container (such as Tomcat or JBoss) you must add the MMC agent and additional libraries to the WAR file. See below for more information.
If you encounter problems with installing or running the console, see Troubleshooting the Installation.
Platform Certification: Supported Application Servers
The management console and the agent have been tested with a variety of application servers.
The table below shows the application servers supported by the management console and the console agent. The column labeled Management Console represents the environments in which the management console has been tested and known to work. The Agent column represents those environments in which an application that embeds Mule with the Management Console agent have been tested and are known to work.
We are currently working hard to expand our support of additional application servers and environments.
| Application Server | Management Console | Agent |
|---|---|---|
Tcat/Tomcat (6.x and 7.x) |
Yes |
Yes |
JBoss (6.x) |
Yes |
Yes |
Mule Standalone 3.2.x |
Yes |
Yes |
Mule Standalone 3.1.x |
Yes |
Yes |
Mule Standalone 2.2.8 |
N/A |
Yes |
WebSphere 7.0 |
Yes |
Yes |
WebLogic version 11g (10.3.3.0) |
Yes |
Yes |
Downloading the Management Console
The management console application has three components:
-
The MMC Console application -
mmc.war -
The MMC Agent, bundled as a Mule application as a
.ziportar.gzfile -mmc-agent-mule3-app-3.1.0.zip/tar.gz -
The MMC Agent, bundled as an embeddable JAR -
mmc-agent-mule3-impl-3.1.0-full.jar -
The MMC Agent, bundled as a Mule application as a
.ziportar.gzfile -mmc-agent-mule3-app-3.2.2.zip/tar.gz -
The MMC Agent, bundled as an embeddable JAR -
mmc-agent-mule3-impl-3.2.2-full.jar
Current subscribers can download these files from the MuleSoft customer portal.
mailto:info@mulesoft.com[MuleSoft Sales Inquiries] to access trial versions of Mule ESB Enterprise 3.2.x and the management console.
Installing the Evaluation (Trial) Version
The evaluation or trial version of the software bundles the management console with the Mule ESB server. After downloading the appropriate zip archive file for your Windows, Mac, or Linux platform, all you need to do is extract the contents of the zip file, run the mule script file mule.bat on Windows in the /bin folder, and start the console through a browser window.
Log in to the console by pointing your browser to this URL: http://localhost:8585/mmc. The login username is admin and the password is admin.
Deploying the Production Version of the Management Console
The management console is provided as a webapp (WAR file) that you deploy in your application server or other container just as you would any other webapp. The management console communicates with the Mule server via the MMC agent, which must be installed in a separate step, explained below.
Deploying the Management Console WAR in Tcat/Tomcat
You can deploy the management console and your Mule applications inside Tcat/Tomcat without any additional modifications.
See Tcat Server Documentation for instructions on how to deploy web applications inside of Tcat. See Deploying Mule as a Service to Tomcat for specifics on this deployment configuration.
For Tomcat, first deploy the MMC WAR file mmc.war by copying it to your Tomcat /webapps directory. After you place the WAR file in this directory, Tomcat, when started, deploys the management console application. You should see a /mmc folder in the Tomcat /webapps folder after Tomcat deploys the console web application.
Deploying the Management Console WAR in JBoss
Deploying the console to JBoss versions 6.x has been tested and certified.
Due to JMX conflicts generated by an old MBeanServer implementation, you must configure JBoss to use the Java5 MBeanServer. You do this by providing the '-Djboss.platform.mbeanserver' parameter in the startup command (that is: ./run.sh -c all -Djboss.platform.mbeanserver).
Before startup for Windows, ensure that the JAVA_OPTS environment variable contains:
-Djboss.platform.mbeanserverbeanserver -Djavax.management.builder.initial=org.jboss.mx.server.MBeanServerBuilderImpl
Note: Memory-related JVM options are still mandatory. For instance:
export JAVA_OPTS="-XX:MaxPermSize=512m -Xmx1G"
You may also try specifying smaller memory parameters depending on your environment, such as: export JAVA_OPTS="-XX:MaxPermSize=300m -Xmx256m".
To successfully deploy the console to JBoss 6.x, you need to remove the jboss-classloading.xml file from the <mmc_war>/WEB-INF directory, where <mmc_war> is the directory where you installed the WAR file for the console. In addition, you need to remove the following files from JBoss:
-
common/lib/quartz.jar -
server/<your_profile>/deploy/quartz-ra.rar, where<your_profile>is your server profile.
Deploying the Management Console WAR to WebSphere
Due to a bug in the IBM JDK, you must install the latest version (1.6 SR6) of the IBM JDK to run the management console.
The IBM Java 1.6 SR6 Patch requires the IBM Update Installer 7.0.0.9, which can be found here. You also need the IBM Java 1.6 SR6 patch, which can be found here. Then, follow these steps:
-
Extract the contents of the IBM Update Installer.
-
Switch to the
./UpdateInstallerdirectory. -
Execute
./install. -
You are asked to enter the installation location of IBM WebSphere.
-
You are then asked to enter the location of the IBM Java 1.6 SR6
*.pakfile. -
Follow the remaining screens to install the patch.
Installing the MMC Console Agent
This section describes installing the management console agent in a Mule ESB server instance running as a standalone and in other environments.
Installing the Agent in a Standalone Mule Instance
You can install the management console agent in a standalone Mule ESB instance. To do so, you must copy the management console agent .zip or tar.gz file (in Mule 3.1.1, the mmc-agent-mule3-app-3.1.0.zip/tar.gz file) to the apps directory of each Mule ESB instance that you want to manage.
The management console agent file is `mmc-agent-mule3-app-3.2.2.zip/tar.gz`.
Note that the management console agent lets the Mule ESB instance securely communicate with the console.
Installing the MMC Console Agent in Other Environments
You can also deploy the management console agent in a Mule ESB instance packaged as a webapp. You must ensure that the classpath for the Mule web application includes the management console agent JAR file and the necessary files required for any additional Mule modules.
For more information on running Mule as a webapp, see the following:
Configuring the Management Console to Use an External Database
By default, the management console uses its own internal database. However, rather than the embedded database you can set up the console to use an external database (for example, Oracle, Postgre, etc.).
Configuring the Management Console Agent
You may want to configure a different default port for agent communication or a different server ID before running Mule. You might also want to do this in order to use a custom agent configuration.
You can change the agent configuration from that of the default URL, which is displayed when registering a new server instance. The agent configuration determines the bind port for the server instance. There are reasons for changing the agent URL, such as if you want to start multiple instances of Mule ESB within the same box and connect the console to these different instances or if you want to connect to remote server instances.
The console assumes a default bind port of 7777. When you start Mule from a command line, you can change the port to which the server binds. You specify the new port as a switch or option in the command setting, as follows: -M-Dmule.mmc.bind.port=`PORT_NUMBER. Note that you specify the port number option after specifying the configuration file option in the command: `-config YOUR_CONFIG_FILE.xml.
In addition, when you change the agent bind port to accommodate multiple Mule instances, you also must start Mule from the bin directory that corresponds to the particular Mule instance. For example, you might run a second instance of Mule as follows, where this second instance is installed at /opt/second_mule:
/opt/second_mule/bin/mule -config hello-config.xml -M-Dmule.mmc.bind.port=7773
Starting the Management Console
To run the management console, make sure your container is running and the management console webapp has been deployed correctly. Then enter http://localhost:8080/mmc in your browser, where mmc is the name of the war file you deployed to the web server. If you see the login screen (see below), you installed correctly and are now running the console.
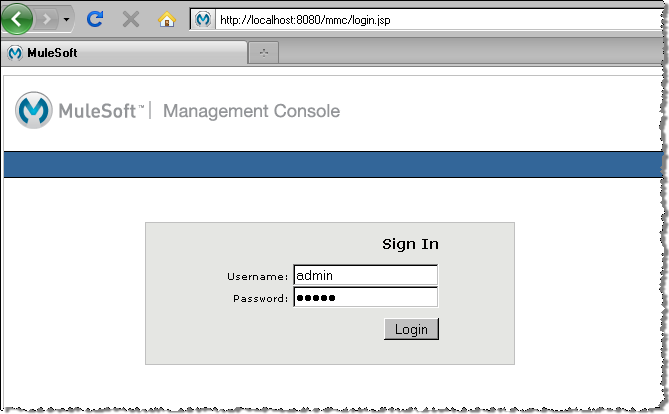
If another app is using port 8080, you can change the port in your container’s configuration (such as the /conf/server.xml file under your Tomcat home directory). If you want to run the management console remotely from another computer, enter the correct name (or ip address) of the host computer instead of localhost.
When you start the management console for the first time, you can log in with the user name "admin" and the password "admin".