Setting Up and Managing Users in MMC
The page takes you through the basics of setting up users via the Management Console. Refer to Managing MMC Users and Roles for information on setting user groups and assigning permissions.
| This page describes adding and managing users via the Management Console. You can also add and manage users using LDAP, but note that once you enable authentication through LDAP, the User link is no longer available in the Management Console. See Setting Up and Managing Users via LDAP for more information. |
Adding New Users and Adding Them to User Groups
-
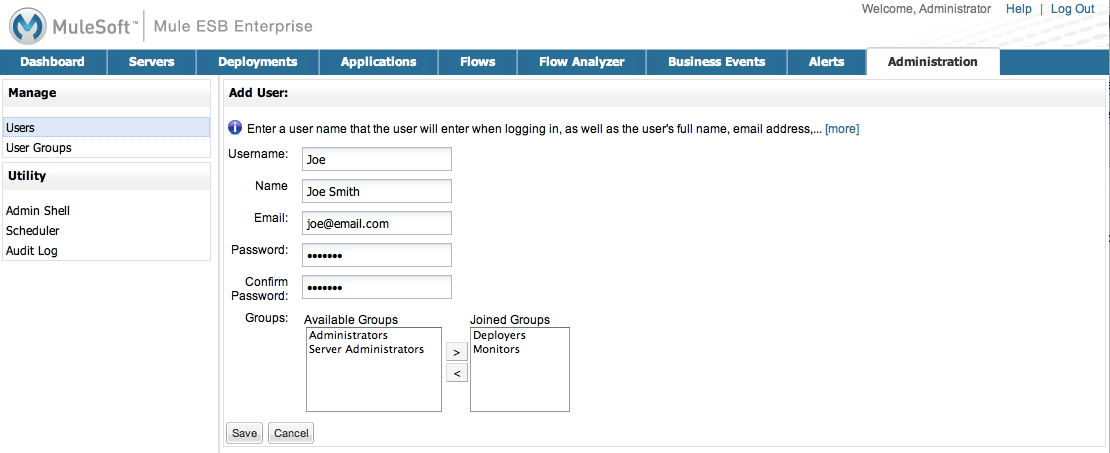
On the Administration tab, click Users in the Manage section of the navigation tree on the left. The pane lists all current console users. Click the New button(circled in the figure below) to create a new user.

-
Enter the user name that the user will enter when they log into the Management Console, as well as the user’s full name, email address, and password. (Note that the password must be at least five characters).
-
Select at least one group from the Available Groups list. The new user will be added to the groups you select. Keep in mind that once the user joins a group, that user has the permissions granted to that group or groups. Use the right angle bracket (>) to move the selected role to Joined Groups.
The default groups are Administrators, Deployers, Monitors, and Server Administrators. If you need to create more groups or roles, see Managing MMC Users and Roles. -
Click Save.
Editing Users
-
On the Administration tab, click Users, and then click the username of the user you want to edit.
-
Edit the user’s name or email address if needed.
-
If you need to reset the user’s password, click Reset Password, enter the new password twice, and then click OK.
-
To assign the user to a group, select the group in the Available Group list and click > so that the group appears in Joined Groups. To remove the user from a group, select the group in the Joined Groups list and click <.
-
When you have finished editing this user, click Save.
Deleting Users
-
On the Administration tab, click Users, and then click the user name of the user you want to delete.
-
Click the Delete button at the bottom of the Edit User screen.
-
Click OK to confirm that you want to delete this user.
See Also
-
Refer to Managing MMC Users and Roles for information on how to define user groups, or roles, and assign permissions to those groups.