The Studio XML Editor
In addition to the drag-and-drop Message Flow canvas, Mule studio provides an XML editor that allows you to edit configuration code directly. You can switch back and forth between this pair of editors at will; whatever changes you make in one mode are reflected immediately in the other.
Opening the XML Editor
If the Mule project whose configuration file you wish to edit in XML mode is not already displayed as a sequence of building blocks on the Message Flow canvas, complete the following steps:
-
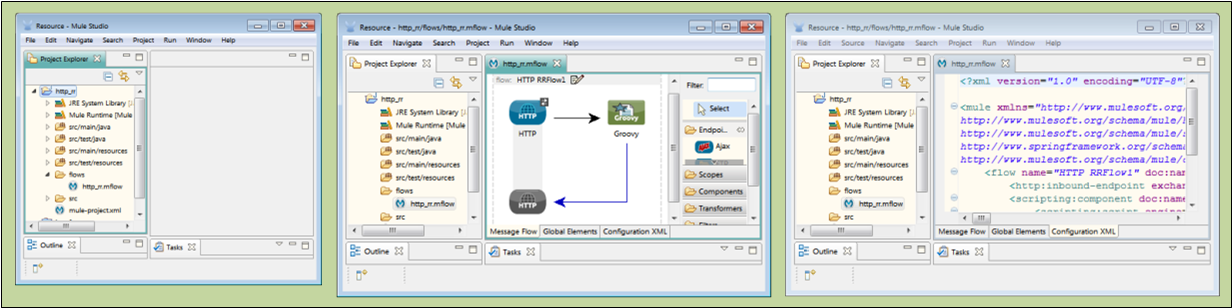
navigate to the Package Explorer pane in the upper-left corner of the Studio application window (See: left)
-
double-click the name of the project you want to edit (in this case,
http_rr) -
click the arrow to the left of the flows node to display all the flows in the project
-
double-click the main flow (in this case,
http_rr.mflow) (See: center) -
click the Configuration XML tab under the Message Flow canvas pane (See: right) to display the XML code that corresponds to the sequence of building blocks displayed on the Message Flow tab
The XML Editor Control Elements
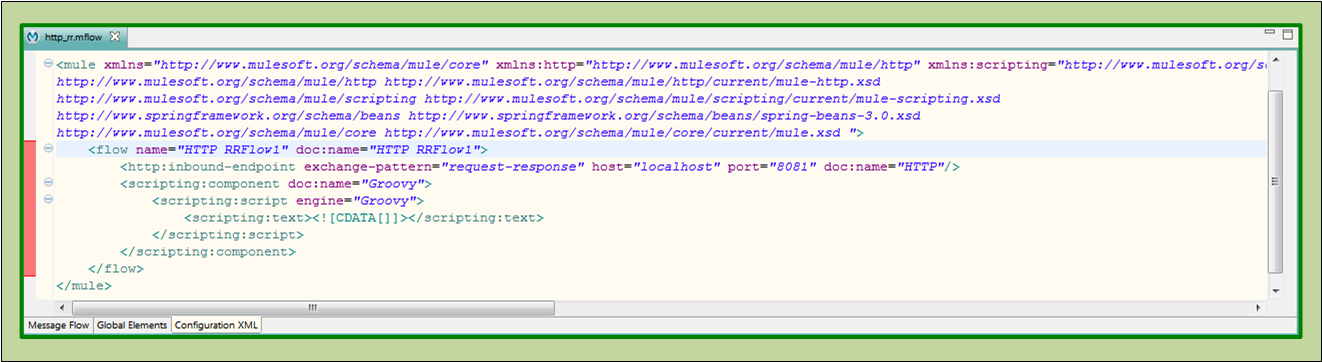
The horizonal and vertical scroll bars appear whenever code is obscured by the XML editing pane borders (See: below). You can use these to bring the obscured code into view, or you can enlarge the editing pane by hovering your mouse over the left, right, or bottom border of the editing pane, then dragging the green border to adjust its size.
A red bar appears just inside the right border of the editing pane (See: below) to indicate all the code lines that belong to the XML element where your cursor currently rests.
A column of blue circles also appears near the right border of the pane to indicate whether the various XML elements in the code are expanded or collapsed. For example, if a "plus" symbol appears next to a line of code, that element is currently collapsed, and you can expand it by clicking the "plus" icon. A "minus" indicates that the element is already expanded, and you can collapse it by clicking the "minus" icon.
The tabs under the editor pane permit you to switch to the Message Flow or Global Element panes at any time (See: below).
XML Editor Colors
The Configuration XML pane uses three colors (See: above) to differentiate among the syntactic categories in the XML code:
-
Green indicates an XML element name and the delimiters associated with that name
-
Purple indicates an XML attribute name and the delimiters associated with that name
-
Blue indicates a value (and its delimiters) associated with an XML attribute
Similarities to the Eclipse Environment
Because Mule Studio leverages the Eclipse IDE (www.eclipse.org), the Configuration XML editor incorporates many features provided by Eclipse.
Code Completion
Studio’s automatic completion feature eases manual editing of Mule configuration code. When you highlight a tag, attribute, or value — or start typing a term — Studio determines how to complete that line of code, then offers appropriate Mule-specific code completion choices for all the highlighted tags and attributes on that line (See: below).
-
Use the scroll bar(or press the up and down arrows) to move through the suggestions, then double-click on a suggestion to select it
-
You can also press Enter to select the current highlighted suggestion.
-
Alternatively, you can continue to type until you have completed the term or value.
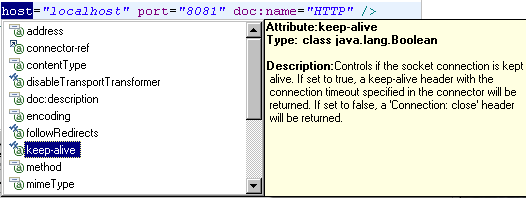
In addition to helping you complete terms and values, Studio can display details about each possible name or value. Click to highlight an item in the suggestion list; a brief explanation of that item appears to the right of the list (See: below).
For example, to modify the attributes for an endpoint configuration,select an attribute for the endpoint, such as "host", then press the Ctrl and space bar keys simultaneously. A list of possible attributes for this particular type of endpoint appears. (See: below)
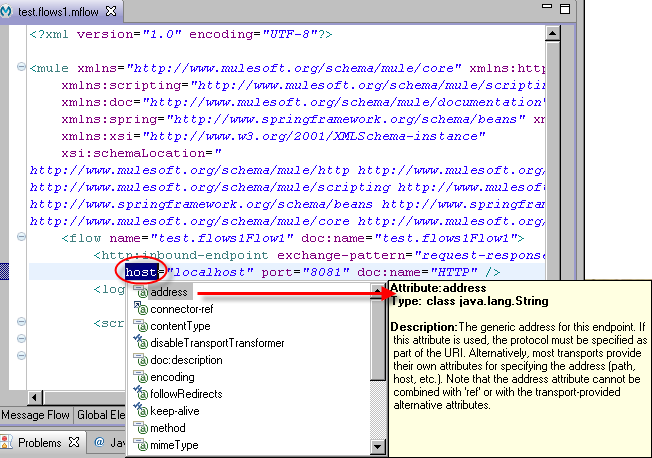
To find other possible attributes, use the scroll bar in the suggestions list, then highlight an attribute to display its description. (See; below).
To enter a new tag manually, enter the tag’s left bracket ( < ), then press Ctrl and space bar simultaneously. Recognizing that you are entering a tag, Studio lists all possible tags for that particular situation. To inspect tag descriptions, navigate through the list, clicking the tags for which you want more information (See: below).
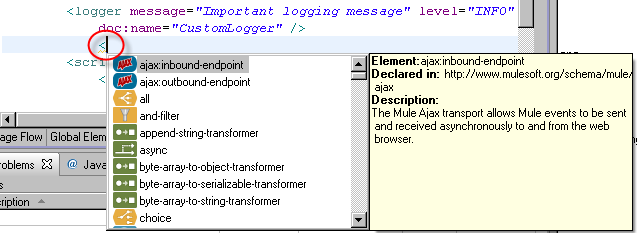
Notice that only the left bracket for the tag has appeared so far (See: above). Pressing Ctrl and space bar opens a list of all possible tags. By default, the first tag or element is highlighted, and a detailed explanation appears to accompany it. Scroll through the list and highlight other tags or elements for which you wish to see detailed explanations.
To insert the Choice Flow Control into the code, navigate to the list and double-click it, or pressing return when it is highlighted. After inserting the element, Studio ensures that the closing bracket ( > )gets inserted as well. (See: below)

For More Information
For complete information on using Eclipse and its code editor, see the Eclipse documentation.