GPS Walker Example
This GPS Walker example demonstrates how to:
-
use AJAX to communicate from a Mule Web service to the browser
-
use a Quartz Endpoint to schedule events
-
use automatic JSON bindings
Assumptions
This document assumes that you are familiar with Mule ESB. For an overview of basic operations, such as starting the server and locating Mule files, consult the Quick Start Guide to Mule ESB Server and the Management Console.
Set Up
Complete the following procedure to run the GPS Walker example.
-
Copy the file
<MULE_HOME>/examples/gpswalker/mule-example-gpswalker-3.3.1.zipto the<MULE_HOME>/appsdirectory. -
Start the Mule server, if it is not already running.
<MULE_HOME>is the root directory of your Mule installation, for example/opt/Mule/mule-standalone-3.3.1. -
Once the application is running, open a Web browser, then navigate to the following URL: http://localhost:8081/services/gps/index.html
|
How to start the Mule Server
How to reload the GPS Walker app without restarting the Mule server (Unix)
|

The example contains a Google Maps key generated specifically for the localhost address. Trying to access the example with a hostname or IP address (for example, if you try to connect from another computer) will result in an error message.
|
Building the Example
First, make sure you have set the MULE_HOME environment variable as recommended in Mule’s README file, <MULE_HOME>/README.txt.
|
The MULE_HOME environment variable (from Mule’s README.txt file) Mule uses the MULE_HOME environment variable to point to the location of your Mule installation. It is good practice to set this variable in your environment. However, if it is not set at startup, Mule temporarily sets it based on the location of the startup script. You may also want to add the MULE_HOME/bin directory to your path. If you are using Windows, you can use the System utility in the Control Panel to add the MULE_HOME variable and edit your path. Alternatively, you can use the Linux/Unix: Windows: |
With Maven installed on your system, you can build the example simply by running mvn from the <MULE_HOME/examples/gpswalker directory. This activity compiles the example classes and produces a zip file that you can copy to the application folder <`MULE_HOME>/apps`.
How it Works
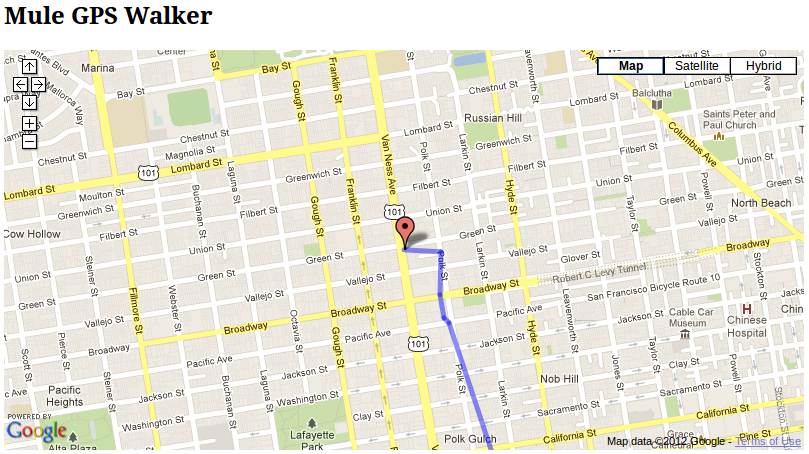
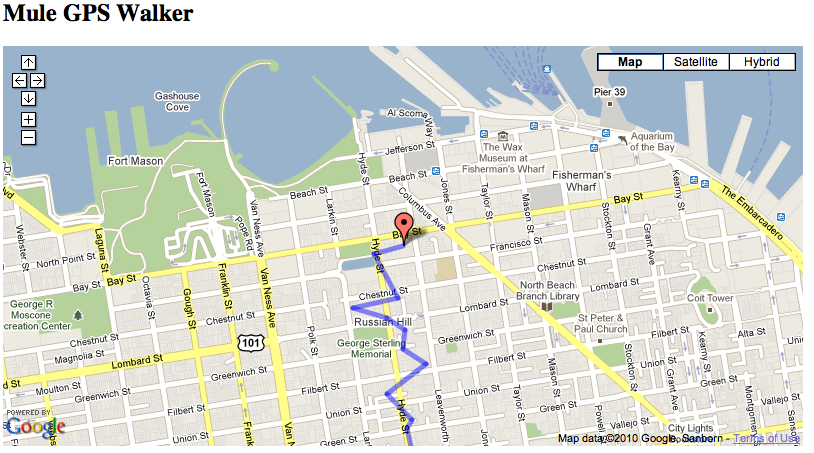
The GPS Walker application generates random GPS coordinates at three-second intervals. It calculates each coordinate pair (latitude and longitude) based on two values: the coordinate pair’s predecessor, and two random values for angle and distance. In this way, the application simulates a "walk," a path that links the successive coordinate points. The application calls Google Maps to display a map of the area, then draws the path that links the generated coordinates.
The application’s configuration resides at the mule-config.xml file in <MULE_HOME/examples/gpswalker/src/main/app. The following sections walk through the configuration file and the source Java files it calls. For the full source of the file, consult the expandable section at Mule Configuration.
The StrollerService Flow
The application contains one flow, the StrollerService flow, defined in the mule-config.xml file.
<flow name="StrollerService">
        <quartz:inbound-endpoint repeatInterval="3000" startDelay="3000" jobName="walkGenerator">
            <quartz:event-generator-job/>
        </quartz:inbound-endpoint>
        <component>
            <singleton-object class="org.mule.example.gpswalker.CityStroller"/>
        </component>
        <ajax:outbound-endpoint channel="/gpswalker"/>
    </flow>
The StrollerService flow contains a Quartz Inbound Endpoint, which invokes the CityStroller service every 3 seconds. CityStroller generates random GPS coordinates, publishes them, then uses each coordinate pair’s values to generate a random value for distance, and another for angle. These two random values determine the next coordinate pair.
The CityStroller service is defined in the file <MULE_HOME>/examples/gpswalker/src/main/java/org/mule/example/gpswalker/CityStroller.java.
The CityStroller service produces GPSCoord objects. GPSCoord objects are Java Beans; Mule automatically serializes them to JSON so that the JavaScript in the browser can easily read them.
Note that the @JsonProperty annotations tell Mule to serialize this object to a JSON string. Mule uses the Jackson Framework for working with JSON.
Finally, an Ajax Outbound Endpoint publishes the data on the /gpswalker channel.
Mule Configuration
Mule stores the configuration in the mule-config.xml file, at <MULE_HOME/apps/mule-example-gpswalker-3.3.1.
<?xml version="1.0" encoding="UTF-8"?>
<mule xmlns="http://www.mulesoft.org/schema/mule/core"
      xmlns:xsi="http://www.w3.org/2001/XMLSchema-instance"
      xmlns:ajax="http://www.mulesoft.org/schema/mule/ajax"
      xmlns:quartz="http://www.mulesoft.org/schema/mule/quartz"
      xsi:schemaLocation="
        http://www.mulesoft.org/schema/mule/quartz http://www.mulesoft.org/schema/mule/quartz/current/mule-quartz.xsd
        http://www.mulesoft.org/schema/mule/ajax http://www.mulesoft.org/schema/mule/ajax/current/mule-ajax.xsd
        http://www.mulesoft.org/schema/mule/core http://www.mulesoft.org/schema/mule/core/current/mule.xsd">
    <ajax:connector name="ajaxServer" serverUrl="http://0.0.0.0:8081/services/gps" resourceBase="${app.home}/docroot"/>
    <flow name="StrollerService">
        <quartz:inbound-endpoint repeatInterval="3000" startDelay="3000" jobName="walkGenerator">
            <quartz:event-generator-job/>
        </quartz:inbound-endpoint>
        <component>
            <singleton-object class="org.mule.example.gpswalker.CityStroller"/>
        </component>
        <ajax:outbound-endpoint channel="/gpswalker"/>
    </flow>
</mule>
Configuration file overview
In Line 4, there is a new 'ajax' namespace. This allows Mule to bind services and flows to Ajax channels on the browser.
xmlns:ajax="http://www.mulesoft.org/schema/mule/ajax"In Line 11, the ajax:connector creates an embedded Ajax server for this application. Note that the resourceBase attribute specifies a directory where you can store HTML and other resources to be published in your application. When the browser requests pages, they will be served from this location. The resourceBase is a new placeholder available in Mule that references the root directory of your application.
<ajax:connector name="ajaxServer" serverUrl="http://0.0.0.0:8081/services/gps" resourceBase="${app.home}/docroot"/>In Line 18, we declare our CityStroller component as a singleton, since we maintain state between requests (the current coordinates).
<singleton-object class="org.mule.example.gpswalker.CityStroller"/>Finally, in Line 16, we define an outbound ajax channel called /gpswalker. The GPSCoord data produced by CityStroller will be sent over this channel to any listeners that have subscribed. Remember, Mule will automatically serialize the GPSCoord to JSON.
<ajax:outbound-endpoint channel="/gpswalker"/>Client Side
In the browser, we use the Mule Javascript client to receive coordinates from the server. To use the Mule JavaScript client, you need a single script import:
<head>
    <title>Mule GPS Walker Example</title>
    <script type="text/javascript" src="mule-resource/js/mule.js"></script>
</head>
When the browser loads this script, the Mule client is automatically loaded and available via the mule variable.
<script type="text/javascript">
    var map = null
    function init()
    {
        setupMap();
        mule.subscribe("/gpswalker", callback);
    }
Now we can create subscriptions to Mule services that publish to AJAX channels. Here we subscribe to /gpswalker, the channel to which our CityStroller We service publishes. That’s all that is required to get Mule ESB and the browser talking to each other!
The subscribe method requires a callback method to be passed in, which will be invoked every time a message is received on the /gpswalker channel.
function callback(message) {
        if (message) {
            var latLng = new GLatLng(message.data.latitude, message.data.longitude);
            map.addOverlay(new GPolyline([marker.getPoint(),latLng]));
            marker.setPoint(latLng);
            map.setCenter(latLng);
        }
    }
The message is received in JSON format, which means the data is easily accessible to JavaScript. We create a new GLatLng object from the latitude and longitude sent from the server, and add an overlay to the Google Map. We will not cover the Google map source in this document, but you can consult the full source of the index.html in the expandable section below.
Mule makes it easy to create Web service-oriented AJAX applications with very little coding. This promotes service-oriented architecture on the server and inherently requires a clean separation of data and presentation. In this GPS Walker example, we created a Web service triggered periodically by a Quartz endpoint, which publishes data to a client application. We used JSON data bindings to automatically manage data transfer between Java and JavaScript, and AJAX channels to communicate between the server and client, which plots data from the server onto a Google map.
Related Topics
For more information on configuring Mule, using transformers, and other topics, consult the home page of the Mule ESB User Guide. Additionally, the following topics in the User Guide provide more information on concepts covered above:
-
For information on configuring various types of components, see Configuring Components.
-
For information on the types of transports that you can use, consult the Transport Reference.
-
For information on using translated strings, see Internationalizing Strings.