Building a Mapping Flow in the Graphical Mapping Editor
Anypoint™ DataMapper’s Graphical Mapping Editor allows you to build transformations by:
-
Starting with defined metadata for the input and output of the mapping flow, as described in Defining DataMapper Input and Output Metadata.
-
Defining one or more element mappings, that link an input element as a source to an output element as a target.
-
For each element mapping, writing transformations that take attribute and child elements from the input and compute the values of the output element.
The Graphical Mapping Editor simplifies management and visualization of the multiple element mappings and associated transformation code.
Working with Element Mappings
The Element Mapping Control
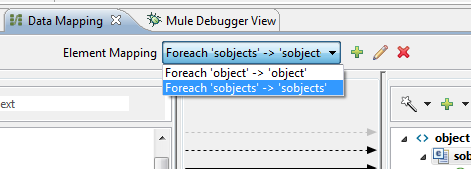
The Data Mapping Editor window contains an Element Mapping control drop-down. Each time you map an input structure to an output structure, the mapping between those elements will be added to this list. When you want to work on mapping child elements within a structure, you must first select the current element mapping that connects the parent elements.

Identifying Elements Available for Mapping
When preparing to map elements from input to output, whether a specific element is mappable depends upon the currently selected element mapping in the editor view. For multiple nested structures, you may have to map parent elements from input to output before you can map their descendants.
Once you select a current element mapping, those elements that are available to be mapped in source and target are presented in bold. For example, consider this DataMapper for constructing a contact phone list from lists of employees and managers:
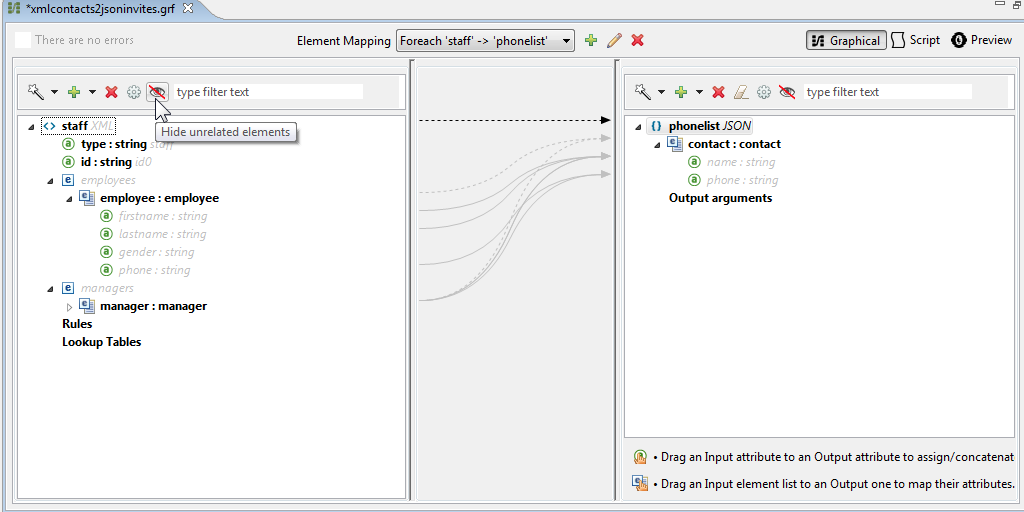
The employee and manager collections of elements are bold to indicate that they can be mapped to the output pane. Selecting the element mapping "Foreach 'manager' → 'contacts'" shows a different set of mappable elements:
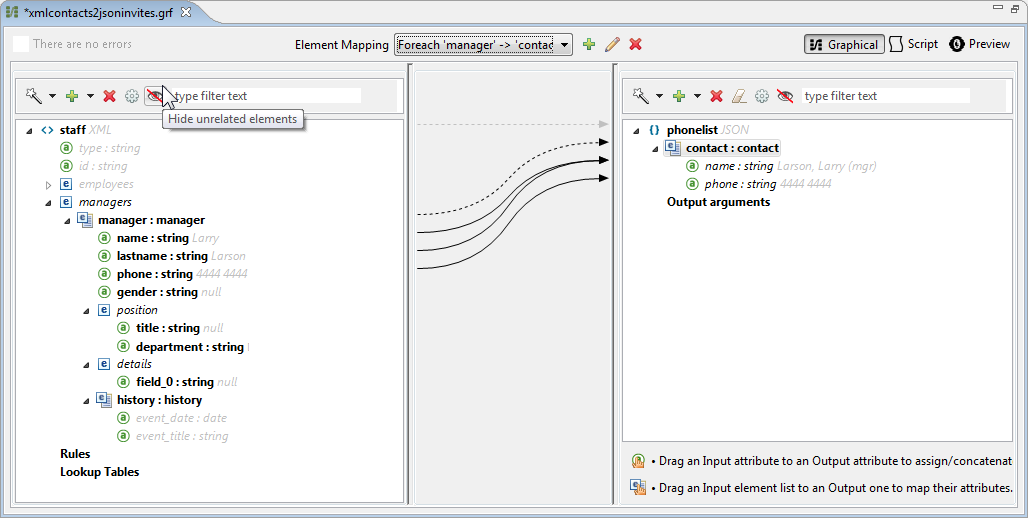
Highlighted are the employee and manager nodes on input, and the contact node on output. Any lower-level descendants of these nodes, such as position (child of manager) are greyed out and unavailable.
Mapping individual fields requires that you write an expression defining the value of the output field in terms of the available input fields, so it is important to understand which fields are available.
You can toggle the display of input and output elements not eligible for mapping use the Eye (Hide/Show unrelated elements) button in the input or output pane.
-
When closed
 hides all elements in the input pane that are not mappable in the currently displayed mapping level.
 -
When open,
 displays all elements in the input mapping pane that are not collapsed, whether or not your can map them in the current mapping level.
Creating an Element Mapping
You can create an element mapping one of two ways:
-
By clicking the "Add Mapping" icon in the graphical mapping editor and specifying a name, the input and output data elements and (for structured data) an optional filter expression to apply to the input;
-
By dragging an input data element to an output data element. An element mapping name is autogenerated, based on source and target names. No filter is defined, although you can edit the element mapping to add one if your source is structured data.
The new element mapping appears in the Current Element Mapping control.
| The Element Mapping Control expresses the idea that element mappings iterate over the inputs by inserting "Foreach" into the generated name of each element mapping. This label is meant as a reminder, but you can edit the name to remove this. |
Editing an Element Mapping
To edit an element mapping, select the mapping the Element Mapping drop-down, then click the Edit Mapping icon. The Edit Mapping dialog appears:
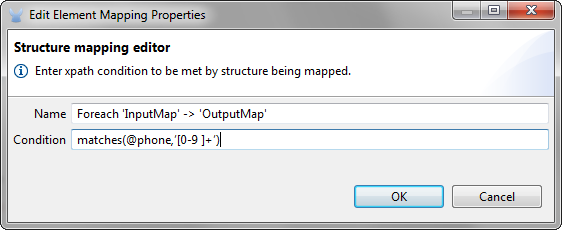
Enter the desired values for Name and, for structured data, an XPath filter Condition here.
Setting an Element Mapping XPath Filter
For structured data, you can define an XPath expression that evaluates to a Boolean to select only inputs where the expression is true. (This capability provides something like a WHERE clause in a SQL expression.)
XPath syntax is available for all types of structured data (including POJO, JSON, and key-value maps). In general, supported XPath includes any XPath condition that can be used in a selector. For example:
Test presence of attribute |
@phone |
Test attribute against a string literal |
@gender=M |
Test attribute phone against a regular expression |
matches(@phone,'[0-9]+') |
Filtering can be used to provide some basic data validation, or to define separate element mappings on the same input data to process individual records differently depending on which filters they match.
Desiging Transformations in the Graphical Mapping Editor
Once you have defined an element mapping, you can design the transformations associated with that element mapping. You can:
-
Map source data to target data via drag and drop, using script expressions or using XPath-based rules.
-
Adding input arguments to your data mapping.
-
Create or connect to lookup tables.
Drag-and-Drop Field Mapping
-
When you first drag an element from input to output, and fields with matching names and types in the input and output are automatically mapped for you. This is called automapping and it can save time and effort when working with large, complex mappings of large numbers of fields and limited metadata.
-
If you drag a second source field to a target that is already has an assigned script, the new value will be concatenated to the old one.
In either case, DataMapper creates an expression, called an assigned script, for the output field.
|
Default Scripting Language for Assigned Scripts Depending upon your default scripting language, the assigned script expression may be in Mule Expression Langauge (the default) or in CTL2 (the only available transformation lanaguage prior to Mule 3.4). MuleSoft recommends the use of MEL in the future, because it is the expression language throughout the rest of Mule ESB, it is better-integrated with the rest of Mule ESB than CTL2, and it will continue to be actively developed with Mule ESB. CTL2 will be supported for purposes of backward compatibility. You can change the default scripting language to CTL2 if you have specific requirement to do so. See [Choosing MEL or CTL2 as Scripting Engine] for details on changing the default scripting language. |
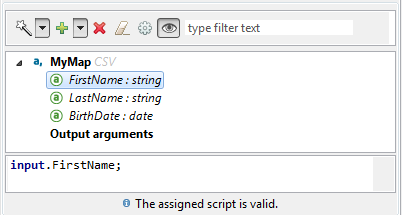
To view an output field’s assigned script, click the field name in the DataMapper’s Output pane. The expression is displayed in the textbox under the Output pane. For example, the assigned script for the output field FirstName is the expression input.FirstName; (see image below)
Writing Assigned Script Expressions Directly
Writing assigned script expressions directly is a must if you are doing more than basic copying and concatenation of data fields. You can still drag the input fields to the output to get the code that references the input, and then write the rest of the expression in terms of familiar operators and an extensive set of build-in functions in the selected expression language.
In the Graphical view, you can select a field and type expressions directly into the assigned script box at the bottom of the Outpane pane.
In the Script view, you can edit the script for the entire element mapping in one place.
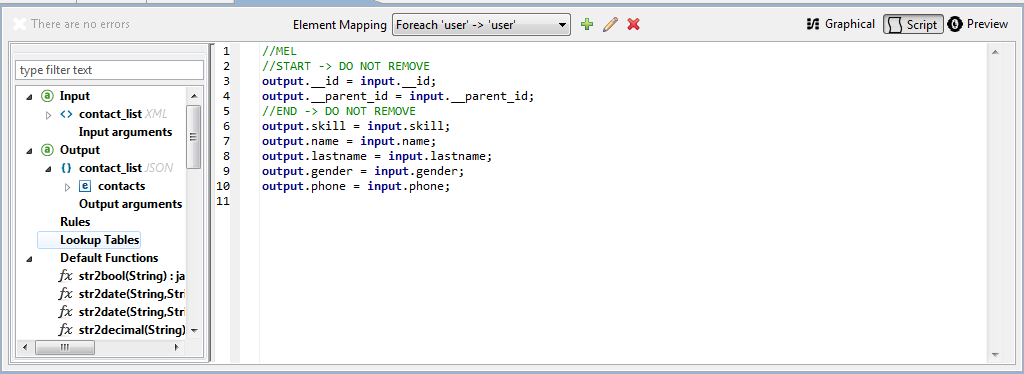
The editor provides several types of support:
-
Autocomplete including input and output fields, variables and functions;
-
Real-time error checking as you compose your script;
-
Syntax highlighting for MEL and CTL2;
-
Drag-and-drop from the tree of mapping inputs and outputs, rules and functions in the left pane into the code in the right pane.
|
Effects of Editing in Script View
|
Using Rules to Extract Fields from Complex Structured Data
Rules in DataMapper allow you to apply XPath selectors to structured input data and make the results accessible for use in transformation outputs.
The most common use case for rules is extracting data from a tree structure, such as particularly complex XML or JSON document, to a flat structure like a CSV. Most use cases for mapping structured input data to structured targets are more easily handled by mapping nested structures with elements mappings. However, a rule can be used to side-step the need to map multiple mapping levels to extract only a few nodes from a structure.
Creating a Rule
Create a rule by either:
-
Clicking + and choosing New Rule;
-
Right-clicking the element from which the Rule will extract data, and selecting Create Rule based on this element.
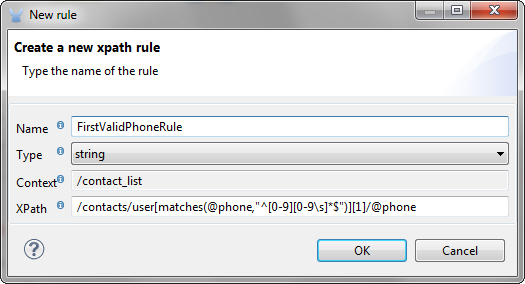
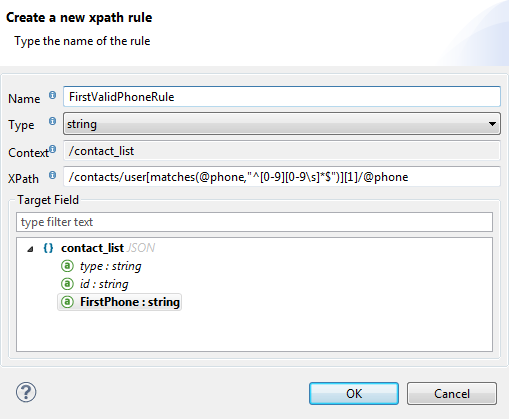
The New Rule dialog appears.
-
Name is used in the input to refer to this rule.
-
Type sets the type of value returned by the rule. This can be a basic data type (string, date, boolean, or any numeric type) or a List of a basic data type.
-
Context is an XPath expression that identifies the top-level input element for this element mapping. It is the node relative to which the XPath selector will be evaluated. Note that you cannot edit this value in the Rule, you can only create a Rule for a different context by selecting a new element mapping and creating the rule under that.
-
XPath is the expression that is evaluated, relative to the context, to return the output value from the Rule. Any XPath expression that can be used in a selector can be used in the rule. The example shown in the screenshot:
/contacts/user[matches(@phone,"^[0-9][0-9\s]*$")][1]/@phoneextracts the phone number attribute from the first/contacts/user node which has a phone number consisting of a series of digitals and spaces.
-
Target Field specifies the output field to which the value returned by the XPath expression is assigned.
Note that XPath syntax is used in rules regardless of what type of structured data is used. For other structured data types, the XPath expression will be interpreted in a fashion analogous to that used with XML.
Using Data Mapping Input and Output Arguments
DataMapper input arguments enable you to include dynamic information (such as the value of Mule variables or functions) in your mappings.
Arguments can reference any information obtainable through Mule Expression Language (MEL), including message and header properties, filenames, etc. Consult Non-MEL Expressions Configuration Reference for details.
|
Input Arguments and MEL Support If using MEL as the scripting language with DataMapper, you can use MEL expressions directly throughout your mapping flow definition. As a result, it may be simpler to reference the MEL expression directly in your code in most cases. If your mapping is using CTL2 scripting, however, you cannot use MEL expressions in the script, and an argument therefore the primary way to pass information into and out of the mapping flow. |
Defining an Input or Output Argument
To define an input or output argument for a mapping, use the following steps:
-
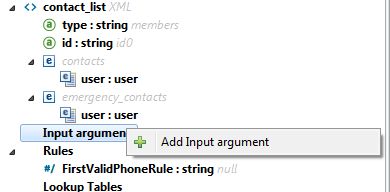
Click the DataMapping tab below the Message Flow canvas to display the Input arguments element in the Input pane (highlighted below, right).
-
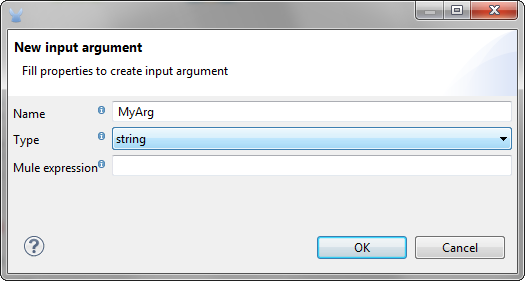
Right-click Input arguments, then select Add Input argument. The New Input Argument dialog opens.
An input argument can be of type string, data, boolean, or any of the numeric types.
If you use the default MEL for scripting, an argument can be a Java object, in which case you are prompted for the class of the object
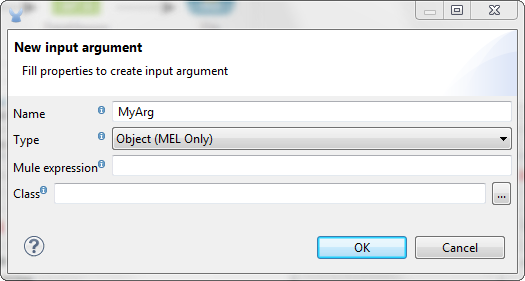
In the Mule expression field, type the Mule Expression Language expression that will provide the value for the input argument. You can use any Mule expression that is logically valid within the context of the flow and that matches with the selected type. For Class, if applicable, browse to or type the name of the object class.
Click OK when finished.
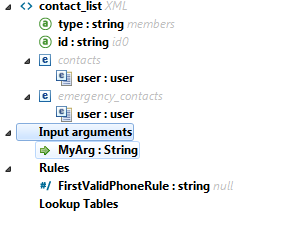
The input argument is then available as an input for mapping and transformation, as shown in the following screenshot:
Lookup Tables in Mappings
Lookup tables facilitate mappings from one value to another on the basis of lookup table definitions. There are several possibles applications:
-
If one format defines priority using 1,2,3, while another format use L,M,H, you can use a lookup table to map 1 to L, 2 to M, and 3 to H.
-
You could enrich or correct a record based on data retrieved in lookup - for example, taking a postal code and looking up city and state or province information to complete the record.
-
You could invoke a flow that implements a business process as a lookup - for example, you could take a customer’s name, address, etc. as input, and pass those to the lookup flow, which either locates a customer’s account record or generates a new customer account, then returns the account ID and other account details for use in the DataMapper.
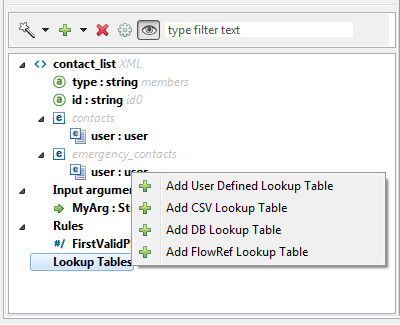
You add lookup table by right-clicking the Lookup Tables item in the mappings panel (see below). DataMapper supports four sources for lookup table data:
-
User-defined: This simple type of lookup table provides an input area where you manually create a keyed data table with one or more fields. The fields are defined as the unique key to fetch or retrieve the value.
-
CSV: This type of lookup table uses a delimited file to supply data for the lookup.
-
Database Lookup: Uses an external JDBC data source for lookups.
-
FlowRef Lookup: Invokes a Mule flow, then uses the output of the flow as a source for a lookup.
See Using DataMapper Lookup Tables for full details on using lookup tables in mappings.
See Also
-
Read about some neat DataMapper tricks in our MuleSoft Blog.


