Deploying an Application
| Mule Runtime Engine versions 3.5, 3.6, and 3.7 reached End of Life on or before January 25, 2020. For more information, contact your Customer Success Manager to determine how you can migrate to the latest Mule version. |
| You can now easily create a cluster through the Runtime Manager UI. See Creating and Managing Clusters. |
With a Mule cluster up and running, we can deploy an application to run on the cluster. The Mule HA Demo Bundle includes a cluster-demo-app that we shall deploy to the cluster.
-
On the management console, click the Deployments tab, then click New.

-
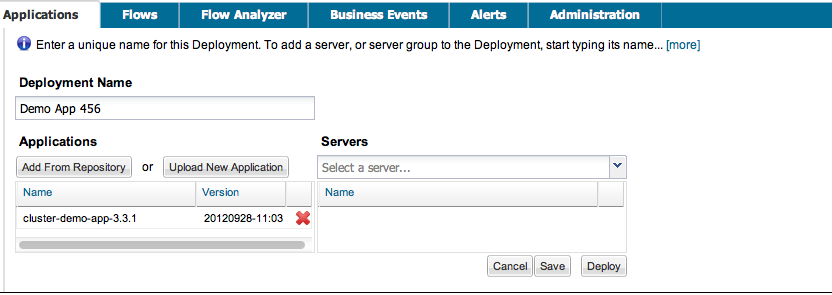
In the Deployment Name field, enter a unique name for the deployment, such as
Demo App 456. -
Click the Upload New Application button.
-
In the pop-up dialogue (see image below, top), click Browse, then navigate to
mule-ha-bundle-2.0>apps>cluster-demo-app.zip. Select the.zipfile, then click Add to upload the application to the management console (see image below, bottom).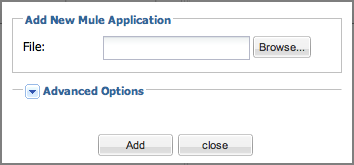
-
Use the drop-down menu under the Servers heading to select the cluster that you created.

-
Click Deploy to launch the cluster-demo-app on your cluster. When Mule completes the deployment — this may take a minute — the management console displays a message at the top of the tab which reads,
Current Status: Successful.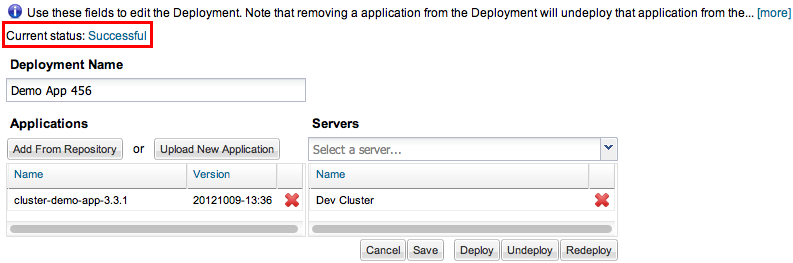
-
Click Deployments in the Package Explorer column at left to return to the main screen of the Applications tab. The management console displays your successfully deployed application, as indicated by the green circle icon.
