<email:smtp-config name="config">
    <email:smtp-connection host="${smtp.host}" port="${smtp.port}"/>
</email:smtp-config>Configuring Properties
|
Standard Support for Mule 4.1 ended on November 2, 2020, and this version of Mule reached its End of Life on November 2, 2022, when Extended Support ended. Deployments of new applications to CloudHub that use this version of Mule are no longer allowed. Only in-place updates to applications are permitted. MuleSoft recommends that you upgrade to the latest version of Mule 4 that is in Standard Support so that your applications run with the latest fixes and security enhancements. |
You can configure properties, such as property placeholders and system properties.
Property Placeholders
You can use Ant-style property placeholders in your Mule configuration. For example:
The values for these placeholders can be made available in a variety of ways, as described in the sections that follow.
Global Properties
You can use the <global-property> element to set a placeholder value from within your Mule configuration, such as from within another Mule configuration file. You can use the global property syntax to reference the values from a .yaml or .properties file, and create new (global) properties that depends on configuration properties, or secure configuration properties. To reference configuration properties, read the section on properties files.
<global-property name="smtp.host" value="smtp.mail.com"/>
<global-property name="smtp.subject" value="Subject of Email"/>
Properties Files
To load properties from a custom file, you can place your custom properties file at src/main/resources and use the tag <configuration-properties>:
<?xml version="1.0" encoding="UTF-8"?>

<mule xmlns="http://www.mulesoft.org/schema/mule/core"
      xmlns:xsi="http://www.w3.org/2001/XMLSchema-instance"
      xsi:schemaLocation="http://www.mulesoft.org/schema/mule/core http://www.mulesoft.org/schema/mule/core/current/mule.xsd">

<configuration-properties file="smtp.yaml"/>

<flow name="myProject_flow1">
    <logger message="${propertyFromFile}" doc:name="System Property Set in Property File"/>
</flow>
To load multiple properties files simply define a <configuration-properties/> tag for each file you want to load.
-
If a property is defined in more than one file referenced in
<configuration-properties/>tags, the first definition will be preserved.
These files must be located at src/main/resources, inside your Mule project, or you can also use absolute paths.
Supported Files
The Configuration Properties support both YAML configuration files (.yaml) and Properties configuration files (.properties). String is the only supported type in both file formats. Use the format that you find easier to read and edit.
YAML file example:
<configuration-properties file="ports.yaml"/>Where ports.yaml is:
smtp:
    port: "8957"
http:
    port: "8081"
Properties file example:
<configuration-properties file="ports.properties"/>Where ports.properties is:
smtp.port=8957
http.port=8081
File Properties
The placeholder value can also be the entire content of the file. The placeholder value becomes the string value, for example:
Some content
<mule:set-payload value="${file::properties-file.txt}"/>The payload’s value becomes "Some content". Just like other properties files, these files must be located in src/main/resources, inside your Mule project. Absolute paths can also be used.
This practice is useful for modularizing the configuration file: You can extract large contents from the config file, SQL queries, or transformations to make the config file clearer, and you can reuse the contents.
System Properties
You can set JDK system properties when running Mule On-Premises, and later use these properties to configure components or modules in a Mule application. There are two ways to specify properties:
-
From the command line, when starting the Mule instance:
mule -M-Dsmtp.username=JSmith -M-Dsmtp.password=ChangeMe
-
Editing the
wrapper.conffile located in the$MULE_HOME/confdirectory, adding entries for each property:wrapper.java.additional.999=-Dsmtp.username=JSmith wrapper.java.additional.1000=-Dsmtp.password=ChangeMe
See System Properties for additional configuration details.
Custom Properties Provider
It is possible to create a custom properties provider implementation using the Mule API. See Custom Configuration Properties Provider for more details.
Setting System Properties in Anypoint Studio
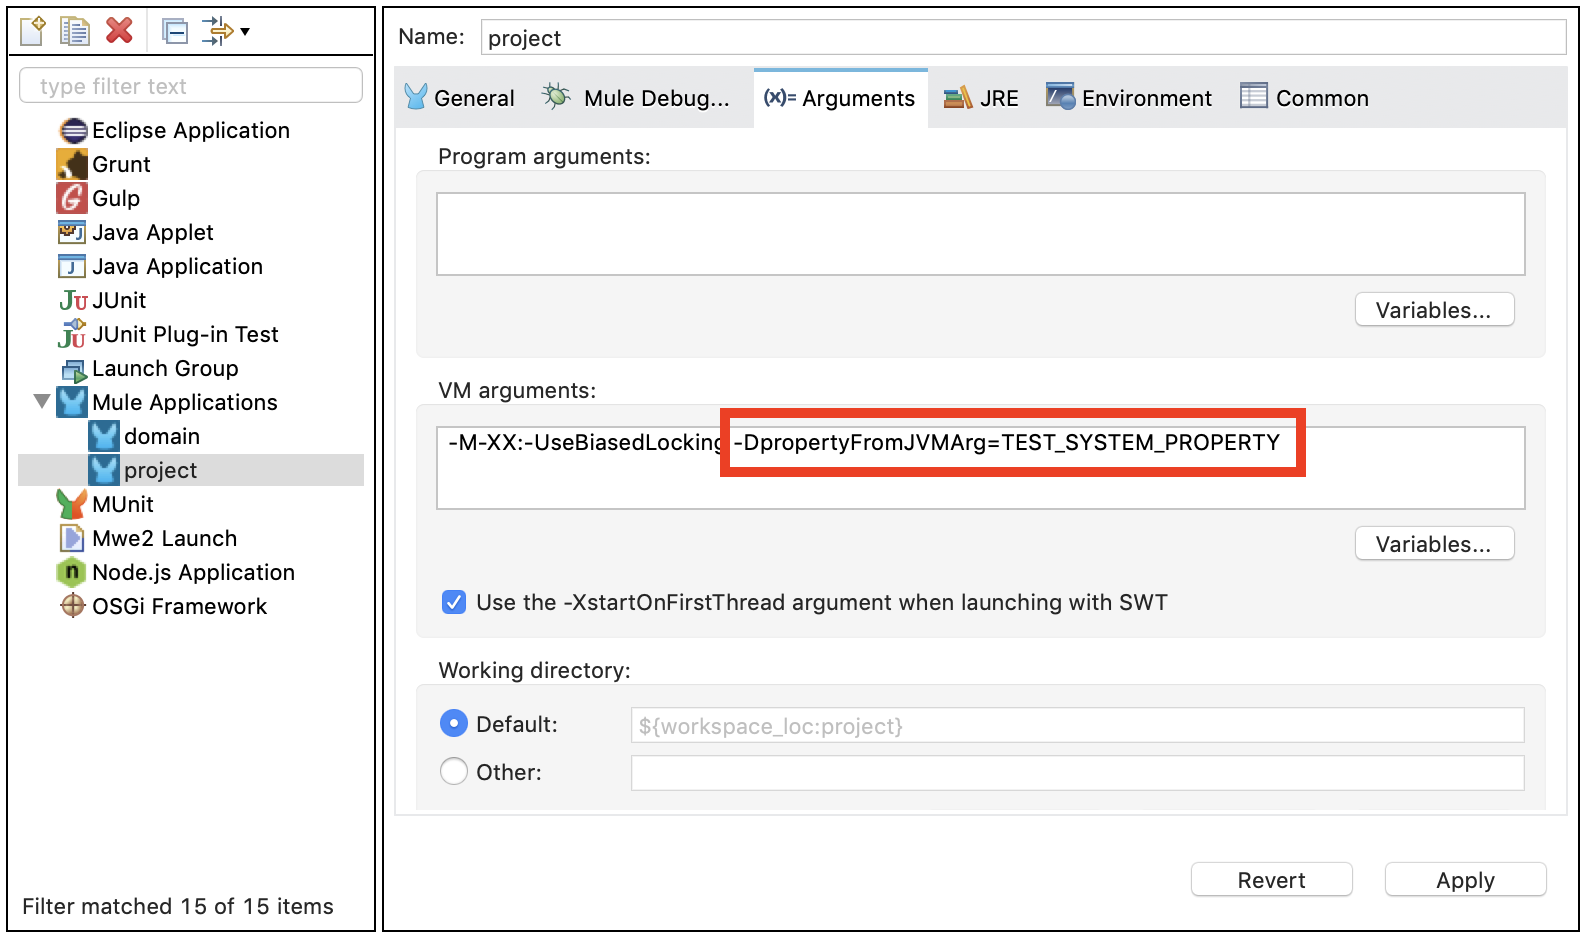
You can add properties when you launch your project on Anypoint Studio, through the Run Configurations menu:
-
Right-click your project in Package Explorer.
-
Click Run As > Run Configurations.
-
Pick the Arguments tab.
-
Add your arguments to the VM arguments field, preceding property names with -D:

Your properties are now available each time you deploy your app through Studio. You can then reference them with the following syntax:
<logger message="${propertyFromJVMArg}" doc:name="System Property Set in Studio through JVM args"/>
Environment Variables
Environment variables can be defined in various different ways, there are also several ways to access these from your apps. Regardless of how an environment variable is defined, the recommended way to reference it is through the following syntax:
${variableName}
Environment Variables From the OS
To reference a variable that is defined in the OS, you can simply use the following syntax:
<logger message="${USER}" doc:name="Environment Property Set in OS" />Setting Environment Variables in Anypoint Studio
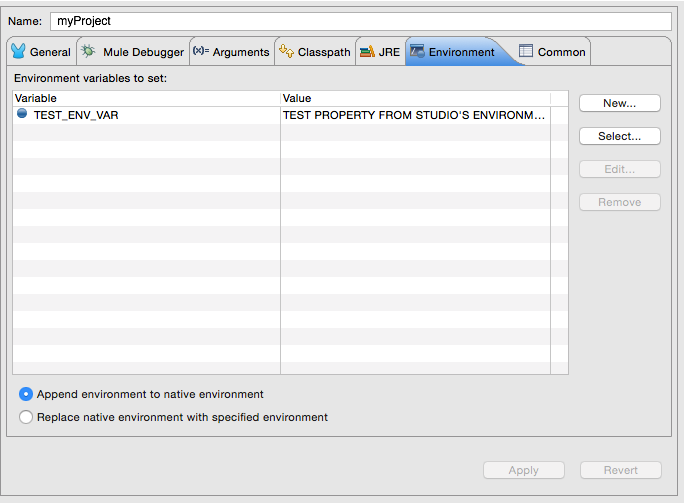
You can set variables in Studio through the Run Configuration menu:
-
Right-click your project in Package Explorer.
-
Select Run As > Run Configurations.
-
Pick the Environment tab.
-
Click the New button and assign your variable a name and value.

Your variable is now available each time you deploy through Studio. You can reference it with the following syntax:
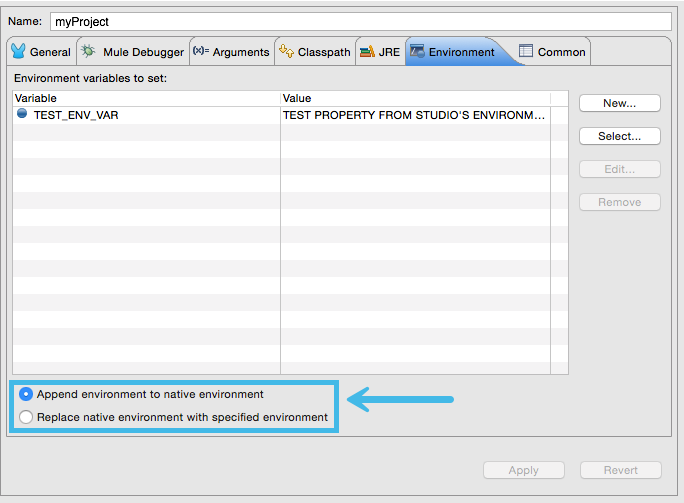
<logger message="${TEST_ENV_VAR}" doc:name="Environment Property Set in Studio"/>| The syntax is the same for referencing variables defined in the OS and variables defined in Studio. You can select if variables defined in Studio replace variables with the same name defined in the OS or not, by checking the corresponding radio button in the UI when creating the variables. |

Setting the Properties File Dynamically
A common configuration use case is to set the file to depend on a property (for example, env) to determine which file to use, for example, to use a development-properties file in development stage or a production file.
<configuration-properties file="${env}-properties.yaml"/>This way, the value of the property env determines which file to use to load the configuration properties. That env property can be set by a global property, system property, or environment property. You can use global properties as a way to define default values for configuration properties. System and environment properties with the same name as a global property will override that global property.
<global-property name="env" value="dev"/>

<configuration-properties file="${env}-properties.yaml"/>
This way, the default value for the env property is dev, which can still be overridden with a system or environment property. Please note that this configuration is required for metadata resolution in Anypoint Studio. If you do not define default values for the properties that are passed through the command line, you receive an error while creating an application model for all message processors that depend on them.
Another thing to consider is that placeholders of a configuration property setting cannot depend on the properties loaded from another configuration property. In the example above, the property env couldn’t have been defined in a configuration property. The example below is not correct:
<configuration-properties file="file-with-env-property.yaml"/>

<configuration-properties file="${env}-properties.yaml"/>
This also includes other type of properties, such as Secure Configuration Properties or Custom Configuration Properties.
Setting Properties Values in Runtime Manager
If you deploy your application to Runtime Manager, you can also set properties through the Runtime Manager console. These can be defined when Deploying to CloudHub, or on an already running application.
To create an environment variable or application property:
-
Log in to your Anypoint Platform account.
-
Click Runtime Manager.
-
Either click Deploy Application to deploy a new application, or select a running application and click Manage Application.
-
Select the Properties tab in the Settings section.
See Managing Applications on CloudHub and Secure Application Properties for more details.
Properties Hierarchy
Configuration properties can be overwritten. The Mule runtime engine uses the following hierarchy to determine which properties take precedence if they have the same name. In this hierarchy, system properties are at the top, so they take precedence over the other types of properties.
-
Deployment properties
-
System properties
-
Environment properties
-
Application properties (includes configuration properties, secure configuration properties, and other custom configuration properties)
-
Global Properties
So, for example, if a configuration property named size is defined as a system property, and there is also an application configuration property named size, the value for the application is the value of the property with the most precedence (in this case, the system property).
Also, a property can derive its value from other properties that are higher in the hierarchy. Therefore, an application property can derive its value from environment, system, and deployment properties. A system property can derive its value from a deployment property, and so on. For example, if there is a system property named env, an application configuration property can have the value file.${env}.xml. On the other hand, an application property cannot depend on an application property’s value unless it’s defined in the same file. For example, a Secure Configuration property cannot depend on a Configuration property.
Because of this hierarchical structure, Mule components that load files cannot depend on an application or a global property. Mule runtime engine loads both, the component and the application property, at the same hierarchy. For example, if Mule loads an import component before loading the application property, the deployment fails because the property is not resolved by the time the import component needs to load.


