[mmc:Mule3.2] Evaluating Mule HA Clustering
| This information in this topic is designed to help you evaluate high availability (HA) clustering in Mule. |
A cluster is a set of Mule instances that acts as a unit. In other words, a cluster is a virtual server composed of multiple nodes. You can use the management console to create one or more clusters. Currently, any cluster that you create must have at least two nodes and up to a maximum of four nodes.
Creating a Cluster
Here is how to use the management console to create a cluster of two nodes in a single machine:
-
If you haven’t already done so, download and install the bundled Mule 3.2.0 ESB enterprise distribution package from here.
-
Install two additional instances of the bundled Mule 3.2.0 ESB enterprise distribution package, and remove the application named "mmc" from these two instances. It is recommended that you install each of these instances on a separate host.
-
Start the three instances of the Mule server. See Start the Mule Server for instructions on how to start each server instance.
-
Open the management console and login. See Open the Console and Login for instructions on how to do this.
-
Register in the management console the two servers from which you removed the "mmc" application. (These are the instances that you want to include in the cluster.) The server that contains the "mmc" application will be automatically registered to the management console. See Register the Server for instructions.
-
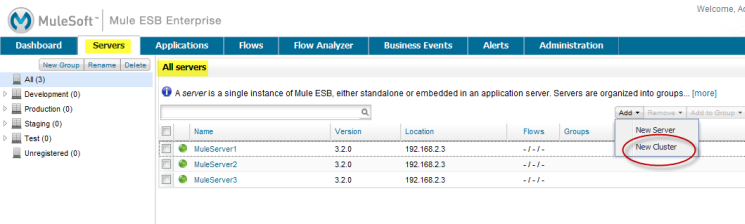
Bring up the All servers pane in the management console. Click the Servers tab, and if necessary, click "All" in the navigation pane. Clicking "All" displays the servers registered in all groups. You may need to click "All" if you’re currently viewing the servers registered in a specific group such as Development or Test.
-
From the All servers pane, click the Add pull-down menu (upper-right toolbar) and select New Cluster from the menu options.
-
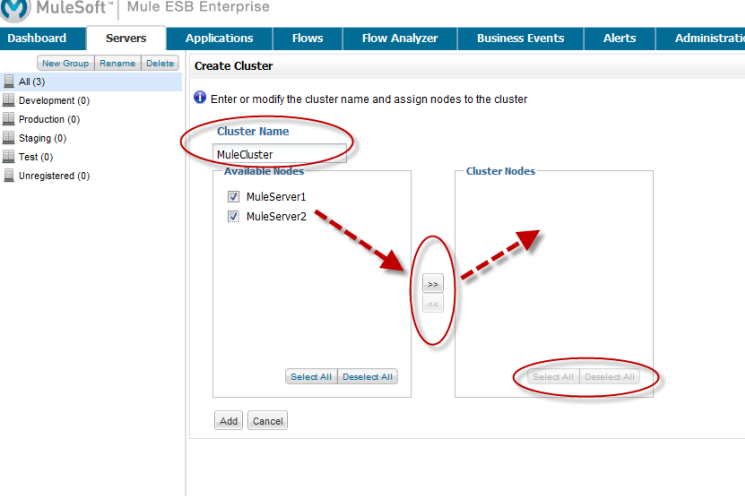
After the Create Cluster pane appears, provide a name for the cluster in the Cluster Name box. Then, select and add to the cluster the two server instance from which you removed the "mmc" application. Use the right arrow to add these two server instance from the Available Nodes list to the Cluster Nodes list – all three servers will be shown in the Available Nodes list. (Use the left arrow to remove nodes from the cluster.) Use the Select All/Deselect All buttons in the Available Nodes and Cluster Nodes lists to select or unselect all items in the respective lists. When finished, click the Add button in the lower left corner to complete the operation, or click Cancel to cancel the cluster creation. Although not shown in the following illustration, the names of the two instances that you registered will include the IP address of their respective hosts.
-
The console then displays the All servers pane. During the cluster creation process the pane marks the new cluster with an "in-progress" icon.

Although not explicitly visible, the management console sends tickets to all the cluster nodes and restarts them. The in-progress indicator indicates that the console is waiting for the nodes to restart. Once the cluster nodes restart, the cluster is ready for use.
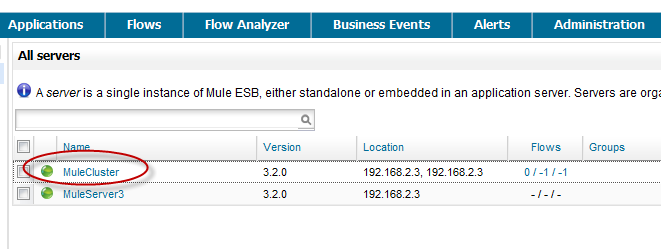
Notice that the All servers pane does not list the individual nodes in a cluster. Instead, it lists the cluster as a single unit.
You can also "disband" (that is, delete) one or more clusters. For further information about creating or disbanding a cluster, see Creating or Disbanding a Cluster.