Mule Filter Processor
Filter Unsecure Messages
Generally positioned immediately after an inbound endpoint in a Mule flow, the Mule Filter Processor evaluates two message properties, then rejects the message if the values fall outside of its configured parameters. The properties that are evaluated are:
-
IP address – If the IP address of a message falls outside the filter’s configured IP address range, Mule does not process the message (see image below).
-
Creation timestamps — Where the message’s creation date and time fall outside the filter’s configured acceptable lifespan (i.e. the message is older than expected), Mule does not process the message (see image below).
image::filter3.png[]
When to Use a Filter
Use a Mule Filter Processor to protect a network, database, or system from unauthorized access by users outside the network. In other words, use a filter to exclude users from non-authorized IP addresses from accessing your system.
Further, use a security filter to protect your resource against a replay attack. By rejecting messages with a lifespan that exceeds a short timeframe — 30 seconds, for example — Mule protects your application from processing the same message a user maliciously sends multiple times. To be effective, a Mule flow should employ a digital signature, in addition to this type of security filter, to sign the creation time of the message.
Configuring the Mule Filter Processor
| This topic introduces the idea of Global Elements; if you are unfamiliar with this functionality, access Understand Global Mule Elements to learn more before proceeding. |
The following steps describe how to configure the Mule Filter Processor to filter by IP address range.
-
Create a new project and drag an HTTP inbound endpoint onto the canvas.
-
Add a Filter Global Element to the Mule application. To do so, complete the following steps:
-
Click the Global Elements tab to display the Global Elements pane.
-
Click Create. The Choose Global Type window pops up.
-
In the Filter input box, type
filter. The drop-down list should now only display the Filters component under Cloud Connectors.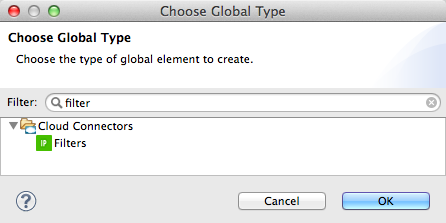
-
Select the Filters component, then click OK.
-
The Global Elements Properties window pops up. In the Name field, type a useful, descriptive name for the filter, then click OK.
-
Click the Message Flow tab to go back to the Message Flow pane.
-
-
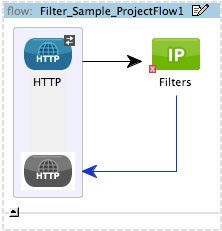
Identify where, in the flow, to place the first security filter. In this case, we want Mule to process only those messages that originate from a specific range of IP addresses. In Mule Studio, drag a Filter building block onto the canvas, dropping it next to the HTTP inbound endpoint.
-
Double-click the Filter icon to open its Pattern Properties window.
-
Enter a descriptive Display Name for this element.
-
In the Config reference drop-down menu, select the Global Element that you defined for the IP Filter.
-
In the Operation drop-down menu, select the filter strategy that you wish to apply.
Filter Strategies
The Mule Filter processor allows you to filter messages according to the following four filter strategies:
| Operation | Description | Example |
|---|---|---|
Filter by IP |
Type an IP address or regular expression to define the address or range from which the Filter will accept connections. |
Regex: |
Filter by IP range |
Enter a net address and mask to determine the IP range. The IP addresses or ranges you enter will be considered valid, and allowed by the Filter. |
Net: Mask: |
Filter by IP range CIDR |
Enter the desired IP range in CIDR notation. |
Cidr: |
Filter expired |
This option allows you to define an expiration time for the message.
|
Date Time: # Expires in: Date Time: Expires in: |