Running the Examples From the Management Console
You can run the example applications from the Mule ESB Management Console. Here are the general instructions for locating the examples, deploying them to the Mule ESB server, and running them.
|
To run the examples from the Mule Management Console, you must first download and install the trial version of Mule ESB Standalone which comes bundled with the Mule Management Console. As a trial version, Mule ESB Standalone with Management Console has a trial license valid for 30 days. |
Locate the Examples
The example applications included with the Mule server package are located beneath the Mule installation folder in the \examples folder. Open the \examples folder and you should see a set of folders, such as \hello, \loanbroker-simple, \stockquote, and so forth.
For example, suppose you installed the server package in the folder \mule-esb. Open this installation folder, then open the \examples folder. You should see a set of folders similar to the figure below:

Each folder in \examples contains all the files needed for that particular sample application, plus a README.txt file with specific instructions to run that example. Here’s the contents of the hello application folder:
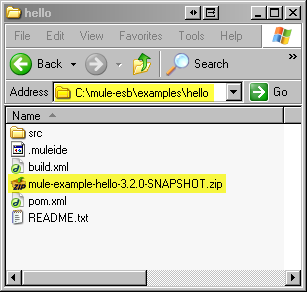
To run an example, deploy the archive (.zip) file, which contains all the application components, to the server. Unless otherwise noted in an example’s README file, the examples are built and ready to deploy and run. For the hello example, this is the mule-example-hello-3.2.0-SNAPSHOT.zip file.
Note that the other example folders contain similar sets of files to the hello application folder.
Deploy the Example to the Server
| You must have registered the server to deploy applications to it. |
Here’s how to deploy an example.
Click the Applications tab in the console window to open the All Deployments window.
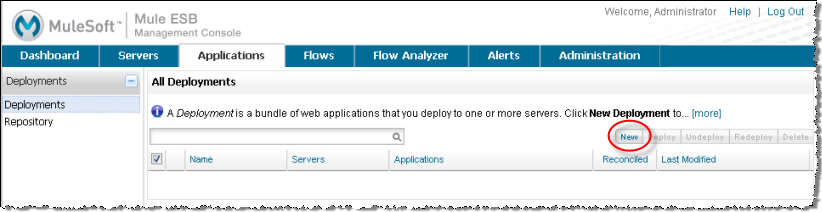
You can add applications that are already loaded into the server repository, or you can upload new applications.
Deploy an application from the repository by clicking the Add from Repository button, then selecting the application.
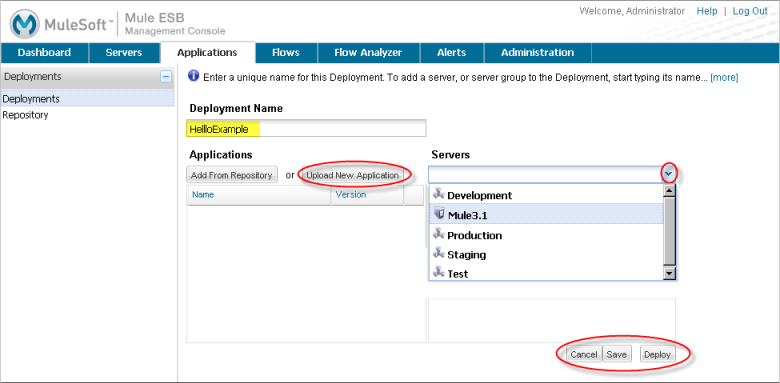
If you are uploading a new example, create a name for the deployment so that you can later identify it.
-
In the Deployment Name field, enter a name, such as HelloExample. (See the figure below. Notice that the Upload Application button is circled, as well as the pull-down arrow for selecting the server for the deployment.)
-
Click the Upload New Application button.
-
A dialog box opens through which you can browse to the application file.
-
Use the browse dialog to locate the folder in which you installed the Mule server and console, then browse to the \examples\hello folder. Select the hello application jar file:
mule-example-hello-3.2.0-SNAPSHOT.zip. -
Expand the Advanced Options in the lower half of the dialog box to further specify the workspace folder, the name of the application as you want it to appear in the console when deployed on the server, and the application version number. In this example, the workspace folder is /Applications, the deployed name is helloApp, and the version number is changed to 3.2-1.
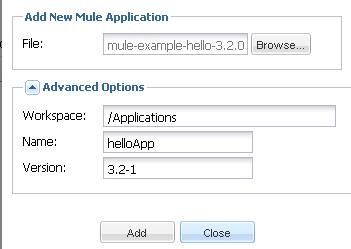
-
Click Add to complete the upload.
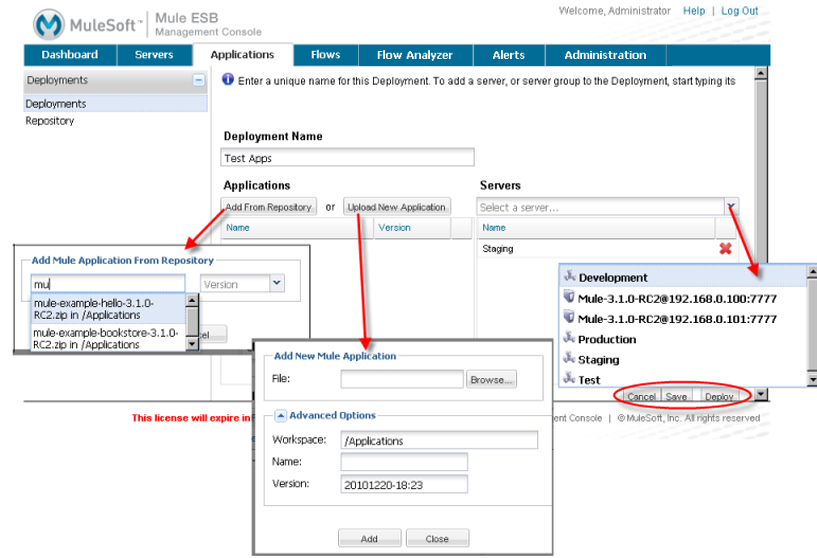
Next, specify the server or servers to which you want the application deployed.
-
Use the pull-down list beneath Servers to select a server for deployment. The list includes the registered server and groups of servers.
The screen might look as shown below:
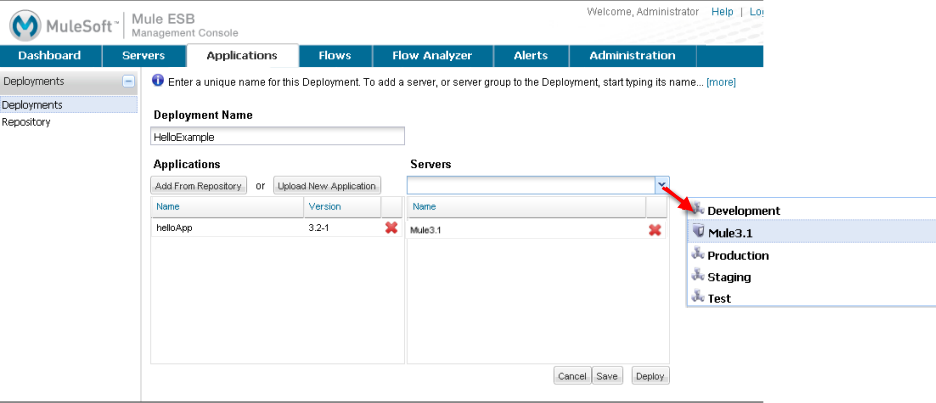
Notice that you can deploy more than one application at a time, and also you can deploy these applications to one or more servers. Click the red X to the right of an application to remove that application from the deployment. Click the red X to the right of a server name to remove that server from the deployment list.
-
Click Deploy to deploy the hello application to the server.
You should see a status message in the upper portion of the screen indicating that deployment is in progress. When completed, the status field indicates whether deployment was successful or not. See the figure below.
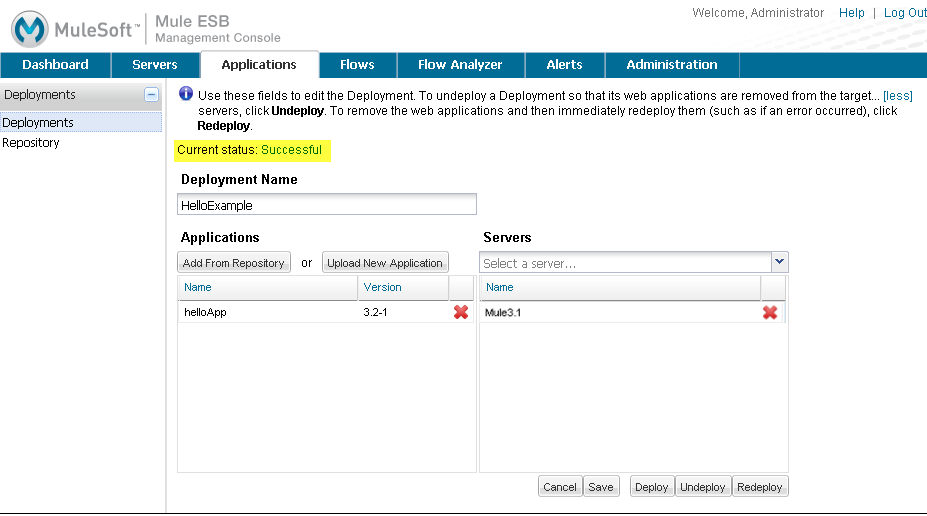
If an error occurred, click the Redeploy button to try again.
-
When you click the Deploy button, the application is also saved in the server repository.
An any time, you can click the Repository node and see information about this deployment. You can also click the Deployments node and return to the All Deployments screen to see a list of all deployments. From All Deployments, you can select specific deployments, then edit, undeploy, redeploy, or delete them.
Run the Deployed Application
Run the deployed hello application through another browser window or tab, according to the instructions for each example.