Studio Visual Editor
-
Create the example application in Anypoint Studio. Do not run the application.
-
Add your WebSphere MQ client libraries to the project build path.
-
Make sure your WebSphere MQ installation has queues named "in" and "out."
-
Run the application. When the application starts, you may see some exceptions in the output console, since WMQ is not configured (we will configure it in the next step).
-
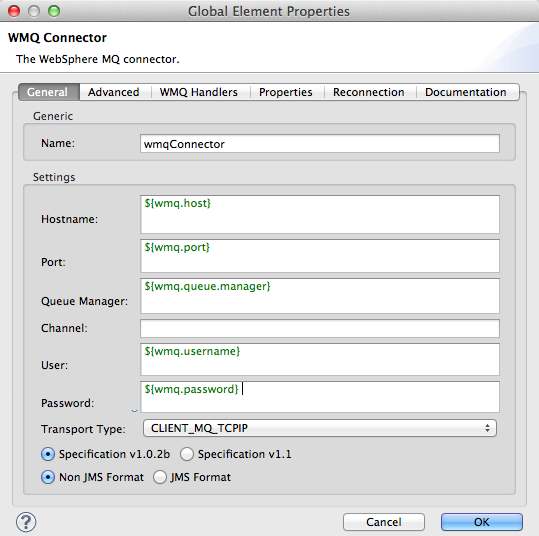
Edit the following properties in
wmq.properties `(located at `src/main/resources) with the values appropriate for your WebSphere MQ installation:wmq.host= wmq.port= wmq.queue.manager= wmq.username= wmq.password= -
After configuring WMQ, restart the application.
Standalone
-
Copy your WebSphere MQ client JARs to your
$MULE_HOME/lib/userdirectory.<MULE_HOME>is the root directory of your Mule installation, for example/opt/Mule/mule-standalone-3.5.0. -
Ensure that your WebSphere MQ installation has queues named "in" and "out."
-
Copy the example’s zip file, for example,
<MULE_HOME>/examples/wmq/mule-example-wmq-3.5.0.zip, to the$MULE_HOME/appsdirectory. -
Start Mule, then wait for it to install the example. You may see some exceptions in the logs, since WMQ is not configured yet (we configure it in the next step).
|
How to start the Mule server: There are several ways to start/stop the Mule server:
On a Windows system, go to the |
-
Edit the following properties in the file <`MULE_HOME>/apps/mule-example-wmq/classes/wmq.properties` with the values appropriate for your Websphere MQ installation:
wmq.host= wmq.port= wmq.queue.manager= wmq.username= wmq.password= -
After configuring WMQ, restart Mule or reload the application.
|
How to reload the Websphere MQ app without restarting Mule (Unix) If you modify the Websphere MQ application while Mule is running, you can reload the application without restarting Mule by "touching" (updating the timestamps of) the file To update the timestamps, run the following command: Mule automatically reloads the application, activating any modifications. |


