Adding Community Runtime
Anypoint Studio comes bundled with an embedded Enterprise runtime with a 30-day Enterprise trial license. You can add Community runtime to your Anypoint Studio instance to build and test applications in the free, open-source Mule runtime environment.
| The steps explained in this document are also valid for downloading and installing earlier versions of the Mule runtime, both of Enterprise and Community Edition. |
-
In Studio, under the Help menu, select Install New Software.
-
In the Work With field of the Install wizard, use the drop-down menu to select:
Mule ESB Runtimes for Anypoint Studio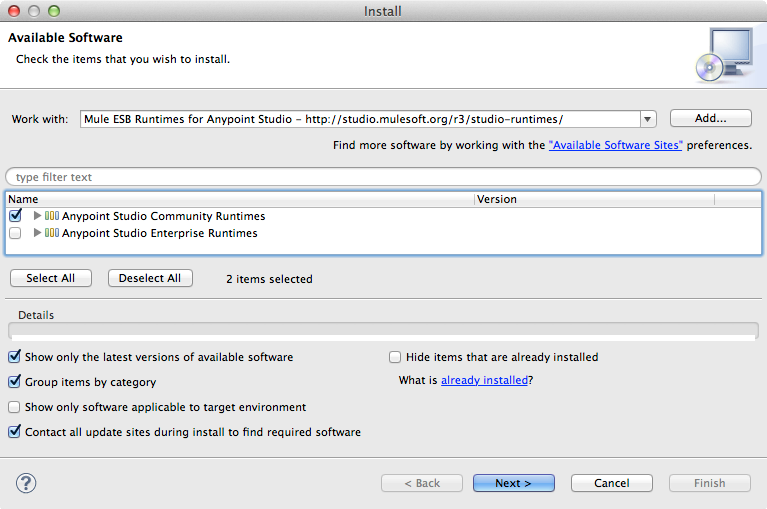
-
Check the box to select Anypoint Studio Community Runtimes, and click Next.
-
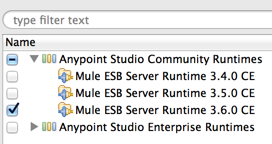
Click one or more runtimes you want to install. If you only want one version, expand the item and click the version you want. After selecting one or more versions, click Next.
-
Click to agree to the terms and conditions of the license agreement, and click Finish. Studio installs the Community runtimes. This may take several minutes to complete depending on the speed of your Internet connection and the number of runtimes you select.
-
Click to agree to restart Anypoint Studio.
-
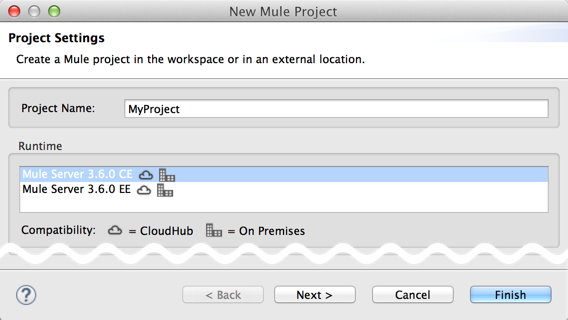
When Studio restarts, under the File menu, select New > Mule Project.
-
In the New Project wizard, click to select a CE option (CE stands for Community Edition).
|
Are you behind a firewall? If you are on a network with firewall restrictions, you may find that the Studio update sites are blocked and you are unable to download extensions. Allow the following sites on your firewall to allow Studio to connect to the update sites: Allow on Firewall
|
Change the Runtime of an Existing Project
-
Complete the procedure above to install additional Mule runtimes on your instance of Studio.
-
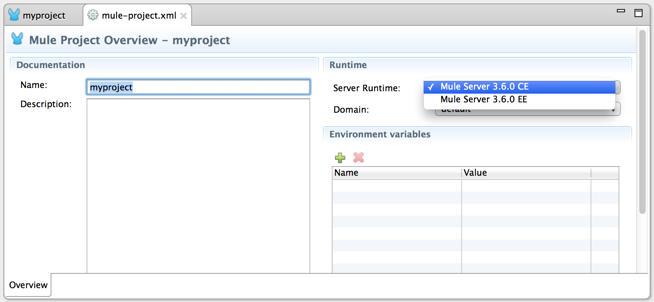
In the Package Explorer in Studio, double-click the
mule-project.xmlfile to open it. -
Use the drop-down menu next to Server Runtime to select a new Mule runtime.
The Community runtime does not support all the features available in Enterprise runtime. If you switch runtimes from Enterprise to Community, be aware that some of your configurations may not be supported.
-
If changing from Enterprise to Community, Studio displays a warning to advise that it may initiate updates to the namespace, and asks for your permission to proceed; click Yes to continue.
-
Studio saves the change. Close the
mule-project.xmlfile.
See Also
-
Read a blog post and/or release strategy explaining the Single Studio distribution.
-
Want to upgrade to Mule’s Enterprise runtime? Install an Enterprise license.
-
Get started with Mule Fundamentals.
-
Access a list of all the update sites available for your version of Anypoint Studio.