[
  {
    "productID": string,
    "category": string,
    "SKU": string,
    "productName": string,
    "inventory": string
  }
]
{
  "Amount": number,
  "Id": string,
  "CloseDate": string,
  "Name": string
}
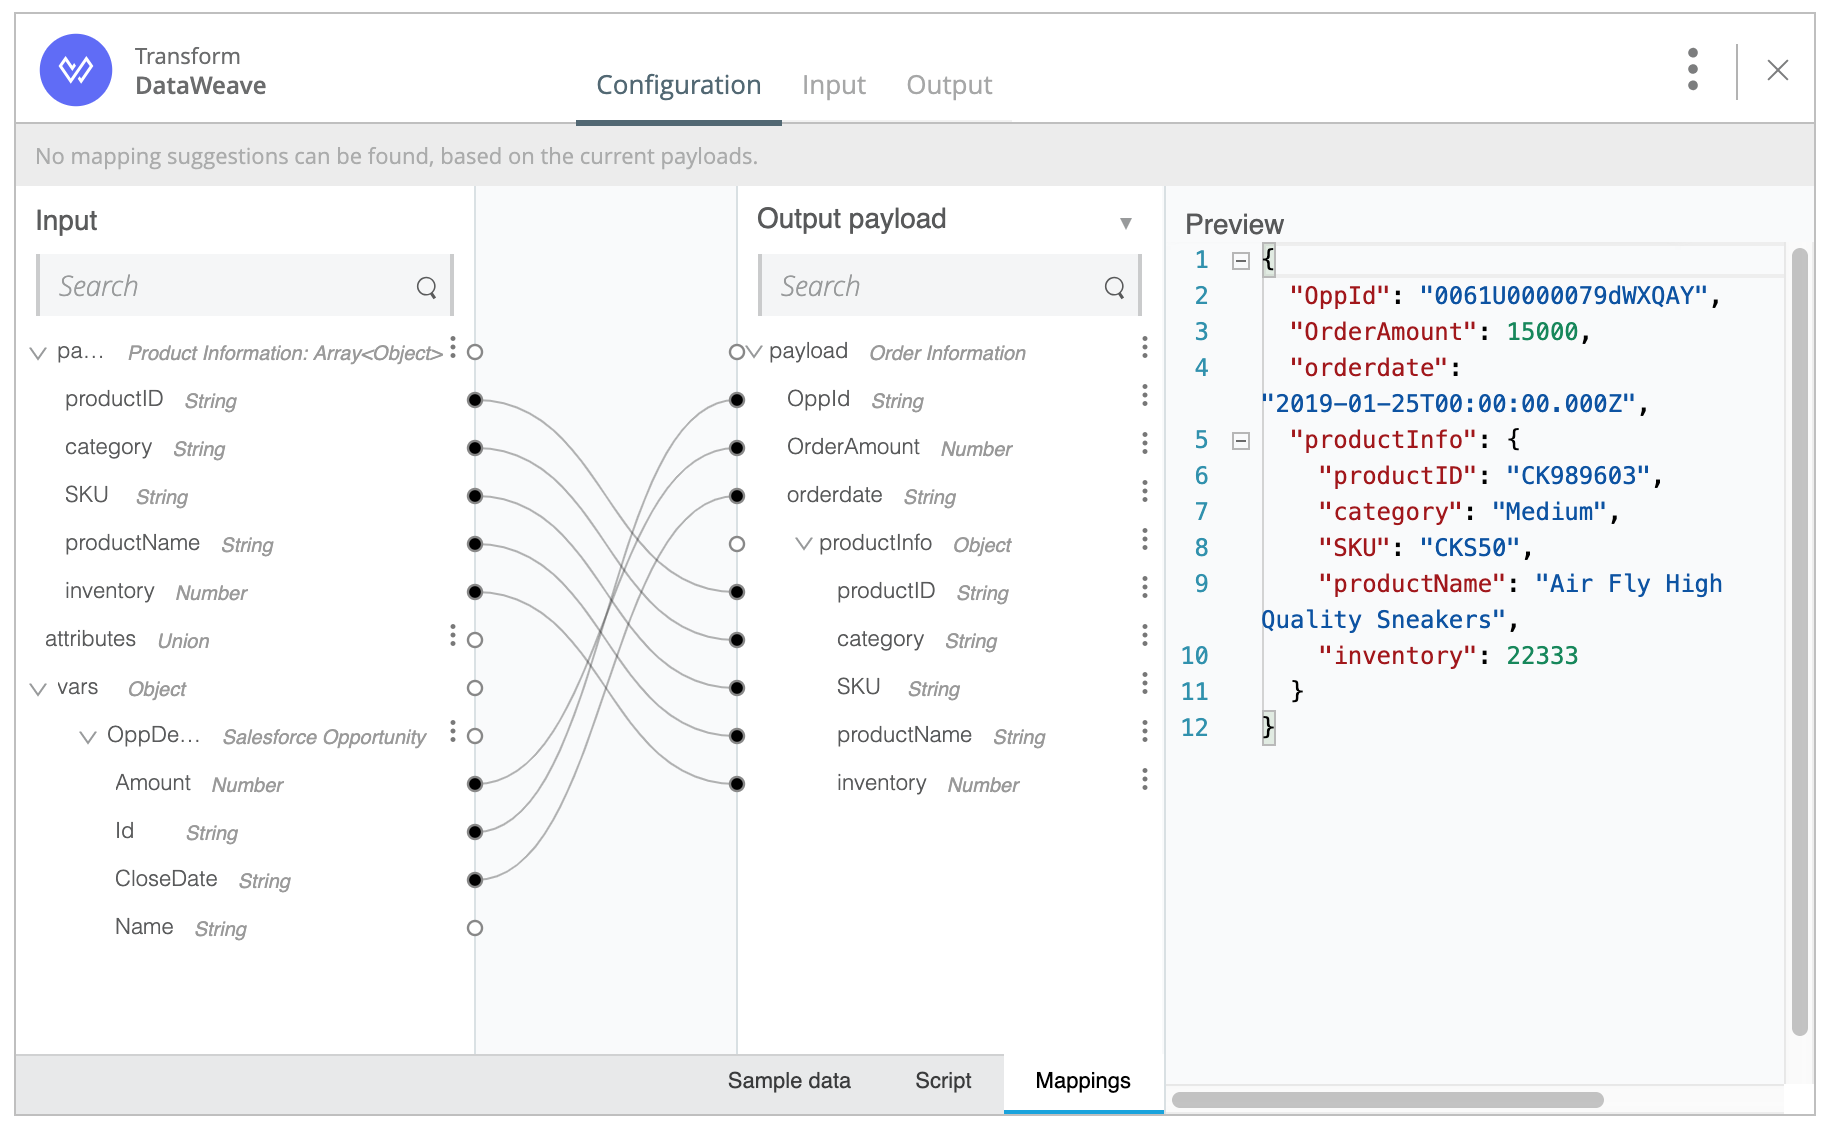
If you followed the steps in the tutorial "Create Your First Mule Application with Flow Designer", then you have already performed such a mapping twice. Let’s take another look at both mappings.
The first time, you needed to map the output of the Choice card to the input that was required by the NTO Order API.
| Data types output by the Choice card | Data type required as input by the NTO Order API |
|---|---|
The Product Information data type
[
{
"productID": string,
"category": string,
"SKU": string,
"productName": string,
"inventory": string
}
]
The Salesforce Opportunity data type
{
"Amount": number,
"Id": string,
"CloseDate": string,
"Name": string
}
|
The Order Information data type
{
  "OppId": string,
  "OrderAmount": number,
  "orderdate": string,
  "productInfo": {
     "productID": string,
     "category": string,
     "SKU": string,
     "productName": string,
     "inventory": number
     }
}
|
To do the mapping, you used a Transform card, clicking and dragging elements from the Input side to elements on the Output side. (In the Transform card, "input" and "output" are terms that are relative to the Transform card itself. The "input" to the Transform card was the output of the Choice card, and the "output" of the Transform card was the input to the Order API.)

You had to do the mapping because the Order API (which was a REST API that you sent a POST message to) did not require all of the data that was in the output of the Choice card. Moreover, some of the elements of the data required by the API had names that differed from the corresponding elements in the Choice card’s output
| This Element from the Choice card | Mapped to This Element for the Order API |
|---|---|
|
|
|
|
|
|
|
|
|
|
|
|
|
|
|
|
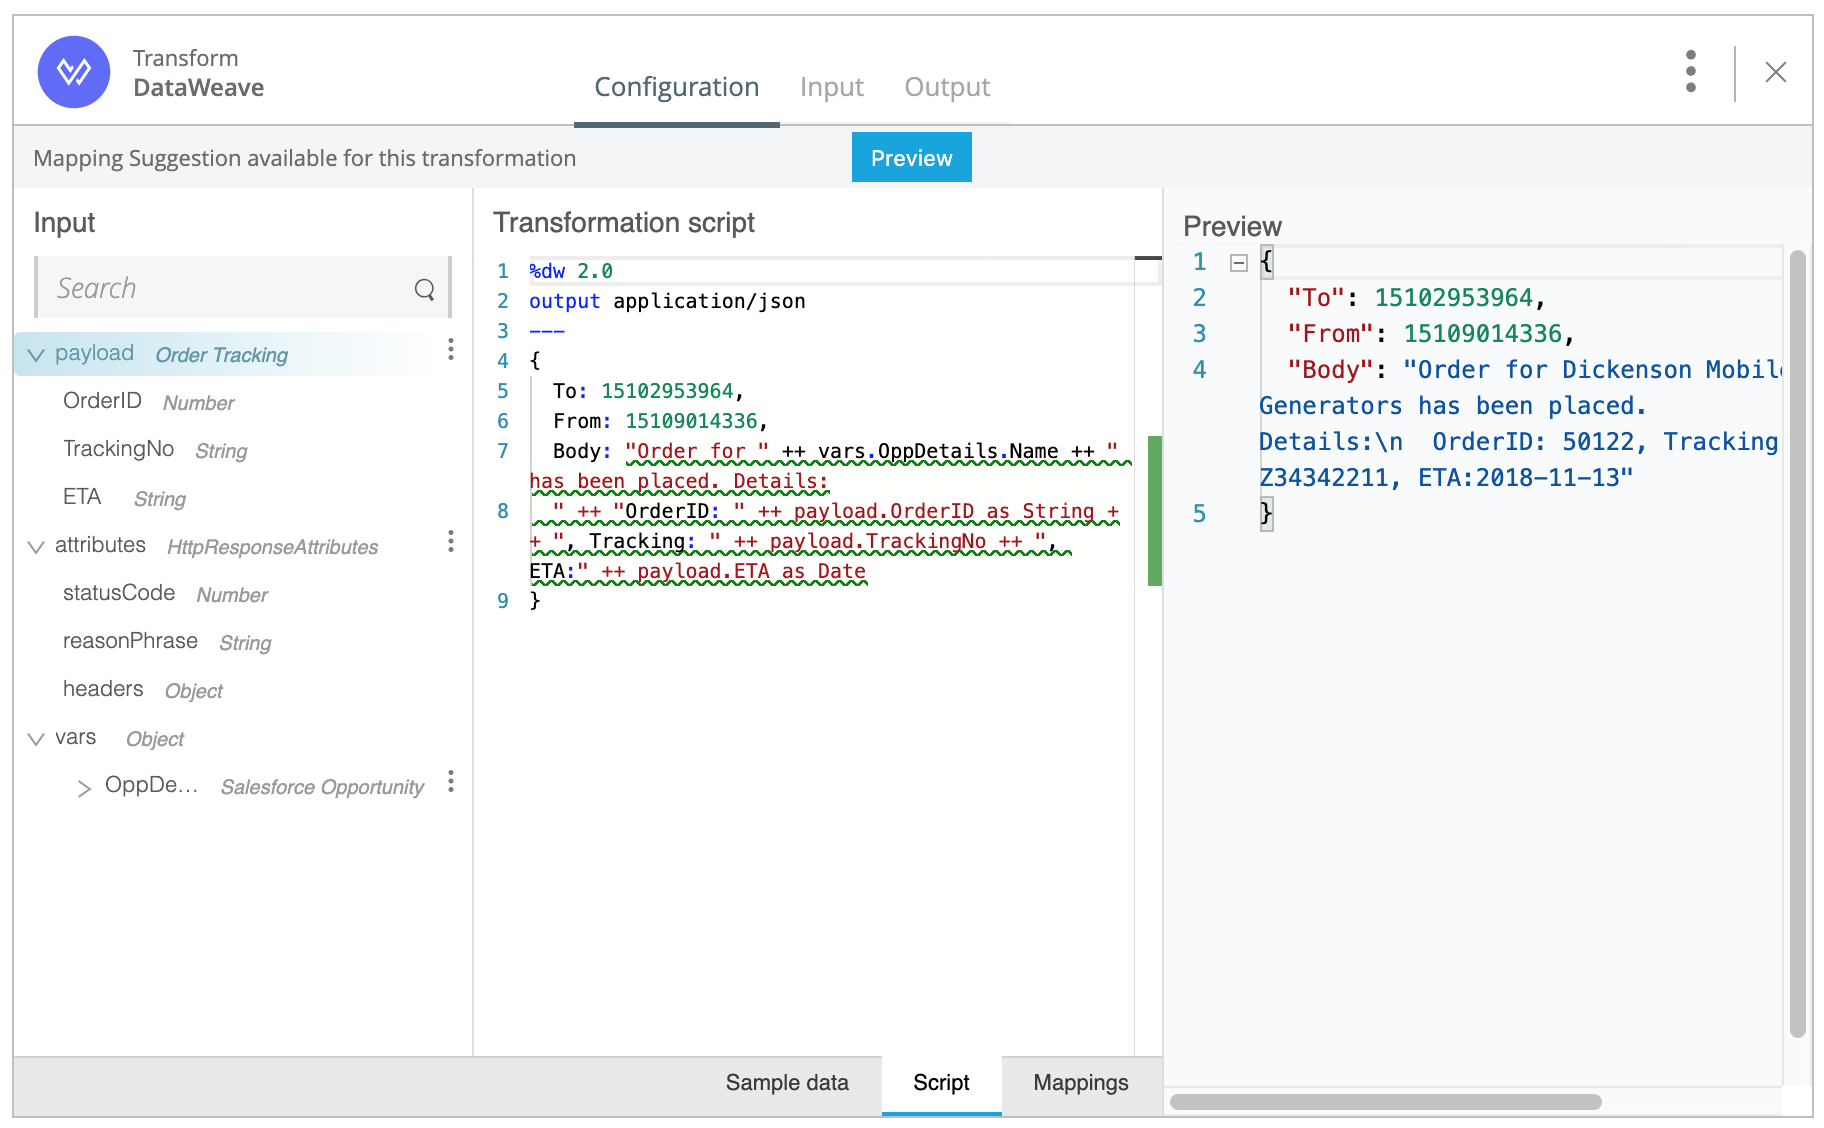
The second time you mapped in the tutorial, you did not need to set a data type explicitly for the input of the Twilio card. The Transform card was able to determine the data structure that the Twilio card required. Also, you did not map data elements. Rather, in the output of the Transform card, you used a DataWeave script to pull data from the input of the Transform card into a message to send customers. You also explicitly set the values of the To and From fields to particular phone numbers, as you can see here in the Script pane of the Transform card.

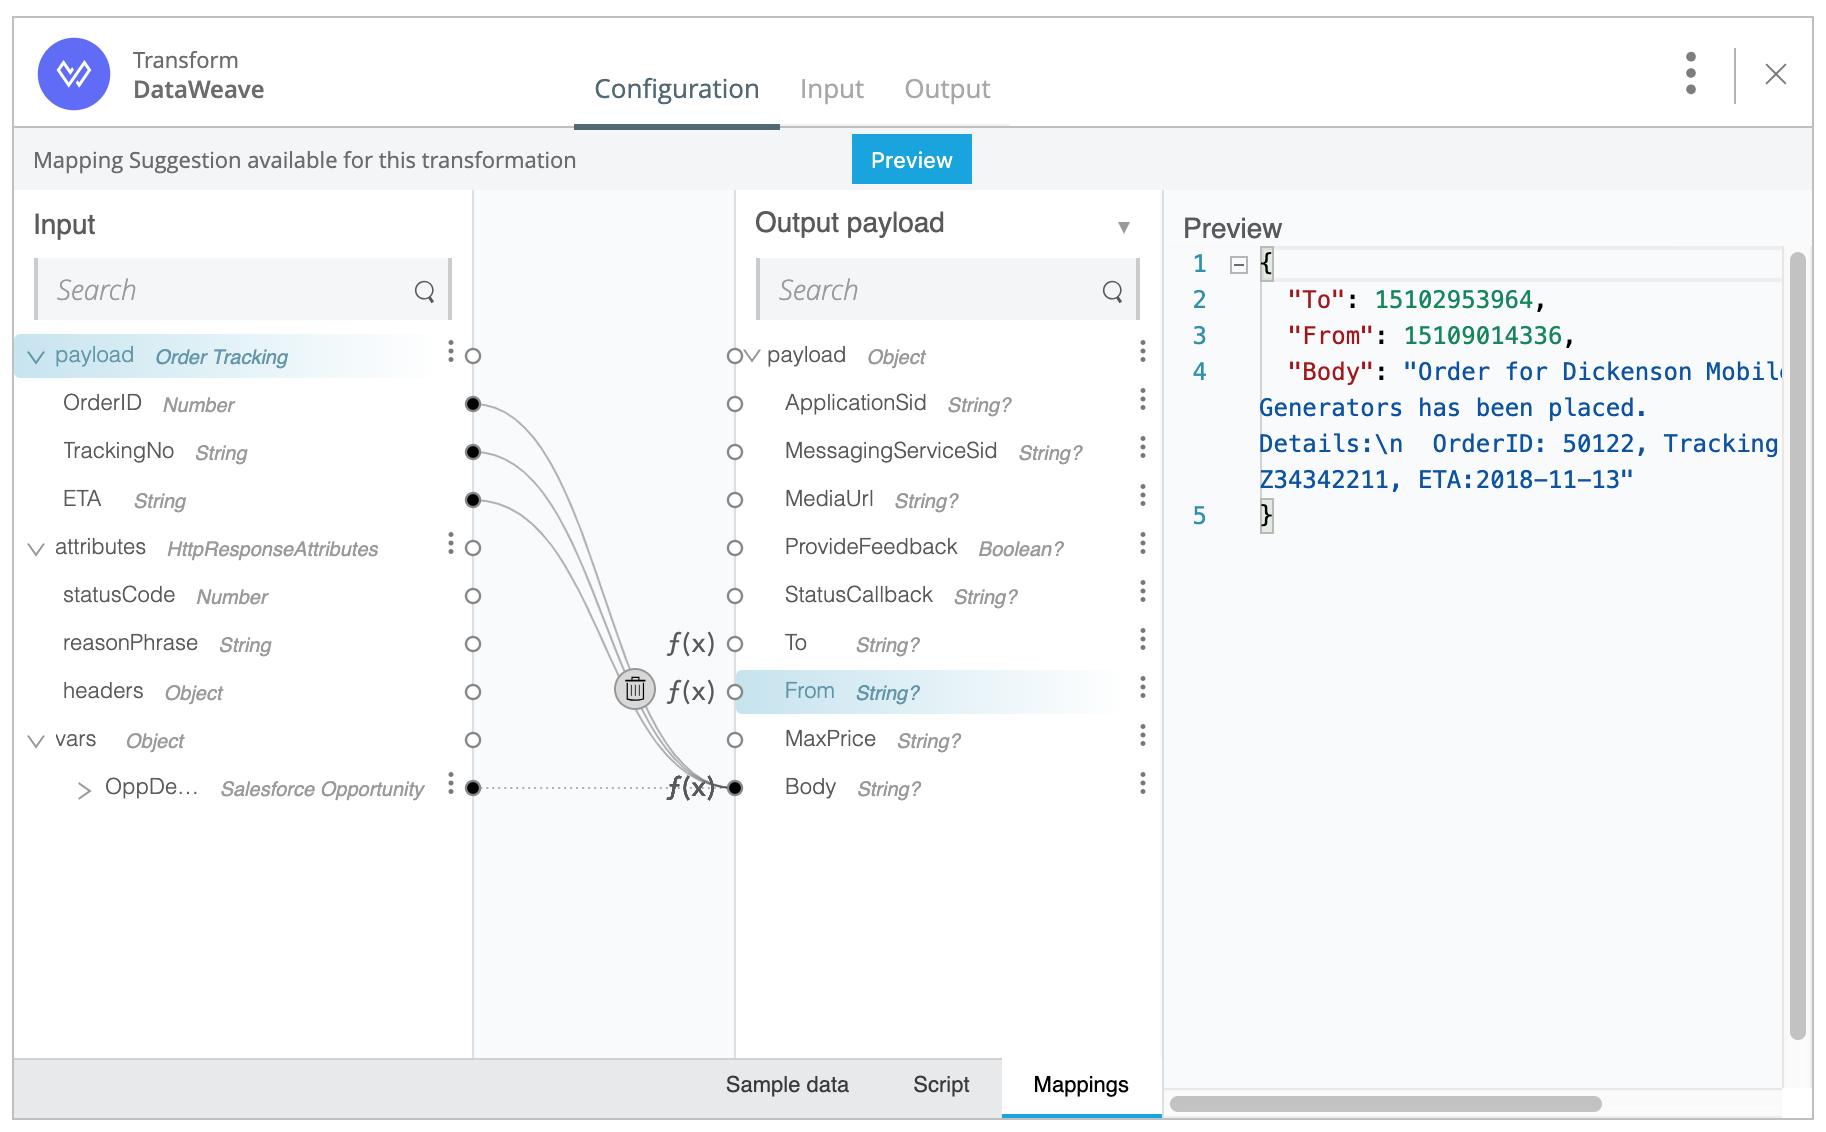
To and From fieldsThe Mappings pane showed this view:

The f(x) markers on three of the field in the output payload show that those fields are populated with values that you supplied via strings or DataWeave expressions. Notice that OrderID, TrackingNo, and ETA in the input payload all map to Body in the output payload because the script in Body references those three payload elements.