Adding Business Logic to a Flow
In this example, we show you how to use a Component to plug custom logic into your Mule Flows. We create a Java Hello component that takes an input name and says hello, demonstrating how your code can interact with a flow. A component in Mule is simply a POJO (Plain Old Java Object) that implements some logic on the data it receives and usually returns data to pass to the next step in the flow. You can write Components in Java or in other languages, such as Groovy, Ruby, Python, Scala, Closure, or JavaScript.
What You Will Learn
-
How to create a Java Component in Mule Studio
-
How to configure the component in the flow
-
How Mule knows what method to call when invoking your component
Build It Now! (10 minutes!)
Prerequisites
This examples adds a new flow to the existing 'core-concepts' project created in the Configuring an Endpoint example.
Building the Example
-
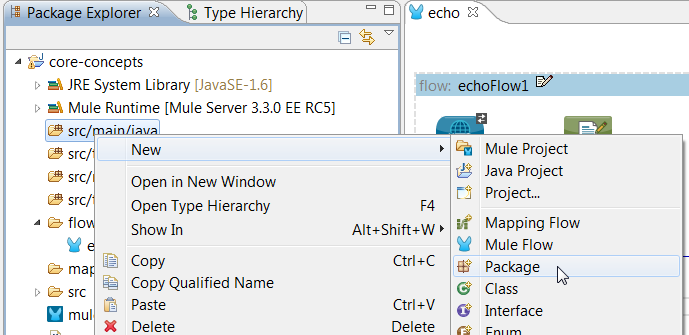
First, let’s create our custom Java component. For those familiar with Eclipse, the process is the same for creating Java classes in Studio. Create a package in the src/main/java folder and name it org.mule.examples.hello:
-
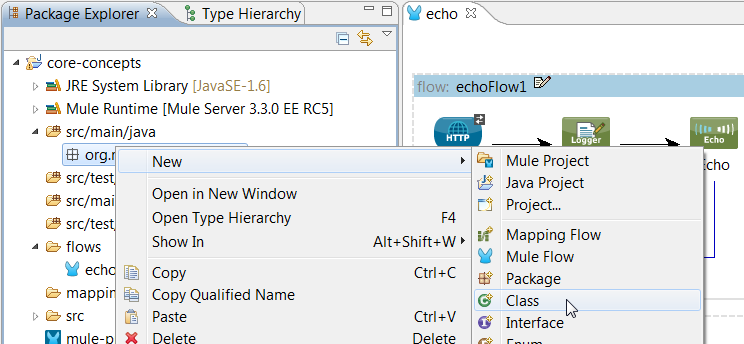
Now create a new Java Class by right clicking on the package you just created:
-
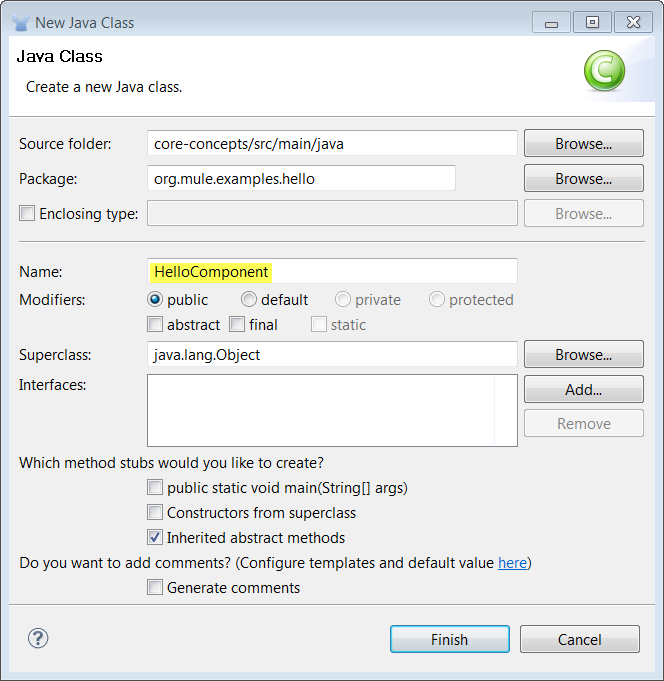
This will open up a dialog box with lots of options, all you need to do is give the class a name, HelloComponent.
-
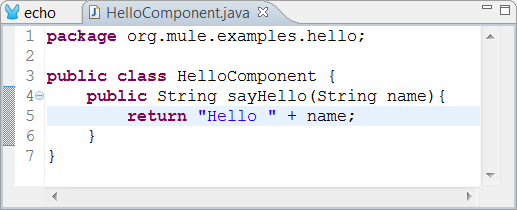
The class has been created so we’re going to add a single method to it called sayHello. This method takes a single String argument.
-
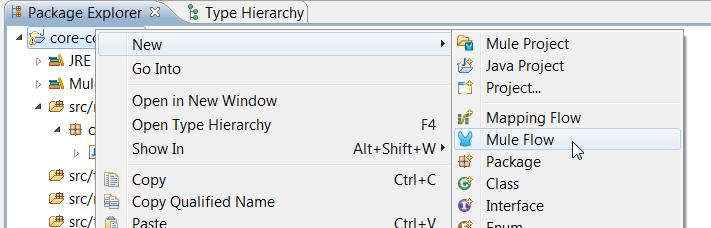
We’re ready to create our new flow. Right click on the project tree and select New -→ Mule Flow. When the New Mule Flow dialog appears, enter hello as the name and click Finish.
-
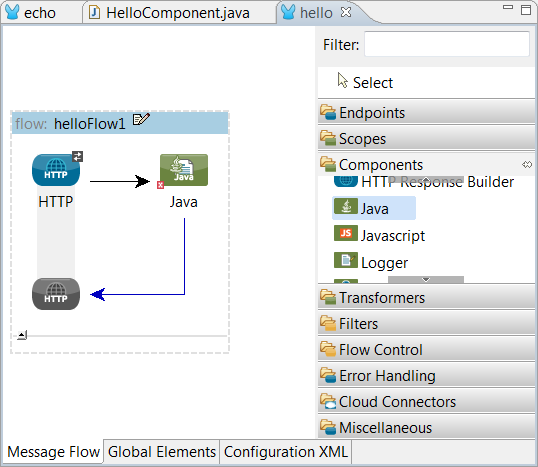
Now drag a HTTP endpoint and a Java component from the palette onto the canvas. It should look like this:
-
Double click on the HTTP endpoint to edit its properties. set the host to localhost and the port to 8082
Choosing a port number
Note that the port for this connector is 8082 not 8081 as in the previous examples. This is because we added this flow to our existing project and when it starts both the echo and hello flows will be loaded; a port conflict would happen if both flows listened on the same port.
-
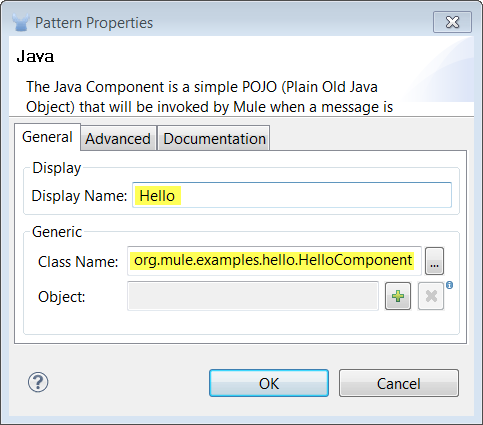
Next, double click on the component to edit its properties. In the Display name field, enter Hello. In the Class name field, enter org.mule.examples.hello.HelloComponent.
-
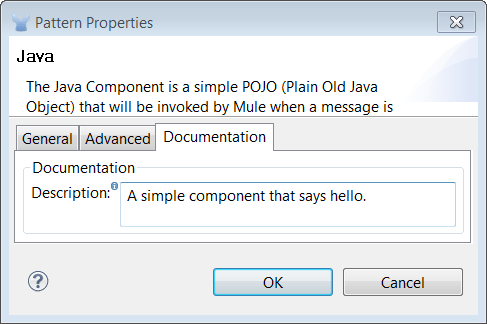
In the same dialog, click on the Documentation tab in the component properties dialog and give the component a description. Click OK.
Running the Example
-
To run the example, right click the flow, hello.mflow, in the project tree, select Run As.. -→ Mule Application. You’ll see logging information in the console window as the application starts.
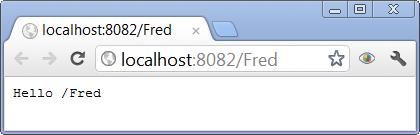
-
In a browser window goto http://localhost:8082/Fred and you should see the following on screen:
What Just Happened?
-
You created a Java Component (a POJO) and plugged it into a Flow.
-
The Java Component got invoked via an HTTP request.
-
The Component didn’t need to know anything about where the data came from or where it was going. Mule has a clean separation of endpoints and components.
How did Mule Know the Method to Invoke?
In Mule the method invoked on a component is called an EntryPoint. Mule invokes the EntryPoint method when an endpoint receives data, using EntryPointResolvers to figure out which EntryPoint method to invoke. Resolvers vary according to the type of data received and the methods on the component. A resolver can be based on annotations, interface, pre-defined, or dynamic data. In this instance Mule used a dynamic resolver since the request was a single string and the sayHello method accepted a single String. Mule matches the resolver to the method’s parameter data. The Invoking Component Methods tutorial covers this topic, providing more information about components and entry points.
Next Steps
Previous: Configuring an Endpoint