Invoking Component Methods
This example demonstrates different ways entry point resolvers are used when you invoke a component. As discussed in the previous example. Mule uses end point resolvers to determine the appropriate method when an endpoint receives data. The type of data determines which kind of resolver to apply. For example, there are different resolvers for dynamic data, pre-defined data type, methods the incorporates annotations, and the Callable interface.
This example also explains how use a Transformer to transform one Java type to another.
What You Will Learn
This example demonstrates four ways in which endpoint resolvers can be applied: s A
-
Case 1 - Using a dynamic data resolver to resolve a lone entry point method
-
Case 2 - Using a dynamic data resolver to resolve between two entry point methods
-
Case 3 - Using the annotated entry point resolver to resolve a method with annotations
-
Case 4 - Using the Callable interface with the
oneCallmethod
Build It Now! (15 minutes)
Prerequisites
This tutorial continues the Adding Business Logic to a Flow example. At this point, you should have created a flow called hello.mflow and a POJO component named Hello with a single method called sayHello. The sayHello method returns the text "Hello" with the name that you pass in.
Case 1 - Using a Dynamic Data Resolver to Resolve a Lone Entry Point
In this part, we create a Custom Transformer called HttpRequestToNameString so that we can pass in a string to the Hello component. This entails creating a class for the Transformer, dragging a Transformer into the flow, creating a reference to the class, and running the example to make sure that the dynamic endpoint resolver works.
-
Create a Java class for the new transformer called HttpRequestToNameString. As shown in the previous example, to create a class, you right-click the
src/main/javafolder and select New → Class. The New Java Class dialog appears. -
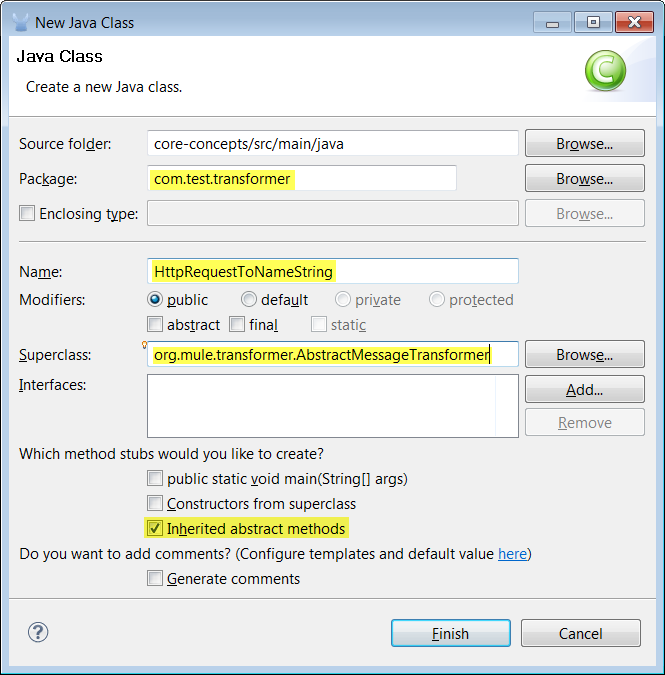
Add the following information in the New Class dialog:
-
Package - com.test.transformer
-
Class name - HttpRequestToNameString
-
Superclass - org.mule.transformer.AbstractMessageTransformer (You can browse for this.)
-
Method stubs - Inherited abstract method
-
The following figure shows the New Java Class dialog, with the information entered.
-
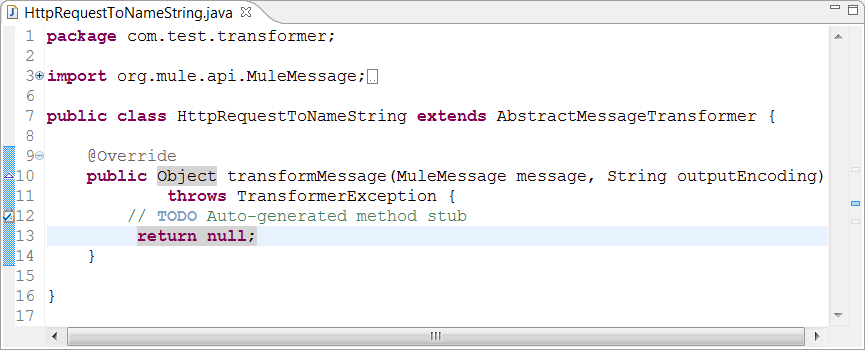
Click Finish to complete the class specifications. The source editor appears with the code and method stub for the new class, as shown below.
-
Replace the
return null:line after the// TODOcomment with the following snippet:String name = message.getInboundProperty("name"); String lastName = message.getInboundProperty("lname"); return name+" "+lastName;The new code defines the incoming data strings and changes the return statement to return the first and last names. Note that the Hello component gets the name and last name strings from the Mule InboundProperty. Mule sets inputs that are passed in the request as inbound properties. You can use the get methods to obtain the value for these properties.
-
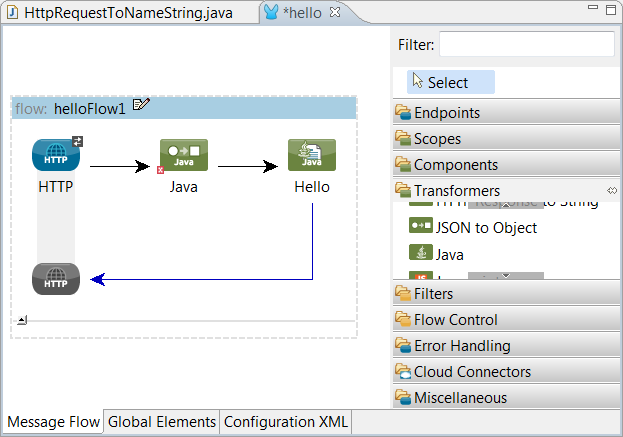
Double-click the hello.mflow tab to display the flow graph and drag a Java Transformer into the flow between http source and the Hello component.
-
Double-click the Customer Transformer icon to display the Pattern Properties dialog. Add the following data:
-
Display Name - HttpRequestToNameString Transformer
-
Transformer Class - com.test.transformer.HttpRequestToNameString
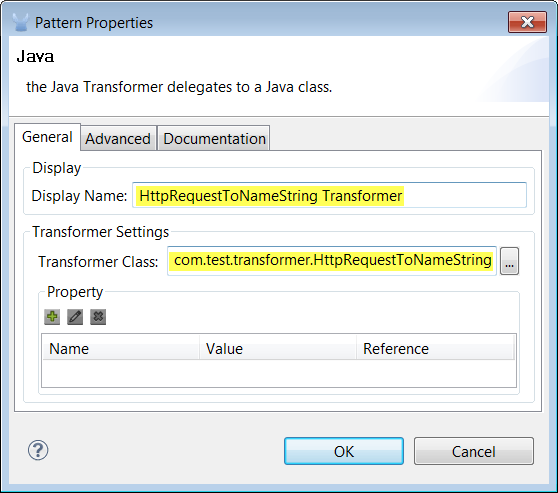
Specifying the Transformer class creates a reference from the flow to the class. Supplying a display name makes it easy to identify the transformer. Click OK.
-
-
To run the example, right-click hello.mflow in the project tree and select Run As… → Mule Application. Note that Mule prompts you to save any unsaved files before proceeding. Access this URL:
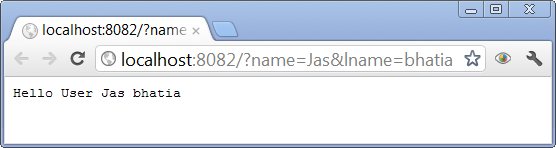
http://localhost:8082/?name=jas&lname=bhatiain a browser. You browser should display Hello jas bhatia as shown in the following figure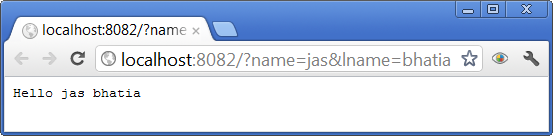
The dynamic data end point resolver finds the sayHello method successfully.
Case 2 - Using a Dynamic Data Resolver to Resolve between Two Entry Point Methods
In this part, we are going to create an object and a transformer and add a method to the component that can accept the object’s data.
-
Create a new Java class called User, as you did in steps 1 - 3, using the following data:
-
Package - com.test
-
Class name - User
-
Superclass - java.lang.Object (the default)
-
Method stubs - none (uncheck andy default settings)
-
-
When the source editor is displayed, add the following codes to the class. This code is used to set and return the first name and last name.
private String name;
    private String lname;

    public void setName(String name) {
        this.name = name;
    }

    public String getName() {
        return this.name;
    }

     public void setLname(String lname) {
        this.lname = lname;
    }

    public String getLname() {
        return this.lname;
    }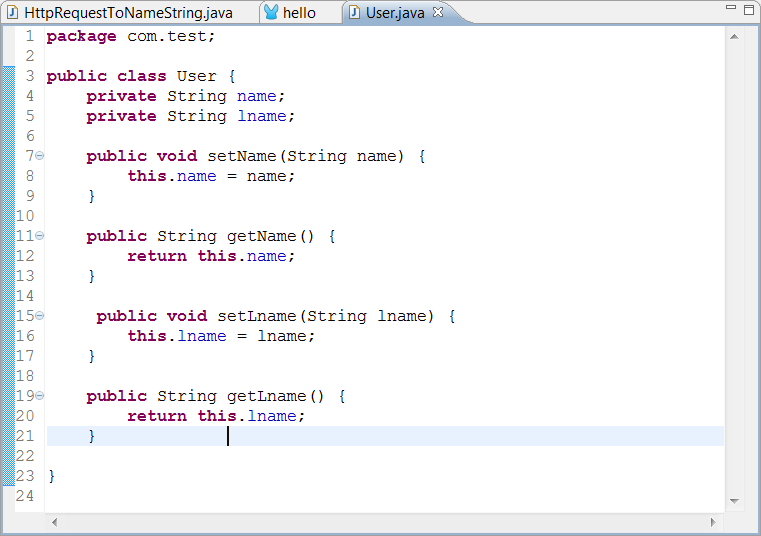
-
Create a new Java class under src/main/java called HttpRequestToUser to convert the input string to User object data. Request steps 1 - 3 and supply the following data:
-
Package - com.test.transformer
-
Class name - HttpRequestToUser
-
Superclass - org.mule.transformer.AbstractMessageTransformer
-
Method stubs - Inherited abstract method
Click Finish when you are done.
-
-
Paste the following code into the Source Editor to match the figure below.
User user = new User();

String name = message.getInboundProperty("name");
String lastName = message.getInboundProperty("lname");
user.setLname(lastName);
user.setName(name);
return user;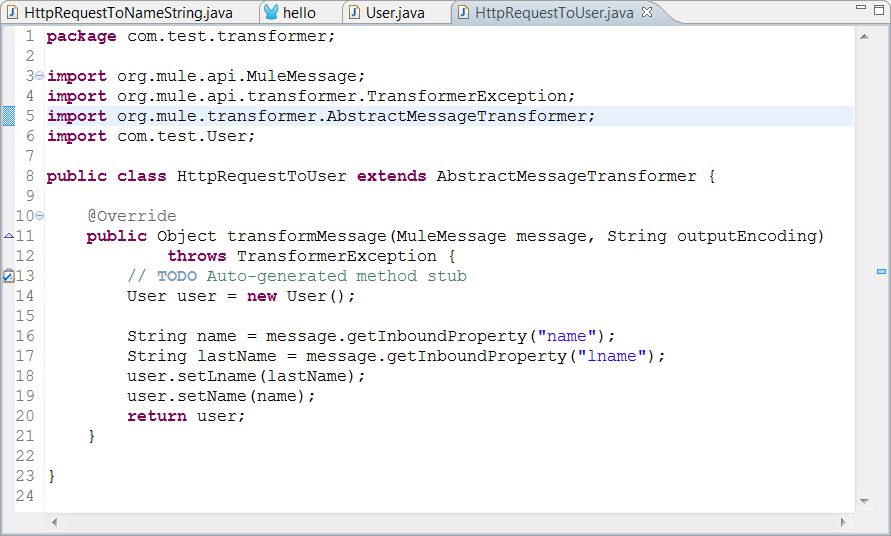
-
Double-click the Transformer icon in the flow and change the transformer to refer to the new class as follows:
-
Display Name - HttpRequestToUser Transformer
-
Transformer Class - com.test.transformer.HttpRequestToUser
-
-
Right-click the flow in the project tree and select Run As… → Mule Application. This time there is no output, because HelloComponent has only one method and that method can accept a
stringtype only we sent data of typecom.test.User. If you check the output console, you see the messageorg.mule.model.resolvers.EntryPointNotFoundException. So let’s add a second method to handle the user data. -
Click the HelloComponent.java tab and change the code to add a source method called
sayHelloUseras shown in the following figure.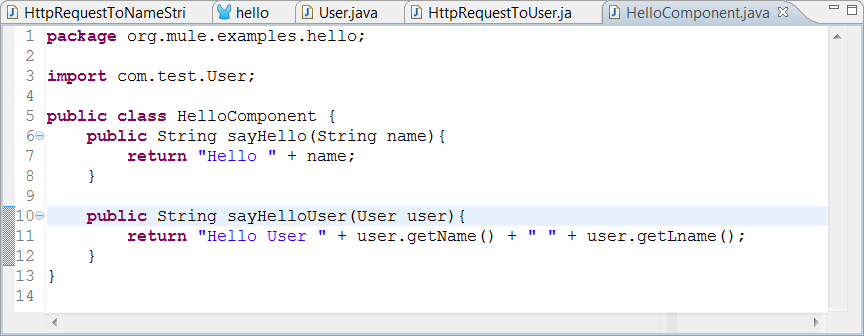
-
Run the project again and use the same URL:
The reason it works now is that the dynamic data end point resolver has two methods to choose from in HelloComponent. The sayHello method can accept the correct type for the com.test.User object.
Case 3 - Using the Annotated Entry Point Resolver to Resolve a Method with Annotations
Annotations allow flow objects to be created solely within the component code. The @ContainsTransformerMethods annotations for creating Mule transformer makes it easy to define and discover customer transformer. You can perform a conversion in a method by the @Transformer annotation.
-
Create a new Java class using the following data:
-
Package - com.test.transformer
-
Class name - AnnotatedTransformer
-
Superclass - org.mule.transformer.AbstractMessageTransformer
-
Method stubs - Inherited abstract method
-
-
Paste the following code into the Source Editor to match the figure below.
package com.test.transformer;

import org.mule.api.annotations.ContainsTransformerMethods;
import org.mule.api.annotations.Transformer;
import org.mule.api.annotations.param.InboundHeaders;
import org.mule.api.annotations.param.Payload;

import com.test.User;

    @ContainsTransformerMethods
    public class AnnotatedTransformer {

        @Transformer
        public User stringToUser(@Payload String s, @InboundHeaders("name") String name,
            @InboundHeaders("lname") String lname) {
        User user = new User ();
        user.setLname(lname);
        user.setName(name);
        return user;
        }
    }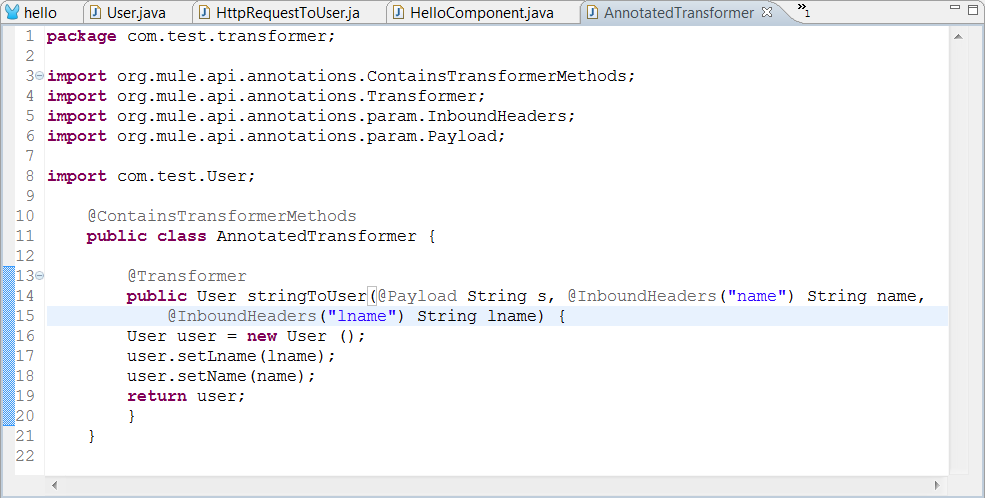
This code uses the following annotations:
-
@ContainsTransformerMethodstells Mule that this class contains an annotated transformer method -
@Transformerregisters this method with Mule so that it can be used when you want to transformerStringtype tocom.test.Usertype. -
@Payloadautomatically transforms the payload type to the specified type, in this case, String. -
@InboundHeaderschecks for an inbound header called "name" and assigns it toStringname.@InboundHeadersfor "lname" works the same way.At this point, you need to register this class with Mule. Currently, Mule Studio does not have the capability to define a Spring bean. The work-around creates a Spring bean in the Configuration XML file.
-
-
Open the flow and click the Configuration XML tab below the source editing window. Add the following line of code so that it appears as shown in the figure below.
<spring:bean id="annotatedTrans" class="com.test.transformer.AnnotatedTransformer"/>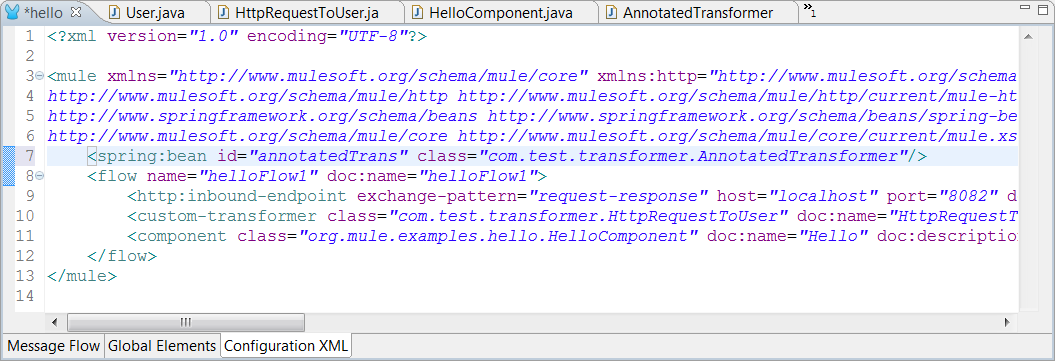
-
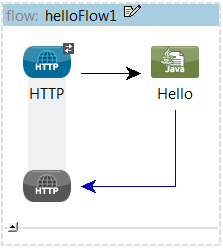
Click the Message Flow tab. Delete the existing Java transformer so that your flow looks like the following:
-
Open HelloComponent and remove the say sayHello method. Add
@Payloadto thesayHelloUsermethod, as shown in the following figure.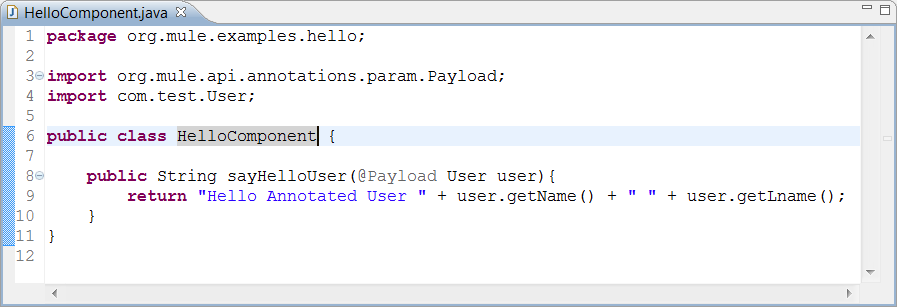
-
Run the example again using
http://localhost:8082/?name=Jas&lname=bhatiaYou will see this working as before:
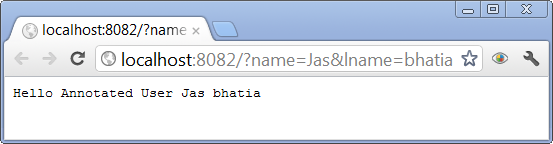
@Payloadhas automatically converted String to User object and has initialized User object on the component method.
Case 4 - Using the Callable Interface with the onCall Method
With the Callable interface, your flow can accept multiple types of incoming data with a single method named onCall. If you implement a callable interface on your component, Mule always invokes the onCall method on the component no matter how many other methods a present. The only exception is if you override the Callable interface by defining an annotated method. Thus, it’s important to make sure that you have removed annotated methods if you want to invoke the onCall method.
-
Change the code in HelloComponent to match the following diagram. In particular, add
import.org.mule.api.lifecylce.Callable; andimplements Callableto the class declaration and paste in the following code:@Override public Object onCall(MuleEventContext eventContext) throws Exception { return "Hello Callable user "+eventContext.getMessage().getInboundProperty("name"); }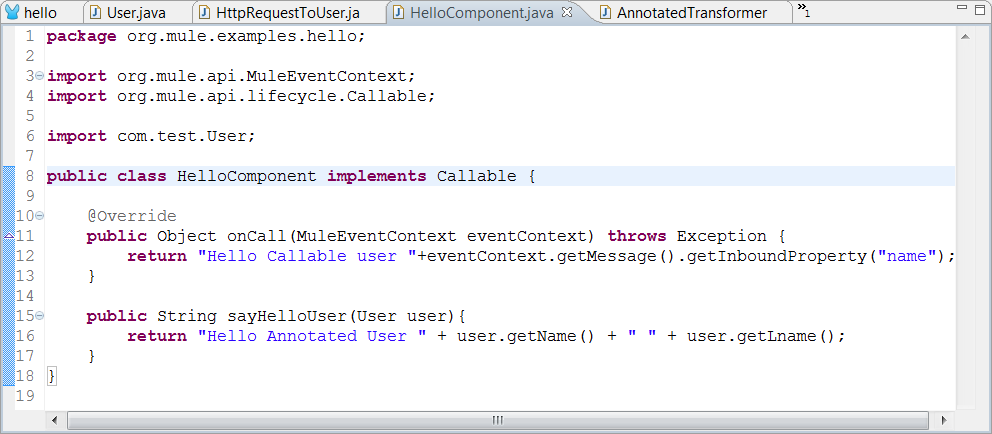
-
Run the example again using
http://localhost:8082/?name=Jas&lname=bhatia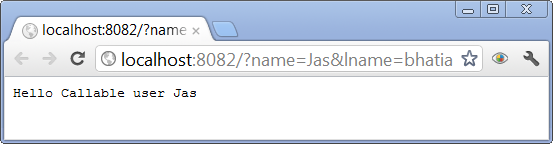
As you can see, the Callable interface provides yet another technique for resolving component methods.
Next Steps
Previous: Transforming Data in a Flow