Mule Studio
-
 Before installing Mule ESB, be sure to install one of the Java Development Kits on your host machine:
 -
Java SE Development Kit Standard Edition 1.6.0_26 (also known as Java SE 6 Update 26)
-
Java SE Development Kit 7 (also known as Java SE 7u13)
Running Studio on a Mac?
-
-
Set your
JAVA_HOMEenvironment variable to the path in which you installed the JDK. -
Visit mulesoft.com to download Mule ESB Enterprise with Mule Studio.
-
Click to download the Mule ESB product that is compatible with your operating system: Windows, Mac or Linux.
-
Unzip the downloaded file to a directory on a hard drive located on your host machine. The Mule Studio folder or directory appears when the unzip operation completes.
-
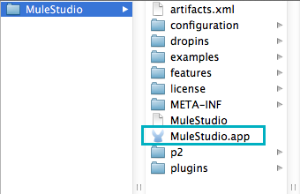
Double-click the MuleStudio.app file, located in the /MuleStudio path.

-
Click OK to accept the default workspace.

-
Mule Studio launches, then displays a Welcome page. Click Go to Mule Studio to begin development immediately.
-
Optional: Add Community runtime to your Mule Studio instance.
-
Optional: Acquire an Enterprise license (recommended for running applications in production).
|
Running Studio on a Mac? If you’re using Mac OS X Mountain Lion, there are two extra consideration to be mindful of when running Mule Studio. ==== Java Runtime Environment Check to confirm that Java runtime environment 6 or 7 is in place on your system. From the command line (Terminal app), run: ` java -version` The response should appear similar to the following: If a Java runtime environment is not installed, the command triggers a prompt to install the JDK tools directly from Apple. Follow the instructions to download and install JDK 6 or 7. ==== Application Execution By default, Mac OS X restricts execution of applications acquired outside the Apple App Store. Because you download Mule Studio outside the App Store, your system may prevent you from running Mule Studio applications and issue a warning message advising you to change your security settings to proceed. (Note: you must have Administrator privileges to adjust the security settings.)
|
Mule ESB Enterprise Runtime
-
 Before installing Mule ESB, be sure to install one of the Java Development Kits on your host machine:
 -
Java SE Development Kit Standard Edition 1.6.0_26 (also known as Java SE 6 Update 26)
-
Java SE Development Kit 7 (also known as Java SE 7u13)
-
-
Set your
JAVA_HOMEenvironment variable to the path in which you installed the JDK. -
Visit mulesoft.com to download Mule ESB Enterprise with Management Tools.
-
Navigate to the folder that contains your copy of mule enterprise standalone, then unzip the file. Alternatively, use
unzipcommand from the terminal or command line. -
From the command line, start Mule using the following command:
-
Windows:
mule.bat -
Linux or Mac:
./bin/mule
-
-
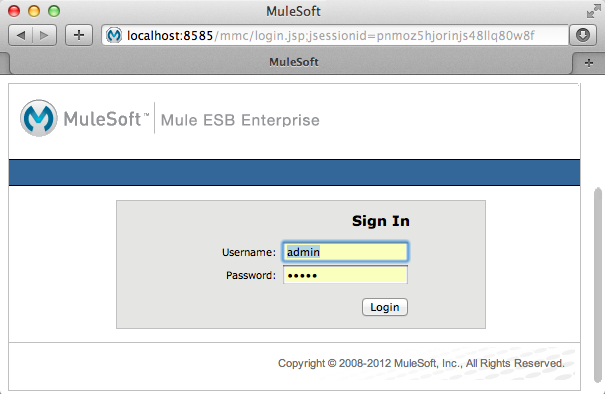
With Mule running, open a Web browser, then point to the following address to access the Mule Management Console:
http://localhost:8585/mmc -
Enter the following login credentials, then click Login.
Username:admin
Password:admin
-
Open an integration development environment (IDE), such as Eclipse IDE for Java Developers, to begin developing with Mule.
-
To stop Mule, type CTRL-C.
-
Optional: Acquire an Enterprise license (recommended for running applications in production).
Mule ESB Community Runtime
-
 Before installing Mule ESB, be sure to install one of the Java Development Kits on your host machine:
 -
Java SE Development Kit Standard Edition 1.6.0_26 (also known as Java SE 6 Update 26)
-
Java SE Development Kit 7 (also known as Java SE 7u13)
-
-
Set your
JAVA_HOMEenvironment variable to the path in which you installed the JDK. -
Visit mulesoft.org to download Mule ESB Mule ESB Standalone Runtime (without Mule Studio) listed under the Standalone ESB Downloads heading.
-
Navigate to the folder that contains your copy of mule standalone, then unzip the file. Alternatively, use
unzipcommand from the terminal or command line. -
From the command line, start Mule using the following command:
-
Windows:
mule.bat -
Linux or Mac:
./bin/mule
-
-
Mule starts running locally on your hard drive.
-
Open an integration development environment (IDE), such as Eclipse IDE for Java Developers, to begin developing with Mule.
-
To stop Mule, type CTRL-C.


