Anypoint Partner Manager Tutorial: Designing a Transaction
| Anypoint Partner Manager V1.0 was deprecated in March 2021. Its End of Life is March 31, 2022. Support for Anypoint Partner Manager 1.0 continues in accordance with the Product Support and Maintenance Terms but is not available for new customers or upgrades. For the latest version of Anypoint Partner Manager, contact your Customer Success Manager to determine how you can migrate to the current version. |
This tutorial:
-
Illustrates the role Anypoint Partner Manager (APM) plays in B2B transaction processing.
-
Introduces Transaction Designer, an APM feature that enables you to design the elements of a transaction from beginning to end.
-
Provides instructions for using Transaction Designer to configure APM so that you can simulate a transaction and see how APM processes it.

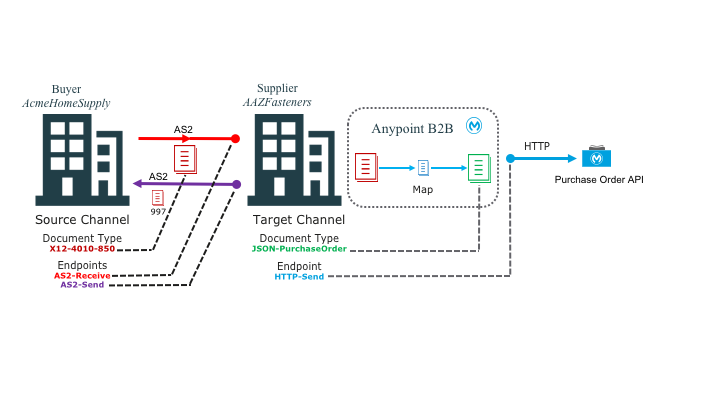
The elements required to process a transaction are shown in Transaction Overview. In this tutorial, you will create and configure these elements in this order:
Before You Begin
Verify that you have the following:
-
Anypoint Platform user account with APM access
If you are unable to access APM, see your MuleSoft account administrator for assistance. -
Anypoint Studio with Mule 3.8.4 and the following connectors:
-
Partner Manager 6.5.0
-
AS2 v2.1.0
-
FTPS v2.0.0
-
EDIFACT EDI
-
RosettaNet
-
X12 v1.2.2
-
Object Store v2.1.0
-
Download Tutorial Materials
-
Download link: APM Tutorial Materials.
-
Click Anypoint Partner Manager Tutorial Materials.zip to expand it.
Get Started
-
Start APM. The Transaction Monitoring Page appears.
-
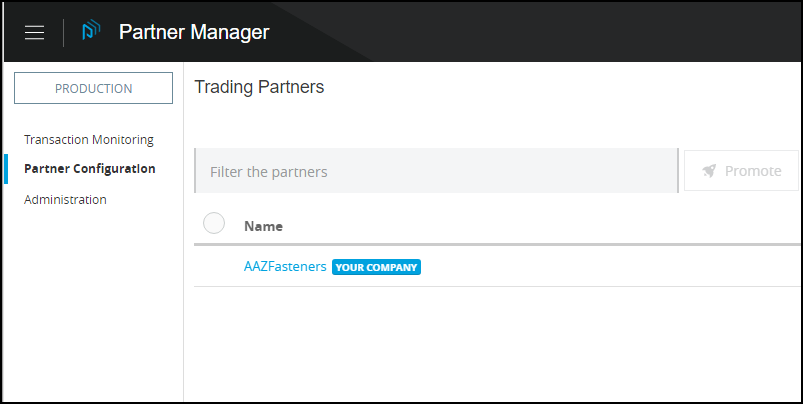
In the left-hand navigation pane, click Partner Configuration. The Partner Configuration Page appears.
Configure a Supplier
This tutorial works with two partners: a Supplier and a Buyer.
The Supplier is AAZFasteners, a fictional retailer of nuts and bolts, also identified on the Partner Configuration Page as YOUR COMPANY.
| In your copy of APM, YOUR COMPANY is probably not named AAZFasteners. However, for illustration purposes, we refer to YOUR COMPANY as AAZFasteners throughout this tutorial. If you want to change the name of YOUR COMPANY to AAZFasteners, see Create and Configure Partners. However, the tutorial will work without making this change. |
The other partner in this tutorial is the Buyer, a fictional retailer of home supplies. In Create the Buyer Partner, we create this partner, identifying it as AcmeHomeSupply. In the tutorial, AcmeHomeSupply uses APM to order products from AAZFasteners. In the following sections, you will:
Add Identifiers
Identifiers are values, communicated in messages, that can be used to uniquely identify a specific partner. Some identifiers are defined by standards bodies, such as DUNS numbers, which are assigned by Dun and Bradstreet. Others are mutually defined between partners. AS2 uses identifiers to identify the sender and receiver of a transmission. X12 and EDIFACT use identifiers to identify the sender and receiver of an EDI document.
For these partners, we use two identifiers:
-
X12-ISA
-
AS2
In the following sections, we add identifiers for the supplier. We will add buyer identifiers in Add Buyer Identifiers.
Add Supplier X12-ISA Identifier
-
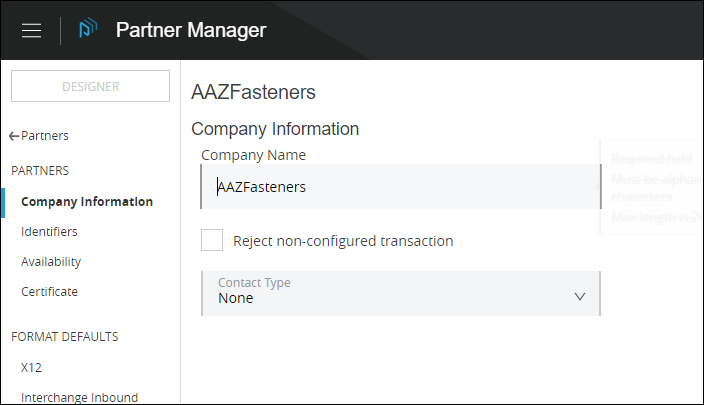
On the Partner Configuration Page, click AAZFasteners.
The Company Information Page appears.
-
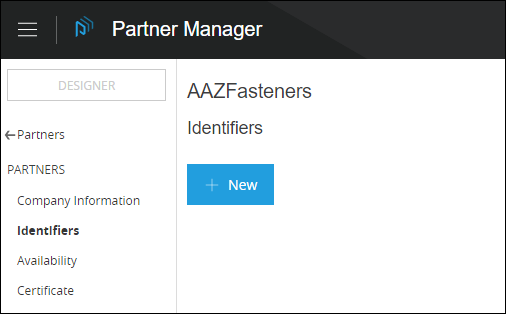
In the Partners section of the left-hand navigation pane on the Company Information Page, click Identifiers.
The Identifiers Page appears.
-
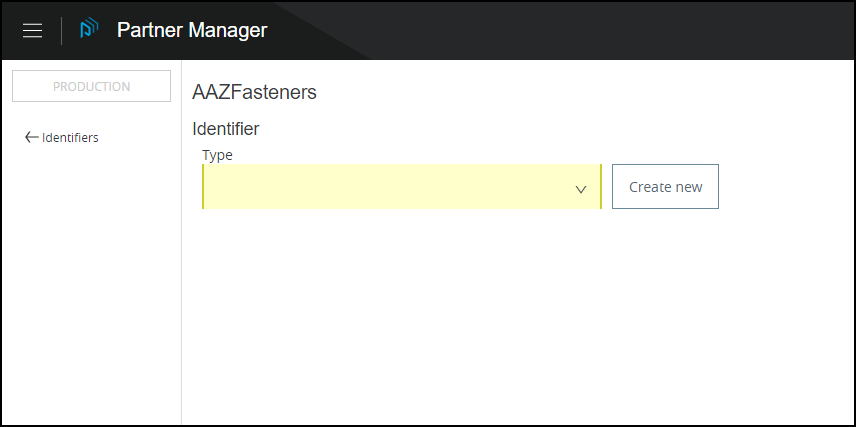
On the Identifiers Page, click New.
The New Identifier Page appears.
-
In the Type box, click the down-arrow.
A list of identifier types appears.
-
From the list, select X12-ISA.
More identifier boxes appear.
(The specific boxes that appear depend on your choice in this step.)
-
In the Interchange ID Qualifier (ISA) listbox, click the down-arrow.
A list of qualifiers appears.
-
AAZFasteners and AcmeHomeSupply do not use standards-based identifiers, so ZZ (Mutually Defined) is the appropriate choice.
-
In the Interchange ID (ISA) box, type AAZ.
-
Click Save to save the new identifier.
The Identifiers Page (Identifier Added) appears.

Note that the Identifier you added in the preceding steps (X12-ISA) now appears.
Add Supplier AS2 Identifier
-
On the [img-identifiers-x12-added-aaz], click New.
The New Identifier Page appears.
-
In the Type box, click the down-arrowhead.
A list of identifier types appears.
-
From the list, select AS2.
The AS2 Identity box appears.
-
In the AS2 Identity box, type AAZ.
-
Click Save to save the new identifier.
The [img-identifiers-x12-added-aaz] appears.
Upload Certificates
APM provides for the uploading of certificates to verify the identity of a partner.
Upload the Supplier Certificate
-
On the [img-identifiers-x12-added-aaz], in the left-hand navigation pane, in the PARTNERS section, click Certificate.
The Certificate Page appears.

-
Click Choose File.
A file selection window specific to the operating system of the computer you are using appears.
-
In the selection window, navigate to the folder to which you downloaded the tutorial materials in Download Tutorial Materials.
-
In the Certificates folder, select HomeOrg.p12.
HomeOrg.p12 appears in the Certificate box.
-
Click Upload Certificate.
The Certificate Page refreshes, displaying details of the uploaded certificate.
Design a Target Channel
A channel provides a means of specifying, for a given partner:
- Type
-
Source or Target, As created in Channels or in Transaction Designer. Source Channel settings are always specific to the origin of a document. Target Channel settings are always specific to the destination.
- Document
-
As created in Document Types or in Transaction Designer
- Document Map
-
As created in Maps or in Transaction Designer
- Endpoint
-
As created in Endpoints or in Transaction Designer
In this section, you create a template for any transaction in which you receive a purchase order from a partner and send it to your HTTP endpoint. Later, in Design a Source Channel, you will use this template as the starting point from which you configure a transaction specific to receiving a purchase order from AcmeHomeSupply.
Start Transaction Designer
-
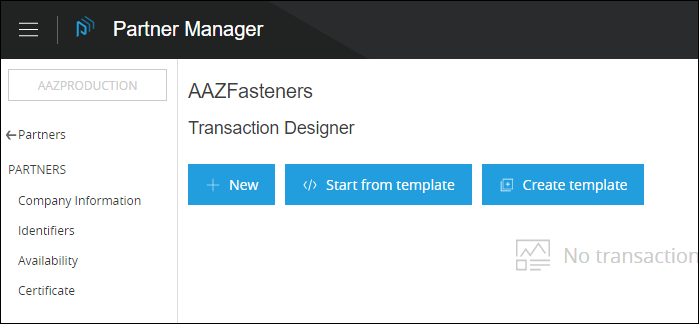
In the CONFIGURATION section of the left-hand navigation pane on the Endpoints Page (or any other APM Configuration page), click Transaction Designer.
The Transaction Designer Page appears.
-
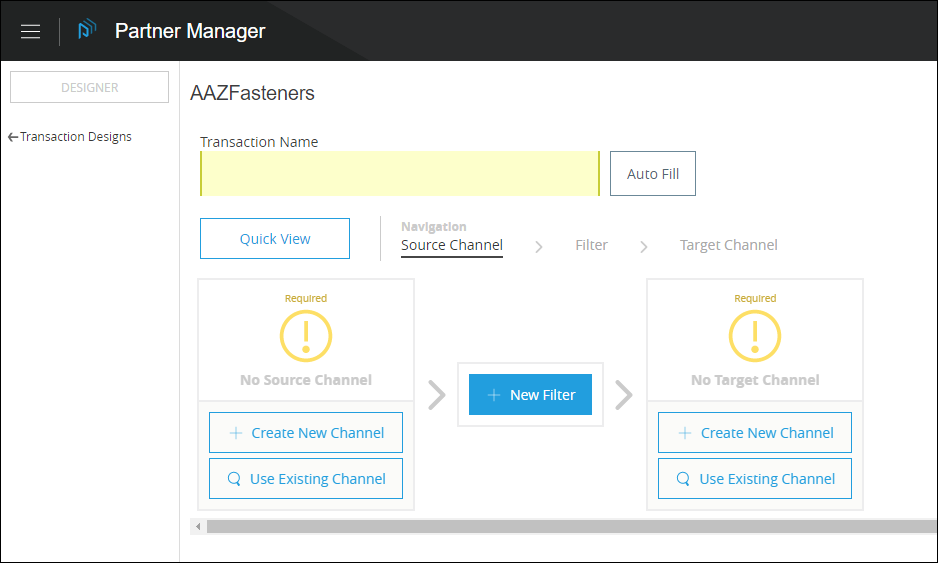
On the Transaction Designer Page, click Create Template.
The Transaction Design Page appears.
Create the Target Channel
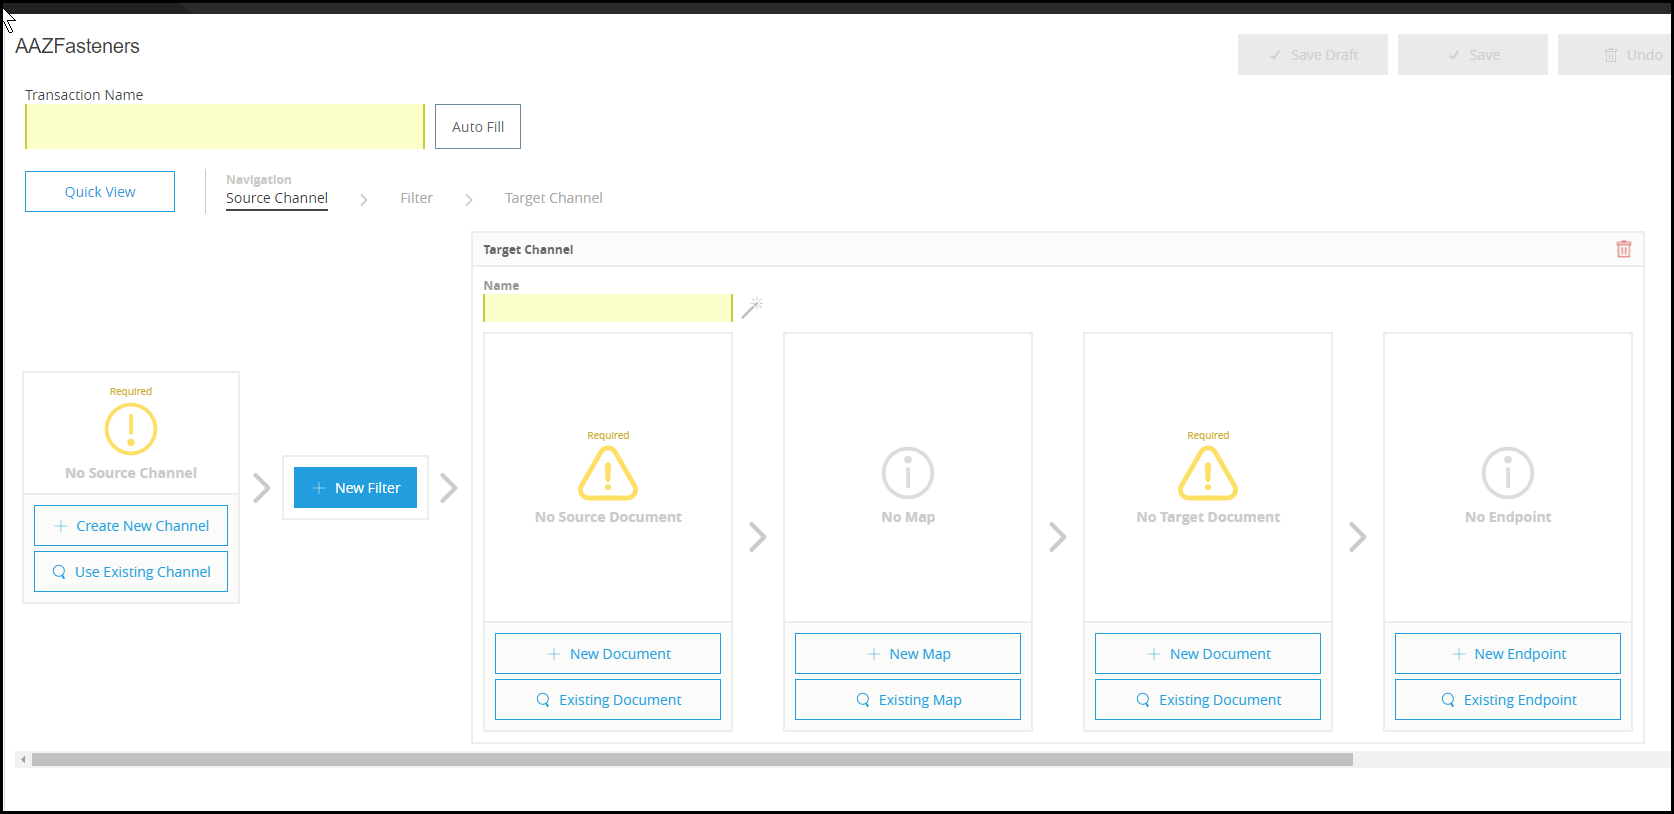
On the Target Channel side of the Transaction Design Page, click Create New Channel.
+ The Transaction Design Page displays the Target Channel In-Progress Page.
Create the Source Document Type for the Target Channel
The terms document, file, and message are used interchangeably in the B2B world to reflect an instance of a structured payload being passed through a system to convey information about a transaction. For consistency, we use the term document to represent these instances.
APM enables you to categorize and configure specific Document Types. In this section, you create a Source Document Type for the Target Channel.
To Create the Source Document Type for the Target Channel
-
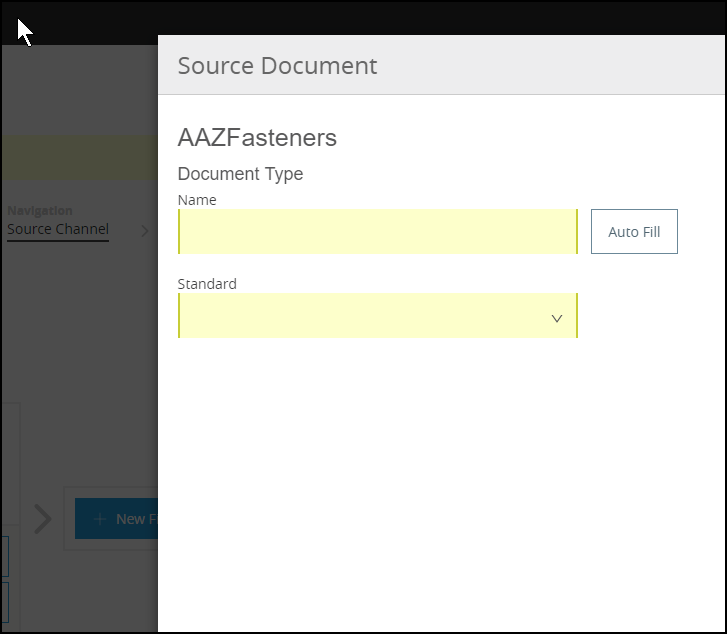
On the Target Channel In-Progress Page, in the Source Document panel of the Target Channel section, click New Document.
The Source Document Page appears.
-
On the Source Document Page, in the Standard listbox, click the down-arrow, then select JSON.
The Message Type box appears.
-
In the Message Type box, type PurchaseOrder.
-
Click Save.
The Target Channel In-Progress Page appears, displaying the Document Type you added.
Configure Endpoints
An endpoint is the entry point to a service, a process, or a queue or topic destination in service-oriented architecture. In APM, an endpoint defines the protocol, address, and other details specific to an exchange of messages between partners.
Configure the Target Endpoint
-
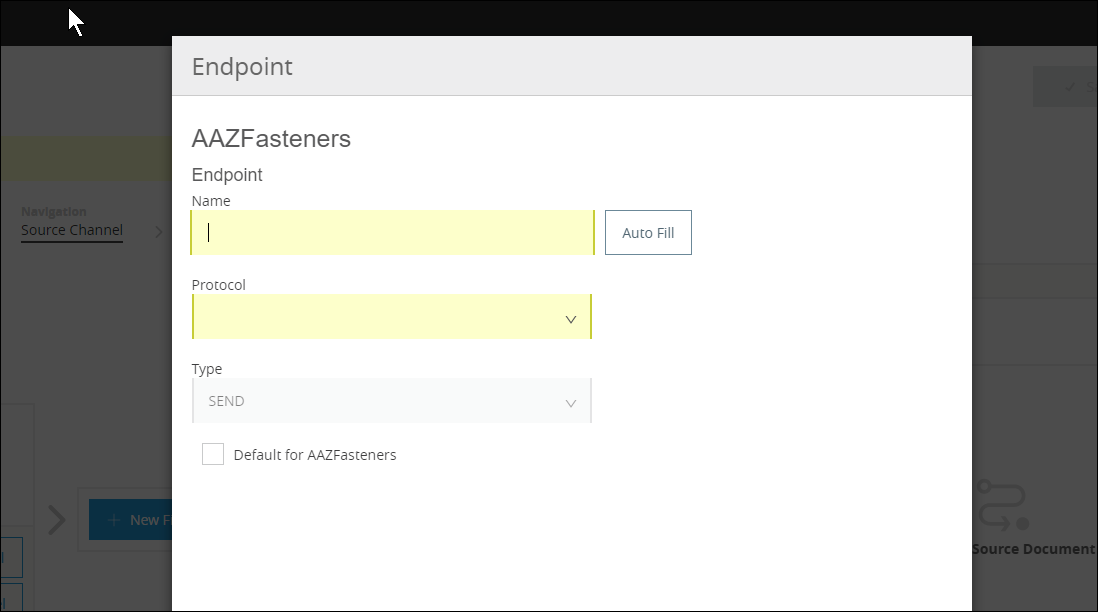
On the Target Channel In-Progress Page, click New Endpoint.
The Endpoint Page appears.
-
In the Protocol listbox, click the down-arrow to expand the list of available protocols.
From the list, click HTTP.
Notice that the the Type box, is populated with the appropriate value (SEND).
The Endpoint Page expands to include more settings.
-
Scroll down to the Operation Settings section.
In the Host box, type 0.0.0.0.
-
In the Port box, type 8086.
-
In the Path box, type /PurchaseOrder.
-
In the Authentication listbox, click the down-arrow to expand the list of available methods.
From the list, click None.
-
Click Save.
The Target Channel In-Progress Page appears.
Save the Transaction
-
In the Transaction Name box, type TargetPurchaseOrder.
-
Click Save Template.
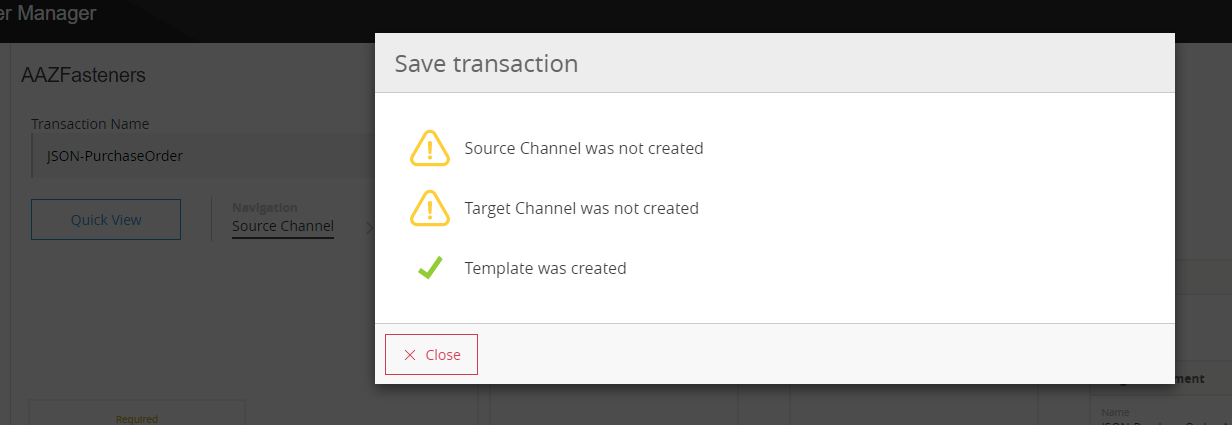
The Save transaction Page appears.
-
On the Save transaction Page, click Close.
The Target Channel In-Progress Page appears.
Configure a Buyer
Create the Buyer Partner
-
On the Target Channel In-Progress Page, in the left-hand navigation pane, click Partners.
The Partner Configuration Page appears. -
On the Partner Configuration Page, click Create New Partner.
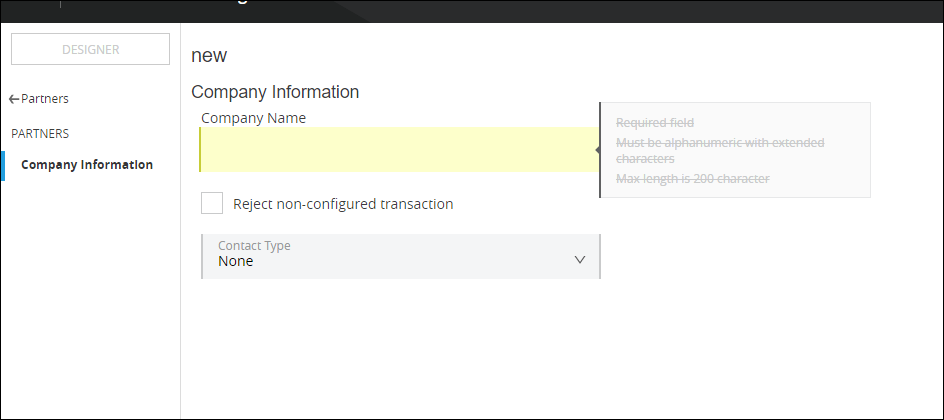
The Company Information Page appears.
-
On the Company Information Page, in the Company Name box, type AcmeHomeSupply.
-
Click Save.
Add Buyer Identifiers
| Make sure you are configuring AcmeHomeSupply, not AAZFasteners. |
Add Buyer X12-ISA Identifier
To add this identifier, perform steps in Add Supplier X12-ISA Identifier, substituting Acme for AAZ.
Add Buyer AS2 Identifier
To add this identifier, perform steps in Add Supplier AS2 Identifier, substituting Acme for AAZ.
Upload the Buyer Certificate
To add the certificate, perform steps in Upload the Supplier Certificate, substituting partner.cer for HomeOrg.p12.
Create the Buyer Send Endpoint
-
On the Certificate Page, in the CONFIGURATION section of the left-hand navigation pane, click Endpoints.
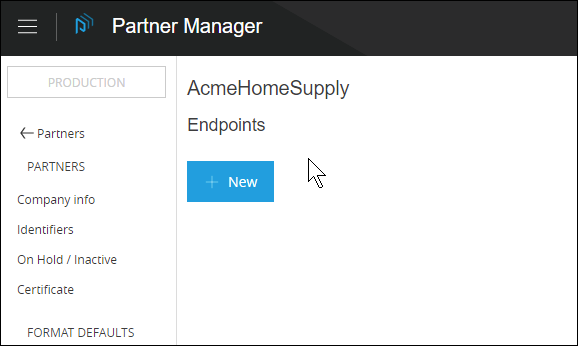
The Endpoints Page appears.
-
On the Endpoints Page, click New.
The Add New Endpoint Page appears.
 Figure 16. Add New Endpoint Page
 -
In the Protocol listbox, click the down-arrow to expand the list of available protocols.
From the list, click AS2.
-
In the Type listbox, click the down-arrow to expand the list of available Types.
From the list, click Send.
The Add New Endpoint Page expands to enable configuration of additional settings.
-
Select Default for AcmeHomeSupply.
-
In the URL box, enter http://localhost:8089/850
-
Make sure that the following checkboxes are selected:
-
Message Encrypted
-
Message Signed
-
MDN Required
-
-
Click Save
The Endpoints Page appears.
Design a Source Channel
Start Transaction Designer
-
In the CONFIGURATION section of the left-hand navigation pane on the Endpoints Page (or any other APM Configuration page), click Transaction Designer.
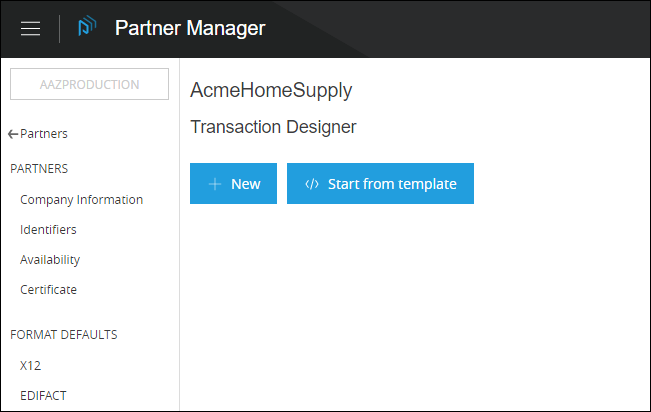
The Transaction Designer Page appears.
-
On the Transaction Designer Page, click Start from template.
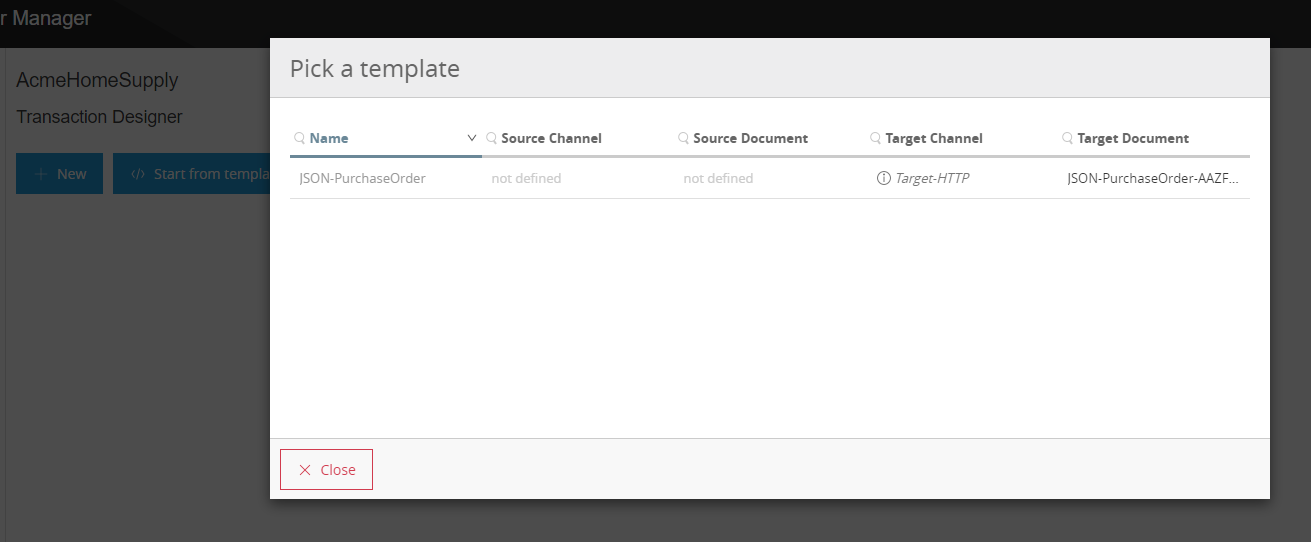
The Pick a Template Page appears.
-
On the Pick a Template Page, select TargetPurchaseOrder.
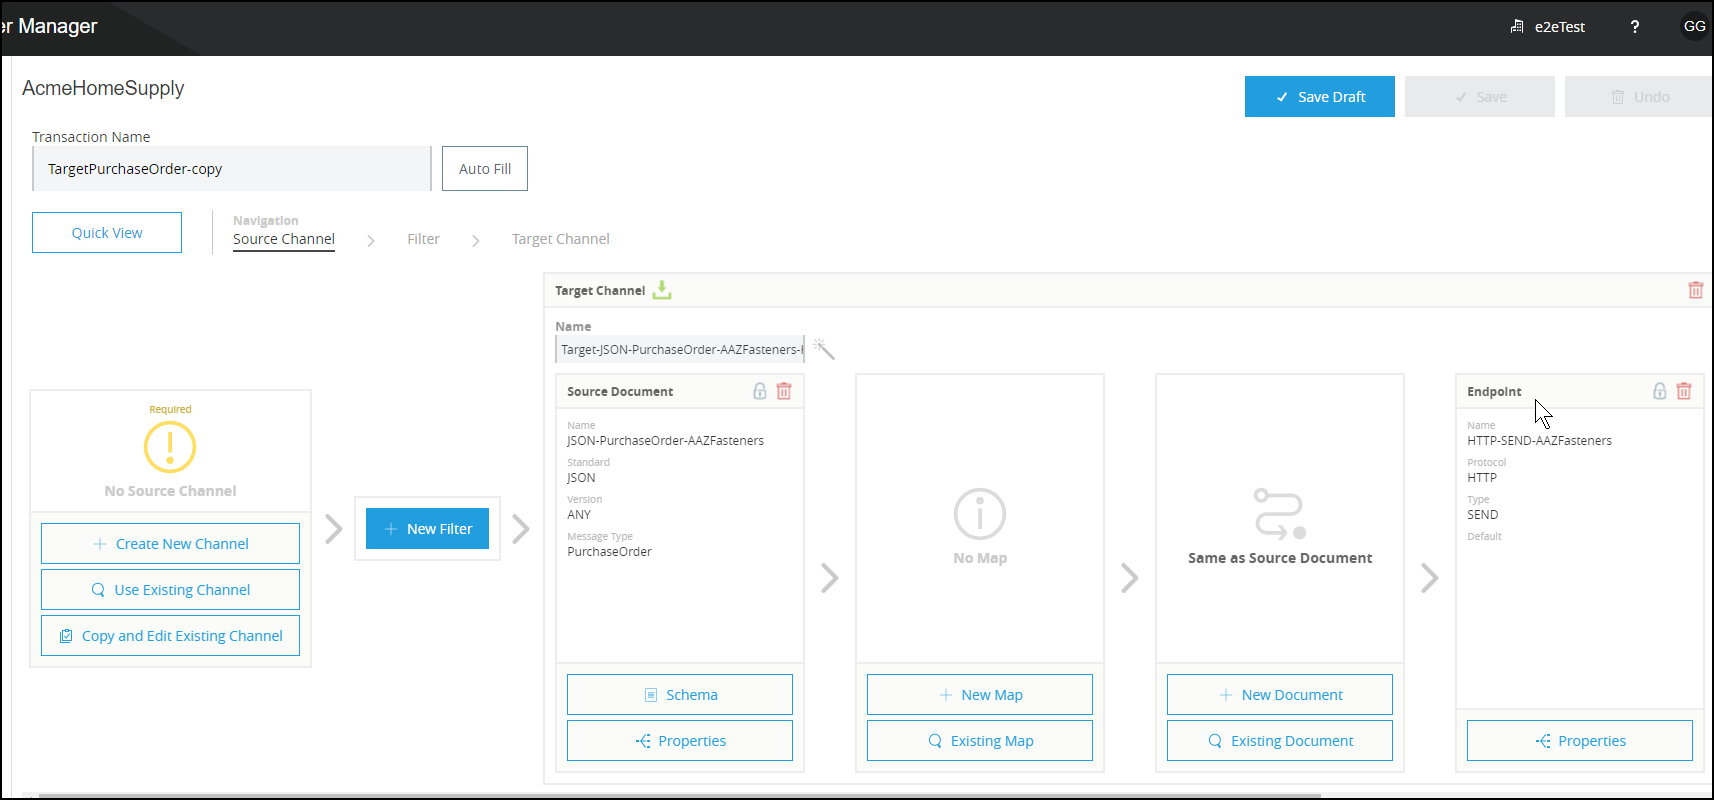
The Transaction Design Page appears.
|
The Name box shows that you are working on a copy of the TargetPurchaseOrder template, as opposed to the template itself.
This enables you to build your transaction without changing the template from which you are starting it. You can edit a template from the Pick a Template Page, but you must be working with YOUR COMPANY - in this case, AAZFasteners - to do so |
Create the Source Channel
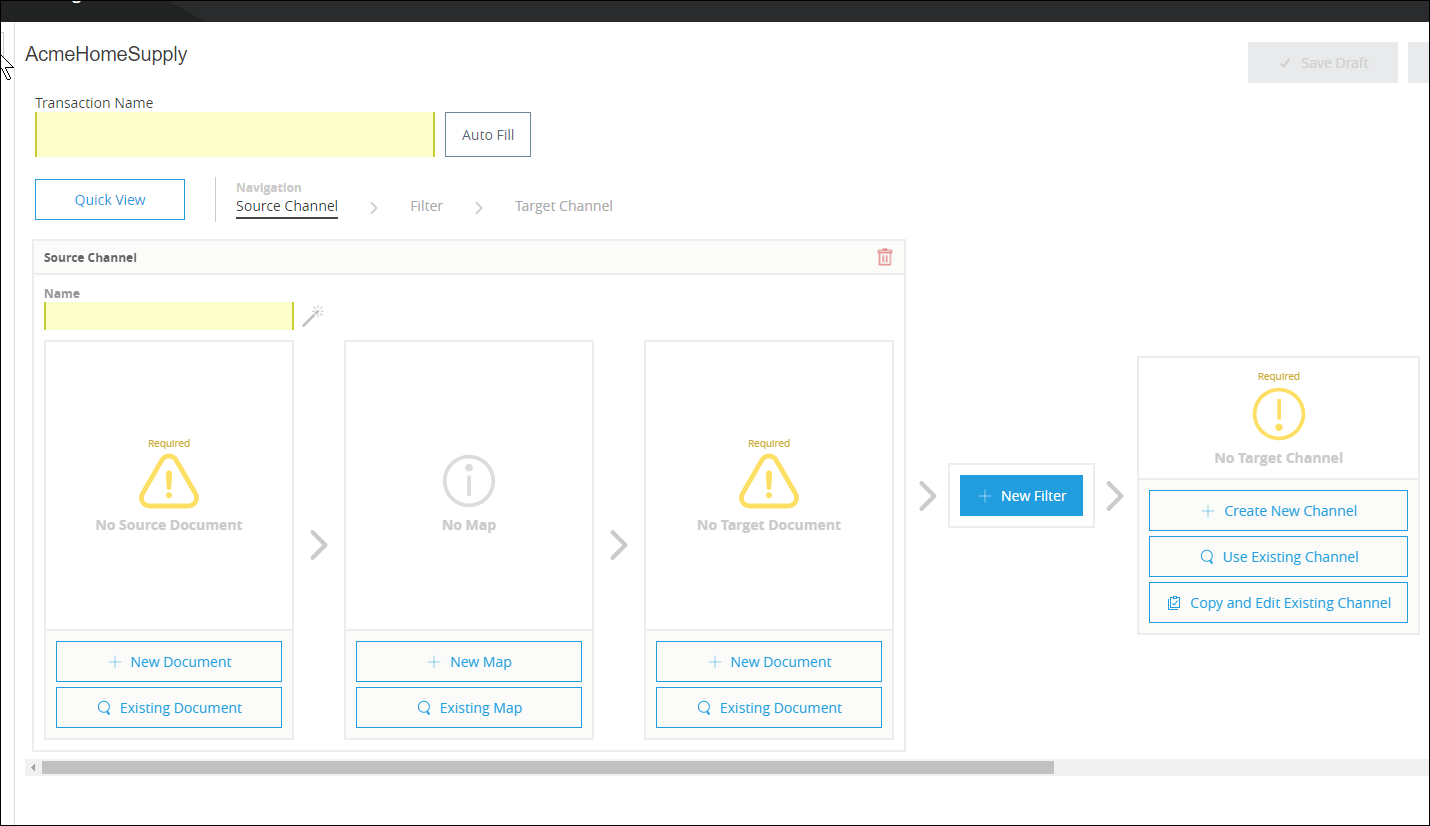
On the Source Channel side of the Transaction Design Page, click Create New Channel.
The Transaction Design Page displays the Source Channel In-Progress Page.
Create the Source Document
-
On the Source Channel In-Progress Page, click New Document.
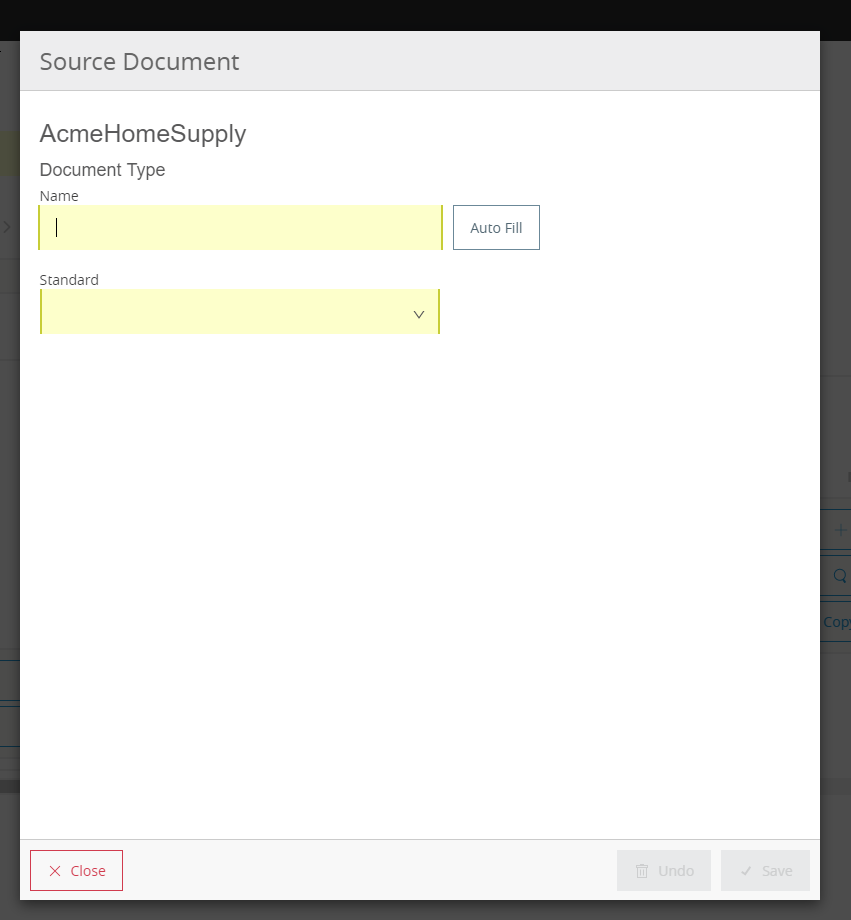
The Source Document Page appears.
-
On the Source Document Page, in the Standard listbox, click the down-arrow, then select X12.
-
In the Version listbox, select 4010.
-
In the Message Type listbox, select PO (850 Purchase Order).
-
Click Save.
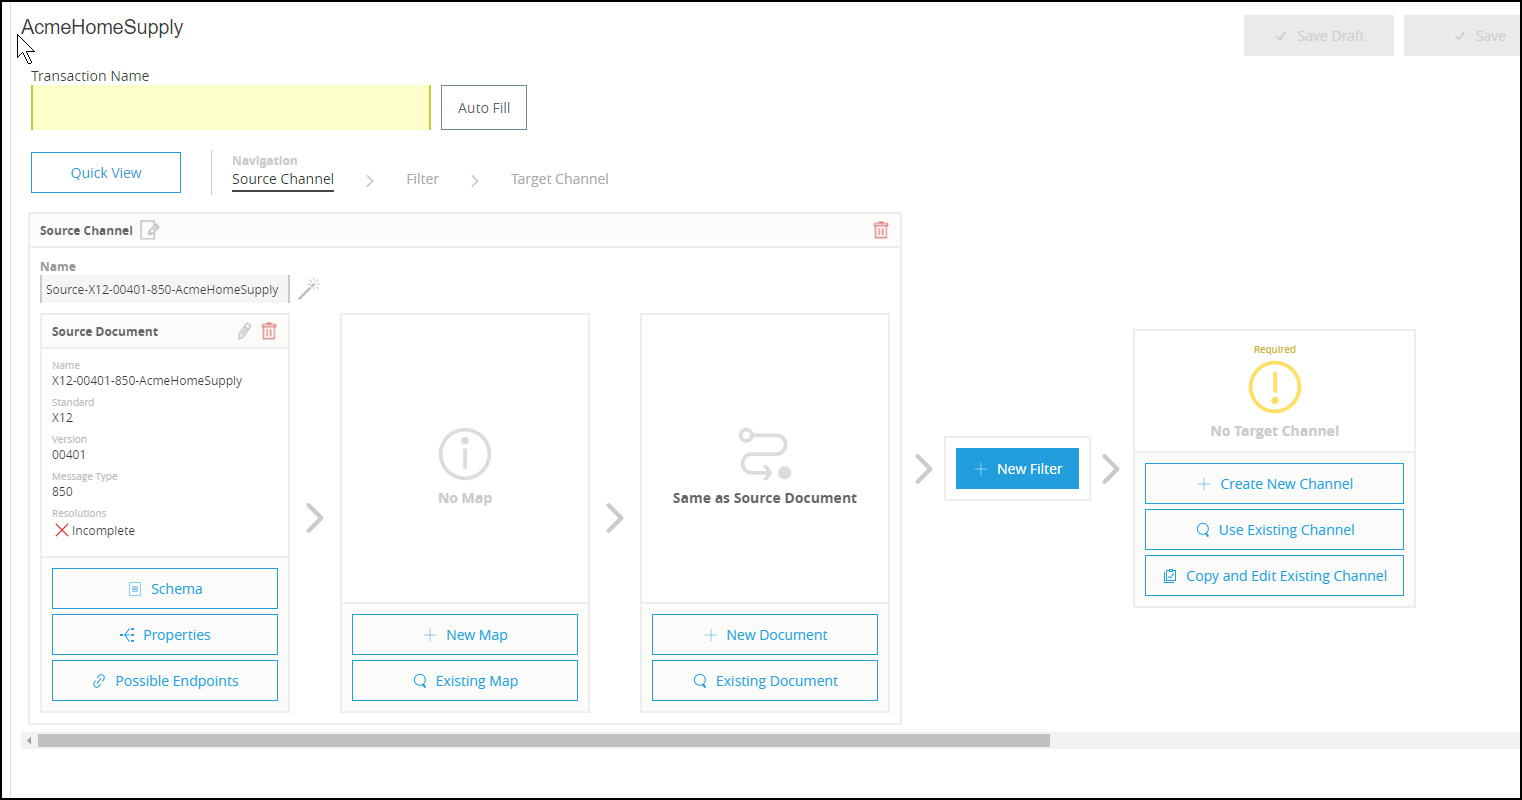
The Source Channel in-progress Page appears, displaying the Document Type you added.
Create the Buyer Receive Endpoint
-
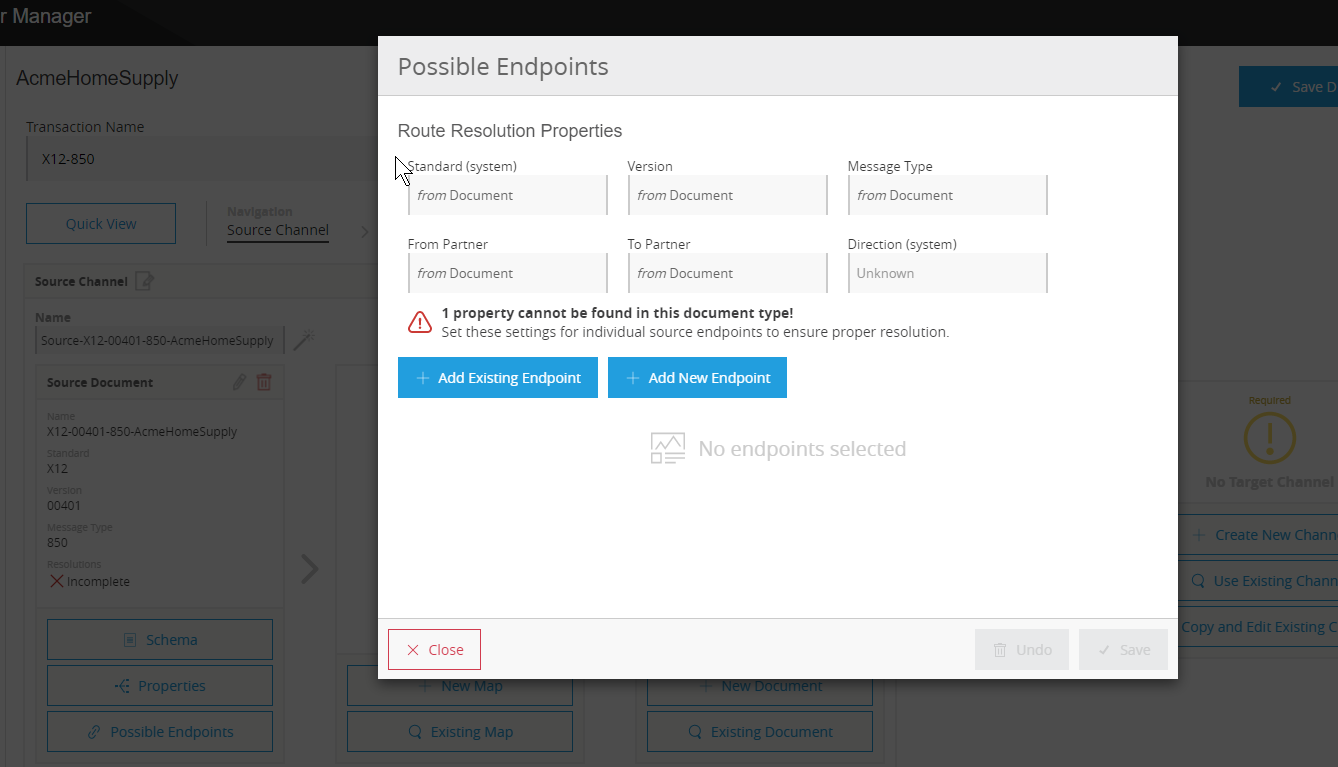
On the Source Channel in-progress Page, click Possible Endpoints.
The Possible Endpoints Page appears.
-
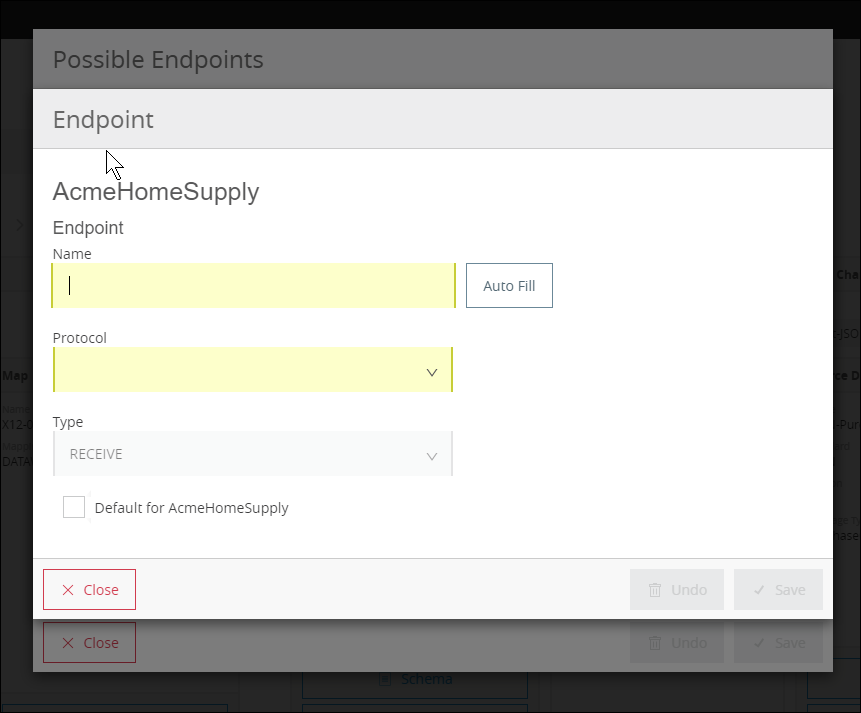
On the Possible Endpoints Page, click Add New Endpoint.
The Endpoint Page appears.
-
In the Protocol listbox, click the down-arrow to expand the list of available protocols.
From the list, click AS2.
-
Notice that the the Type box, is populated with the appropriate value (RECEIVE).
The Endpoint Page expands to include more settings.
-
Select the Default for AcmeHomeSupply checkbox.
-
In the URL box, type http://localhost:8085/edi.
-
Check the Message Encrypted and Message Signed checkboxes.
-
Click Save.
The Possible Endpoints Page appears.
-
On the Possible Endpoints Page, click the left end of the AS2-Receive endpoint row.
On the Possible Endpoints Page the row expands to identify that a property is missing.
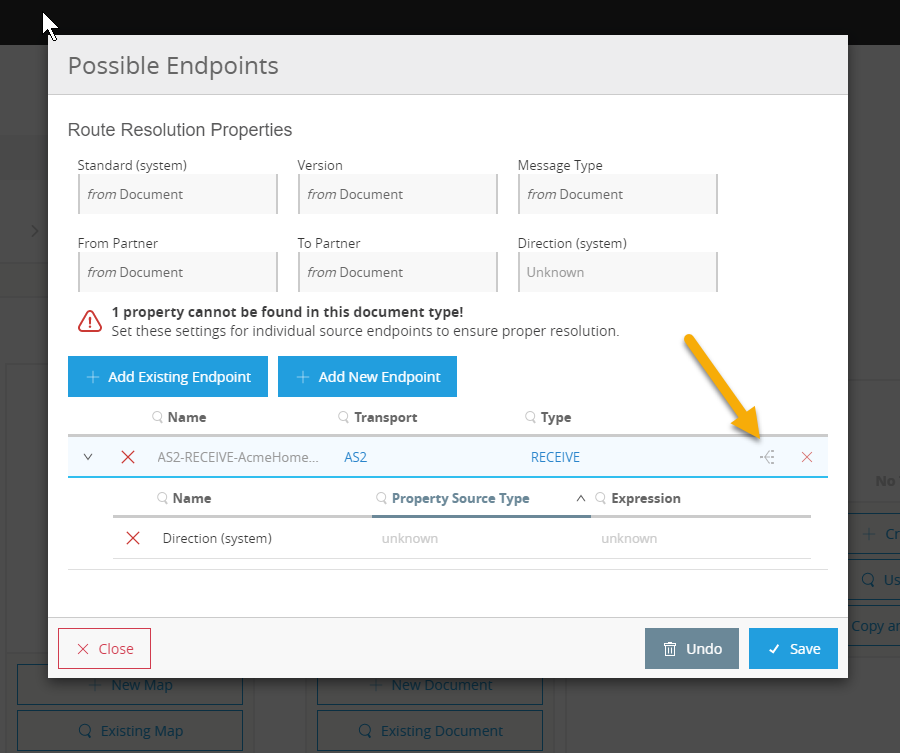
Note that, on the Possible Endpoints Page, the warning 1 property cannot be found in the document type appears.
Add a Property
-
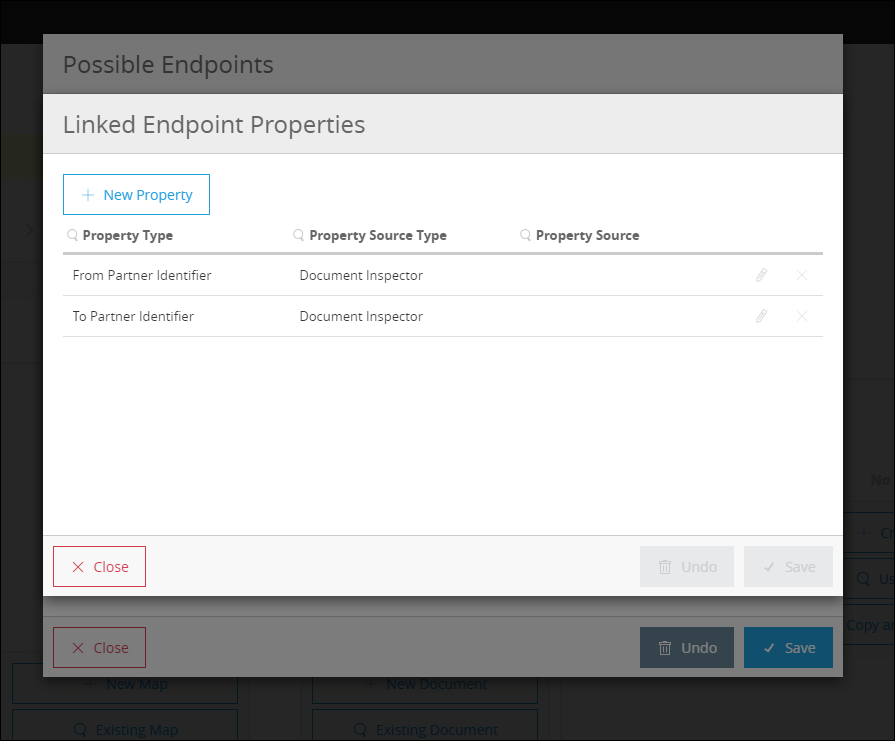
On the Possible Endpoints Page, click the Property icon (identified by a gold arrow in the figure). The Linked Endpoint Properties Page appears.
-
On the Linked Endpoint Properties Page, click New Property.
The Add Property Page appears.
-
In the Property Type listbox, click the down-arrow.
-
In the drop-down list, scroll down to select Direction (system).
-
In the Property Source Type box, select Constant.
-
In the Path box, type INBOUND.
-
Click Save Property.
The Linked Endpoint Properties Page appears.
-
Click Save.
The Possible Endpoints Page appears.
-
Click Save.
The Source Channel in-progress Page appears.
Note that Resolution status is Complete.
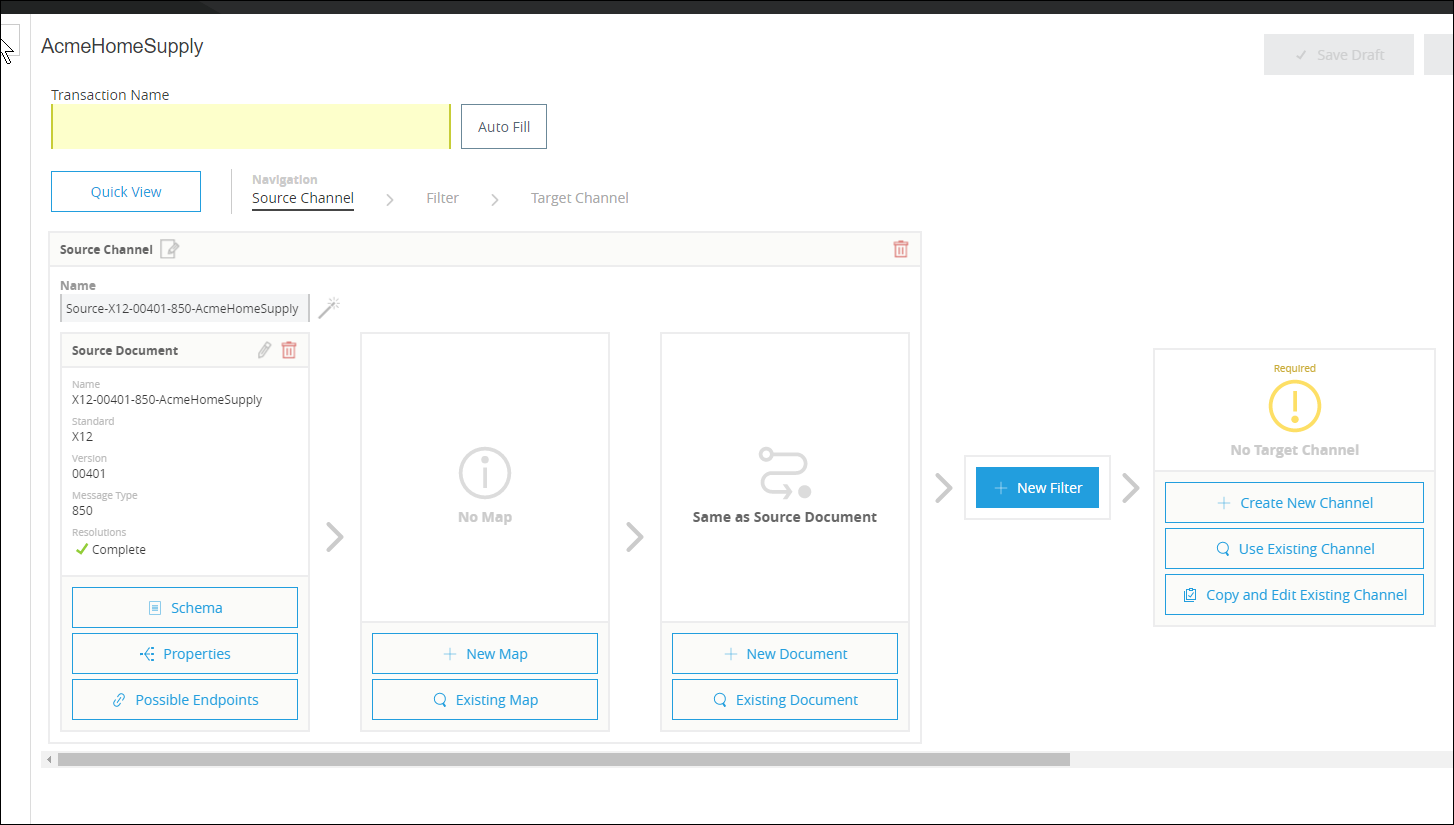
Configure the Map
A map is a file that contains information necessary to transform one document type to another. In this walkthrough, we upload a map to transform a source document of the type we created in the previous section to a target document of the type we created in the previous section.
-
On the Source Channel in-progress Page, click New Map.
The Map Page appears.
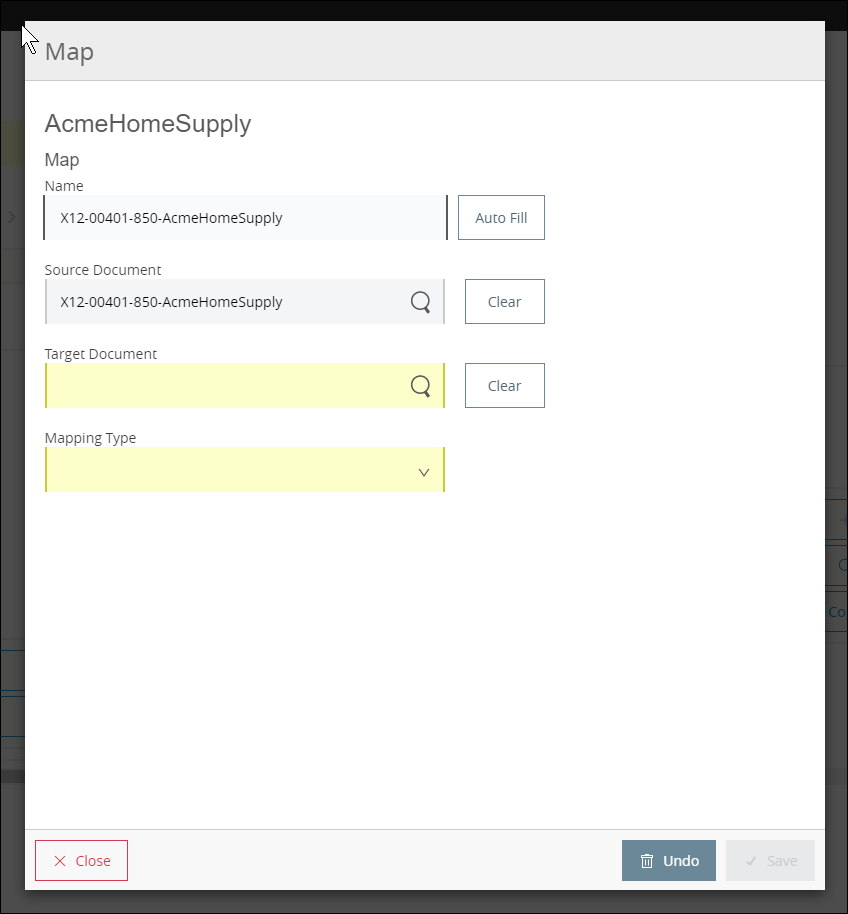
-
On the Map Page, click the Target Document box.
The Pick a document Page appears.
-
On the Pick a document Page, click the row that corresponds to the Target Document Type - that is, the row for which the value in the Name column is JSON-PurchaseOrder-AAZFasteners.
The Map Page appears, with JSON-PurchaseOrder-AAZFasteners in the Target Document box.
-
In the Mapping Type box, click DataWeave.
For more information, see DataWeave.
-
Click Save.
The Source Channel in-progress Page appears.
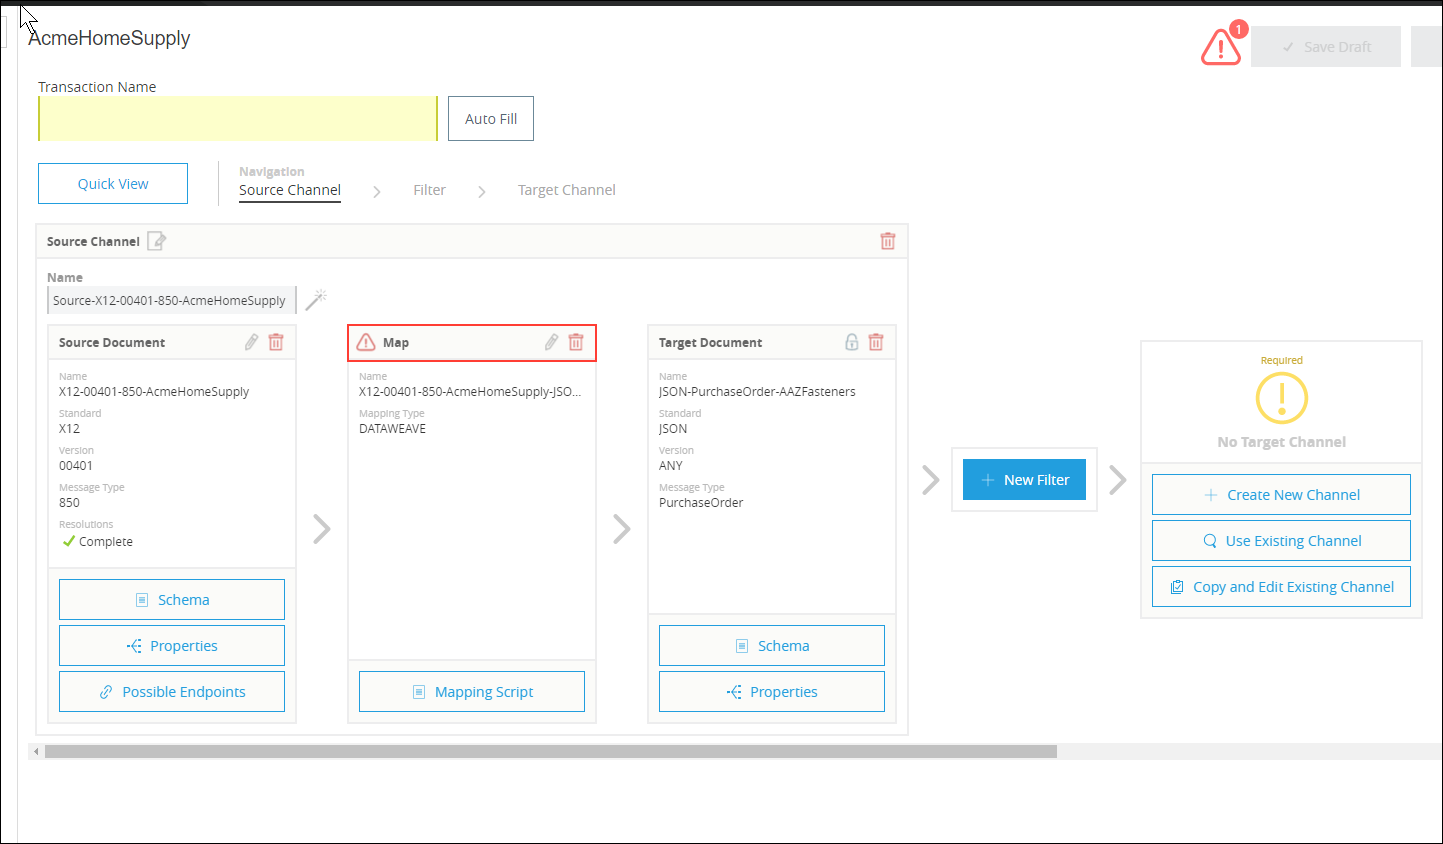
-
On the Source Channel in-progress Page, Click the Mapping Script box.
The Map Script window appears.
-
Click Choose File, then navigate to the folder you created when you unzipped EDI Demo in Download Tutorial Materials.
In the Maps folder, select apm-tutorial-850_4010_IN.dwl.
apm-tutorial-850_4010_IN.dwl appears in the Schema box.
-
Click Save.
The Source Channel in-progress Page appears.
Add the Target Channel
-
On the Source Channel in-progress Page, click Use Existing Channel.
The Pick a Target Channel box appears.
-
On the Pick a Target Channel box, pick the JSON channel you created in Design a Target Channel.
The Source Channel in-progress Page appears, displaying the completed Target Channel.
-
Click Save.
The Save Transaction Page appears.
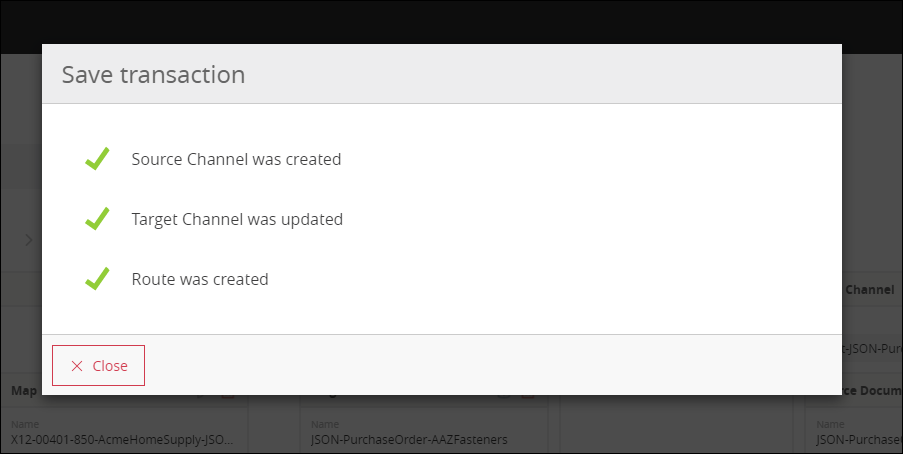
-
Click Close.
The Source Channel in-progress Page appears.
-
In the left-hand navigation pane, click Transaction Designs.
The Transaction Designer Page appears.

Configure an S3 Bucket (optional)
Configuring an Amazon Simple Storage Service (Amazon S3) bucket enables you to view message payloads in Monitor the Transaction. You will add configuration data from the bucket in Configure APM Routing Engine in Anypoint Studio.
Copy APM Information
In order to identify your APM environment and its API Key to Anypoint Studio:
Copy your Environment ID
-
On the B2B Transactions Page, in the left-hand navigation pane, click Administration, then click Environments.
-
In the row that corresponds to the environment with which you are working, click copy.
Identify or Create an API Key
In order to create a Mule project, you must enter an API Key.
If you have an existing API Key, use it. If you do not know the API Key, consult your organization’s MuleSoft administrator.
If your organization has not created an API Key, you can use APM to create one.
| The API Key is used by every Mule application across your entire Master Organization that communicates with Anypoint Partner Manager. Therefore, before you create a new API Key, coordinate with your organization’s MuleSoft administrator to ensure that none of your organization’s processes are using an existing API Key because, if they are, creating a new API Key will cause them to cease functioning. In that case, instead of creating a new API Key, use the existing API Key. |
To obtain a key, see Create a New API Key.
Configure APM Routing Engine in Anypoint Studio
For information about using Anypoint Studio, see Anypoint Studio.
Import Applications
Import the Routing Engine Application
-
In Anypoint Studio, click File.
The File Menu appears. -
On the File Menu, click Import.
The Import Source Selection Window appears. -
In the Import Source Selection Window, select Anypoint Studio generated Deployable Archive (.zip).
-
Click Next.
The Import Mule Project Window appears. -
In the Import Mule Project Window, browse to the location to which you downloaded the archive in Download Tutorial Materials.
-
Click to expand APM Tutorial Materials, and then click Apps to expand that folder.
-
In the Apps folder, click apm-tutorial-routing-engine.zip, then click Open.
The Project Name box auto-populates.
NOTE: The Project Name must be unique with respect to any previously-imported projects. If it is not, Finish will not be enabled. If this is the case, change the Project Name so that Finish is enabled. -
Click Finish.
The project appears in the Anypoint Studio Package Explorer pane.
Import the Mock Partner Application
To import the mock partner application, repeat the steps in Import the Routing Engine Application, substituting apm-acme-mock.zip for the Routing Engine App in Step 7.
Insert APM Environment Information
-
In Anypoint project (expand if necessary), expand the src/main/app, double-click apm.prod.edi.properties.
Project properties appear in the Anypoint Studio Canvas. -
In Line 2, replace {Insert environment id} with the environment ID you copied in Copy your Environment ID.
-
In Line 3, replace {Insert API Key} with the API Key you copied in Identify or Create an API Key.
-
In Anypoint Studio, click File, then click Save All.
Start the Applications
-
In Package Explorer (Anypoint Studio), right-click apm-routing-engine-nm.
-
Click Run As.
-
Click Mule Application (configure).
-
On the General tab, in the Mule domains/projects to launch pane, select both apm-routing-engine-nm and AS2-partnermock.
-
Click Run.
When both applications have deployed, proceed to Send a Message.
Send a Message
-
Choose and install the Postman app specific to your operating system from getpostman.com.
-
In Postman, import apm-tutorial-postman-collection.json from the location to which you downloaded in Download Tutorial Materials, then select the archive and click Open.
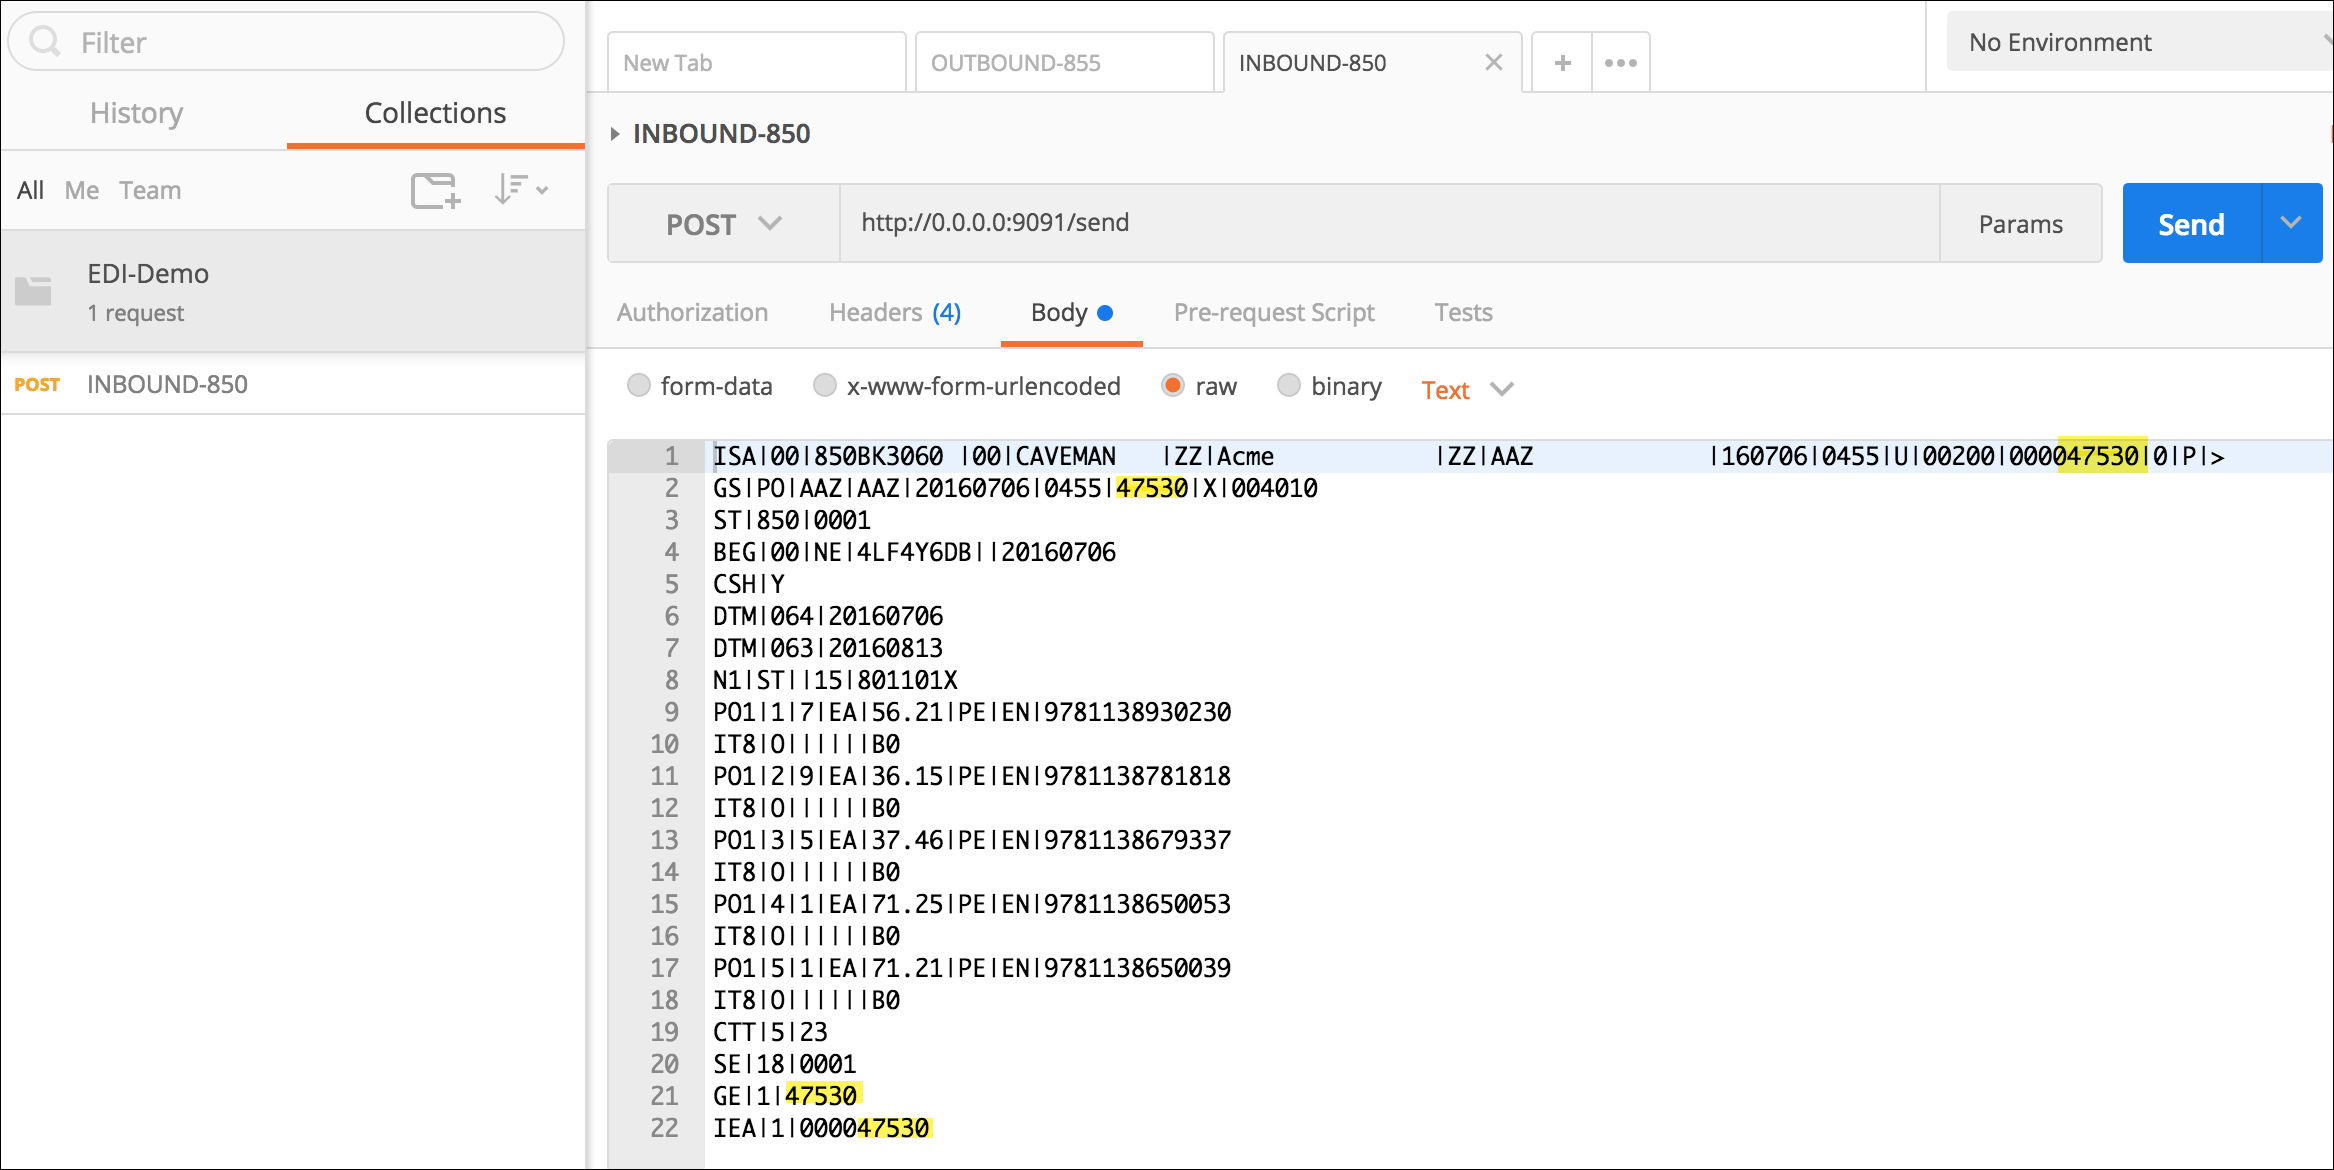
The Postman user interface looks something like Postman User Interface.
-
In the imported collection, select INBOUND-850.
-
Click Send.
-
Go to Monitor the Transaction to see how APM displays transaction information.
-
If you send another request from Postman, increment the request number in the four places it appears. In Postman User Interface, this number is 47530. We have added yellow highlighting where the number appears in the figure.
Monitor the Transaction
In Anypoint Manager, in the left navigation pane, click Transaction Monitoring
The Transaction Monitoring Page appears.
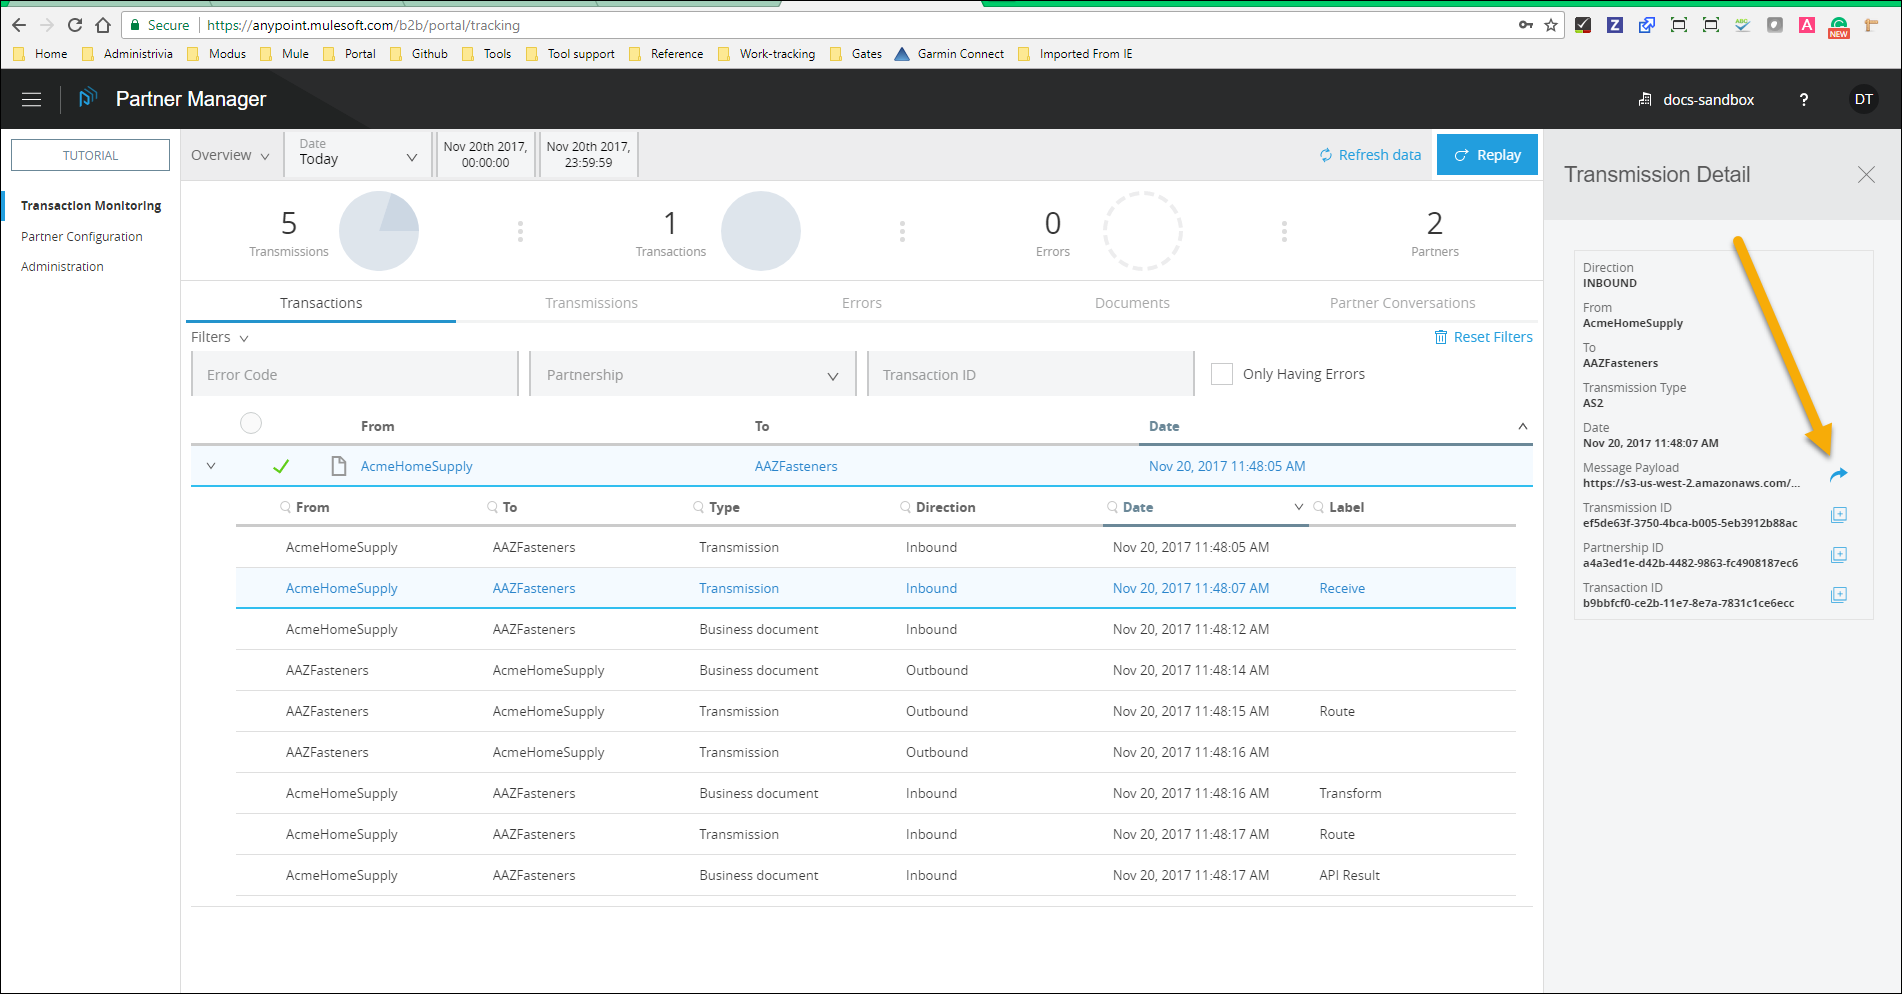
The Transaction Monitoring Page should confirm that:
-
An XML purchase order as read from the company’s filesystem and transformed to an X12 850 document.
-
The 850 was sent to a supplier over AS2.
-
The AS2 Connector listened for (on an AS2 endpoint) and received an X12 997 document that identifies whether the 850 was accepted or rejected.
Inspect a Payload
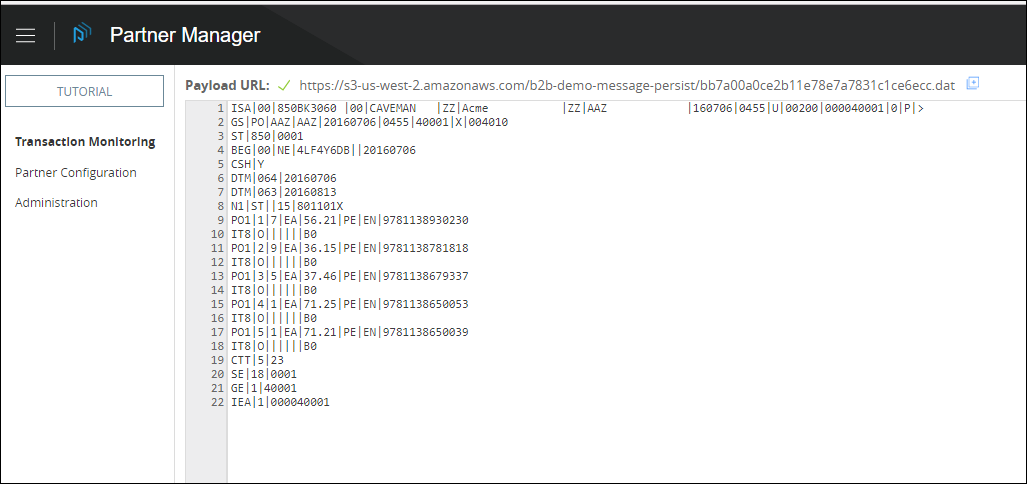
APM enables you to view a transmission payload. For example, in Transaction Monitoring Page, click the Payload icon in the right pane (identified in the figure by the gold arrow). The Transmission Payload Page appears, presenting payload data.
