Installing Tcat Server on Solaris
| Tcat Server reached its End of Life in 2017. Contact your Customer Success Manager to determine options for managing, monitoring, or deploying your application. |
This document describes how to install MuleSoft Tcat Server on the Solaris operating system. A basic installation using the Solaris installer is described below, followed by advanced installations in headless, text-only mode. In addition, this document describes how to start and stop Tcat Server, access the Tcat console, and provides advanced configuration and security steps.
For additional information and to install Tcat Server on other operating systems, see:
Send comments or questions to: tcat-install
Solaris Operating Systems Supported
Tcat Server is supported on all Solaris operating systems that have a supported Java runtime. Server restarts are supported on Solaris 10 and 11.
For additional operating systems supported, see installation documentation on: Linux, Mac OS X, and Microsoft Windows.
Required Software
Tcat Server operates within a Java Virtual Machine (JVM) and requires the Java SE Runtime Environment (JRE). However, it is strongly recommended that you install the Java SE Developers Kit (JDK). JDK includes JRE and provides for additional utilities.
JRE/JDK Versions Supported
MuleSoft recommends the latest Oracle/Sun HotSpot JDK or JRE. The following runtimes are known to work with Tcat Server:
-
Oracle/Sun JRE or JDK version 1.6.0_04 or newer (also known as "Java 6").
-
Oracle/Sun JRE or JDK version 1.5 (all builds) also works if you are only running the Tcat agent. The Tcat console requires versions 1.6.0_04 or newer.
-
Oracle/JRockit version 1.6.0_20 or newer JDK (Note: the Tcat console v6.4.1 and older show zero logs in the logs tab).
Note: Tcat Server runs in two or more Java Virtual Machines:
-
The Tcat console runs in Tomcat 6.0, and requires JDK or JRE 1.6.0_04 or newer.
-
The Tcat agents can run in Tomcat 5.5 or newer, including Tomcat 7, and require JDK or JRE 1.5.0 or newer
The following Java Runtimes have also been tested but are known to not work, and are unsupported:
-
Oracle JDK or JRE version 7, releases older than update 2 (due to HotSpot loop optimization bugs)
-
Oracle/Sun JDK or JRE versions 1.6.0_03 or older (due to JAXB, any 1.6.0 Oracle/Sun Hotspot JVM older than 1.6.0_04 doesn’t work)
Setting the JAVA_HOME Environment Variable
An environment variable must be set that points to the current JRE or JDK. Tcat Server first looks for an installed JDK with the JAVA_HOME environment variable. If it doesn’t find a JDK, it looks for a JRE with the JRE_HOME environment variable.
Installing Tcat Server
You need to know the default credentials to access the Tcat Server dashboard once installation is complete. Both the username and password default to admin as detailed below.
Download Tcat Server for Solaris
Download and install Tcat Server and click the Download button.
Installation with the Solaris Installer
Follow these steps to install Tcat Server with the Solaris installer. All defaults may be chosen for an initial installation. However, custom ports, installation directory and a service instance name can be customized by changing the defaults as shown below. Later, when installing additional Tcat Server instance on one or more remote computers, the Tcat console need not be installed.
-
Download Tcat Server from the link above.
-
Run the installer. The welcome screen opens in a few moments, click Next and accept the license agreement.
-
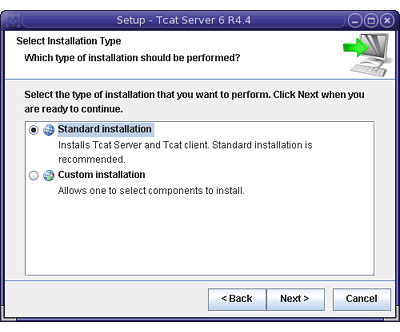
Choose a Standard Installation to install both Tcat Server and the Tcat console. Choose Custom Installation if you wish to only install Tcat Server on a remote computer that is administered by your primary installation. The Custom Installation option also allows you to install Apache Tomcat documentation.
-
Configure ports: After choosing the directory for installation, the next screen allows you to configure ports. Ports can also be later changed in the
conf/server.xmlandconf/Catalina/localhost/agent.propertiesfiles.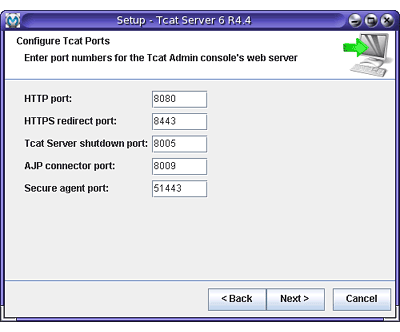
-
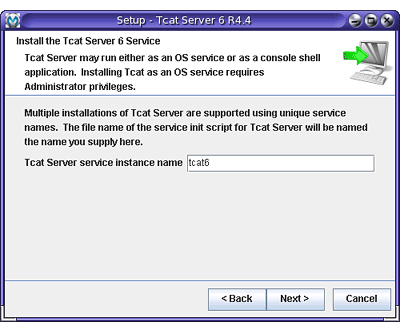
Define a unique service name for this instance of Tcat Server.
-
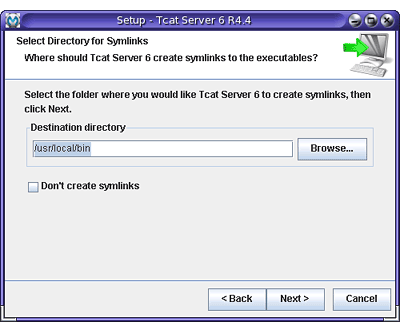
Choose whether you would like symlinks created, and if so, the folder to create them in.
The installation then starts and takes several minutes to complete.
-
Start Tcat Server by opening a Command Prompt window and execute:
/opt/TcatServer6/bin/tcat6 start
-
Open a web browser and navigate to:
http://localhost:8080/console -
Log in with admin for both the username and password.
The Tcat Server dashboard launches in your web browser.
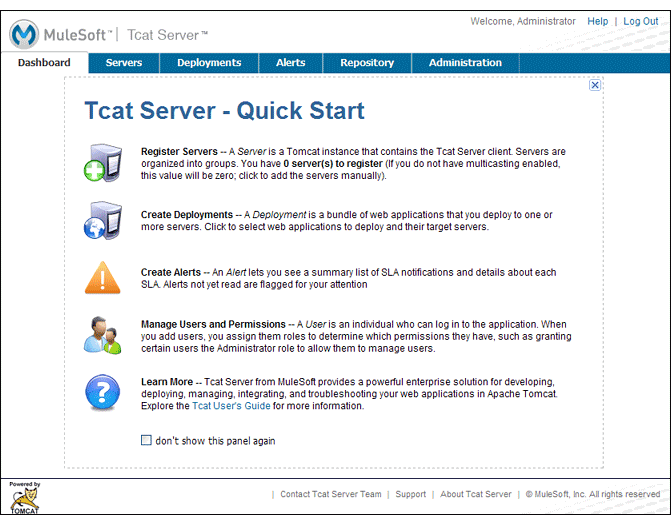
Your next steps after launching the Tcat dashboard include registering a server in the console, and then adding a new web application to the server instance. See the Working with Servers guide for additional steps in these procedures.
Upgrade Installation
If you are upgrading from a previous release of Tcat Server, see Upgrading to Tcat Server 6 R4 and follow the upgrade instructions provided in this document.
Advanced Installations
This section demonstrates how to install Tcat Server in headless and unattended modes with custom options.
Headless (Text-Based) Installation
The "headless" (text-only) mode of installation allows users to customize the installation in both an attended (interactive) and unattended (non-interactive) mode. In the interactive mode, users answer configuration questions in the shell, and then the installer begins an unattended installation. In the non-interactive mode, users can automate multiple installs with an external configuration file.
Attended Headless Installation
To begin the headless installation, open a Command Prompt window and navigate to the directory where Tcat Server was downloaded, then type the following at the prompt (using your downloaded filename as it may differ from this):
sh tcat-installer-6.4.4-solaris-no-jre.sh -c
The installer’s interaction in the Command Prompt window looks similar to this:
# sh tcat-installer-6.4.4-solaris-no-jre.sh -c
Starting Installer ...
Java Accessibility Bridge for GNOME loaded.

This installs Tcat Server 6 on your computer.
OK [o, Enter], Cancel [c]

Please read the following License Agreement. You must accept the terms of this agreement before continuing with the installation.
...

I accept the agreement
Yes [1], No [2]
1
Which type of installation should be performed?
Standard installation [1, Enter]
Custom installation [2]

Where should Tcat Server 6 be installed?
[/opt/TcatServer6]
...
Unattended Headless Installation
Several options are available for an unattended headless installation:
1. Default Installation
If you wish to install Tcat Server with all default options, use the -q argument instead of -c. This installs the software in its default location of /opt/TcatServer6 with both Tcat Server and the Tcat console. It also uses all default port numbers, which can later be changed in the conf/server.xml and conf/Catalina/localhost/agent.properties files.
The command for a default installation is:
sh tcat-installer-6.4.4-solaris-no-jre.sh -q
2. Installation with an External Options File
An options file can be produced and referenced during the headless installation. If the installer has already been run, then a default option file response.varfile already exists in the .install4j directory within your installation directory. It is best to copy and modify this file and use it for future installations. Otherwise, the following code can be copied into a new text file, and customized for your use if necessary. It can then be used as the installation option file when installing Tcat Server version 6.4.4. The contents of this varfile is in the same format as a simple Java properties file:
#install4j response file for Tcat Server 6 R4.4
sys.component.51$Boolean=true
sys.installationDir=/opt/TcatServer6
sys.languageId=en
sys.programGroup.linkDir=/usr/local/bin
sys.programGroup.name=Tcat Server 6 [tcat6]
tomcatHttpsPort$Long=8443
tomcatShutdownPort$Long=8005
sys.programGroup.enabled$Boolean=true
sys.component.53$Boolean=true
sys.component.37$Boolean=true
tcatUsername=tomcat
tcatServiceName=tcat6
tomcatAjpPort$Long=8009
sys.programGroup.allUsers$Boolean=true
tomcatHttpPort$Long=8081
secureAgentPort$Long=51443
sys.component.54$Boolean=true
sys.component.52$Boolean=true
After producing the above options file, and naming it response.varfile, execute the following command in the Command Prompt window to start installation:
sh tcat-installer-6.4.4-solaris-no-jre.sh -q -varfile response.varfile
To also display debugging information about the installation in the Command Prompt window, use the following command to start installation:
sh tcat-installer-6.4.4-solaris-no-jre.sh -q -varfile response.varfile -Dinstall4j.debug=true -Dinstall4j.detailStdout=trueAdding Tcat Server Capabilities to an Existing Apache Tomcat Installation
Tcat Server capabilities can be added to an existing Apache Tomcat installation. All Tomcat 5.5.x and newer releases, and all Tomcat 6.0.x and 7.0.x releases are supported. See Add Tcat Server Capabilities to an Existing Tomcat Installation for installation instructions.
Installing Multiple Tcat Instances on a Single Computer
Multiple instances of Tcat Server can be run on a single machine. One instance (or more) of the Tcat console allows users to manage all the additional Tcat Server instances, each running in their own Java Virtual Machine (JVM). For more information, see Installing Multiple Tcat Instances on a Single Machine.
Starting and Stopping Tcat Server on Solaris 10 and 11
If you want to use the standard Tomcat catalina or startup commands to start Tomcat, any environment variables you set in the Tcat console do not take effect until you restart Tomcat using Tcat Server commands. Therefore, for best results when setting environment variables in the Tcat console, you should always start Tomcat using Tcat Server commands described below.
By default, Tcat Server automatically starts after installation on Solaris 10 and newer, as part of the Solaris Service Management Framework (SMF). Or, without using SMF, you may also directly invoke the Tcat Server init script, named tcat6. You may invoke the tcat6 script in the Tcat Server bin/ directory, or in the path /etc/init.d/tcat6 if you installed Tcat Server with root privileges. By default you should use SMF, but if you have insufficient permissions to use SMF, then the tcat6 init script works. For any single Tcat Server installation, you should choose to invoke either SMF or the tcat6 init script, not both.
Using SMF, you may query the service to inspect its current state:
sudo svcs -l tcat6
Or, if you’re not using SMF, you can query Tcat’s status:
/opt/TcatServer6/bin/tcat6 status
To stop Tcat Server, disable its SMF service:
sudo svcadm disable tcat6
Or, if you’re not using SMF, you may stop Tcat Server:
/opt/TcatServer6/bin/tcat6 stop
To start Tcat Server from a disabled state, run:
sudo svcadm enable tcat6
Or, if you’re not using SMF, you may start Tcat Server:
/opt/TcatServer6/bin/tcat6 start
You can also restart the server via SMF:
sudo svcadm restart tcat6
Or, if you’re not using SMF, you may restart Tcat Server:
/opt/TcatServer6/bin/tcat6 restart
Additional Options on Solaris
If your shell user does not have root permissions when you run the installer, the installer cannot add a tomcat shell user, nor can the installer install the Tcat Server SMF service. This is okay, and is a fully supported use case on Solaris. The user who runs the Tcat installer is the user that the Tcat JVM runs as, and you should start|stop|restart Tcat Server on the command line via the tcat6 init script as described in the previous Starting and Stopping Tcat Server on Solaris 10 and 11 section.
Installing Tcat Server inside a Solaris zone is also supported. The installer is unaware it is being installed in a non-global zone and the installation works the same as if you are installing it in the global zone. If you have root privileges in a zone, but the zone does not allow you to use SMF, then the installer may be unable to install the SMF service, but the installation does not fail – it succeeds and completes the installation without the SMF service. You can operate Tcat Server without SMF on the command line via the tcat6 init script as described in the previous Starting and Stopping Tcat Server on Solaris 10 and 11 section. By default, Solaris 10 and 11 allow SMF to be used as root inside non-global zones. If you do not have root privileges in your non-global zone, installing Tcat inside this zone is the same as installing Tcat in the global zone without root privileges.
If you installed as root via the installer, you can invoke the init script for start|stop|restart|status:
/etc/init.d/tcat6 status
As a next step, you may wish to start the Tcat console as detailed in the following section.
Starting the Tcat Console
The Tcat console is an administration console for managing and monitoring Tomcat instances. To run the Tcat console on a local installation, enter http://localhost:8080/console in your web browser. If the server is remote or you changed the default port, replace localhost:8080 with the correct server name and port where the console is deployed.
You can now select and register one or more of the unregistered servers, adding them to server groups as needed. For more details, see Working with Servers.
Make Contents of Webapps Directory Unwritable
By default, the Tcat console enables a user to edit files on any Tcat Server instance registered to it. For additional security, you may wish to make the Webapps directory unwritable.
This property is set in the spring-services.xml file located in the webapps/agent/WEB-INF/ directory. Below is the relevant snippet:
<property name="writeExcludes">
    <list>
        <value>lib/catalina*.jar</value>
        <value>**/tomcat*.jar</value>
        <value>conf/tcat-overrides.conf</value>
        <!-- block the webapps directory -->
        <!-- <value>webapps/**</value> -->
    </list>
</property>
To disable this ability, take the following steps:
-
Uncomment last element shown in the above snipper, replacing this:
<!-- <value>webapps/**</value> -->With this:
<value>webapps/**</value> -
Save the file
-
Restart Tcat Server instance
Modifying JAVA_OPTS
You may wish to modify the JAVA_OPTS environment variable for several reasons:
-
To enable JMX so that you obtain more detailed information about connectors and server status, for example:
-Dcom.sun.management.jmxremote
-
To increase memory settings because you are installing all the components offered in the installer, as an example:
-Xmx512M -XX:PermSize=64M -XX:MaxPermSize=128M
-
To modify the secure port, as an example:
-Dtcat.securePort=51444
JAVA_OPTS can be modified after installing Tcat Server using the Tcat console. This can be done in two ways:
-
Manually setting the options on each server by modifying the server’s environment variables.
-
Modifying the options in the server profile that you use across multiple Tcat Server instances. This requires administrative privileges.
Uninstalling Tcat Server
The following options uninstalls Tcat Server:
-
For a Tcat Server installation with the Solaris installer, choose the uninstall shell script in the Tcat installation directory (the default location is:
/opt/TcatServer6). -
If Tcat Server and Tomcat were manually installed in the same directory, and you want to delete both programs, simply delete the entire folder.
-
If Tcat Server was manually installed on an existing Tomcat installation, delete the console, agent webapps and their folders from the webapps directory.