Publish a Project to Exchange
Anypoint Studio allows you to connect to Exchange to publish your project as a new asset.
-
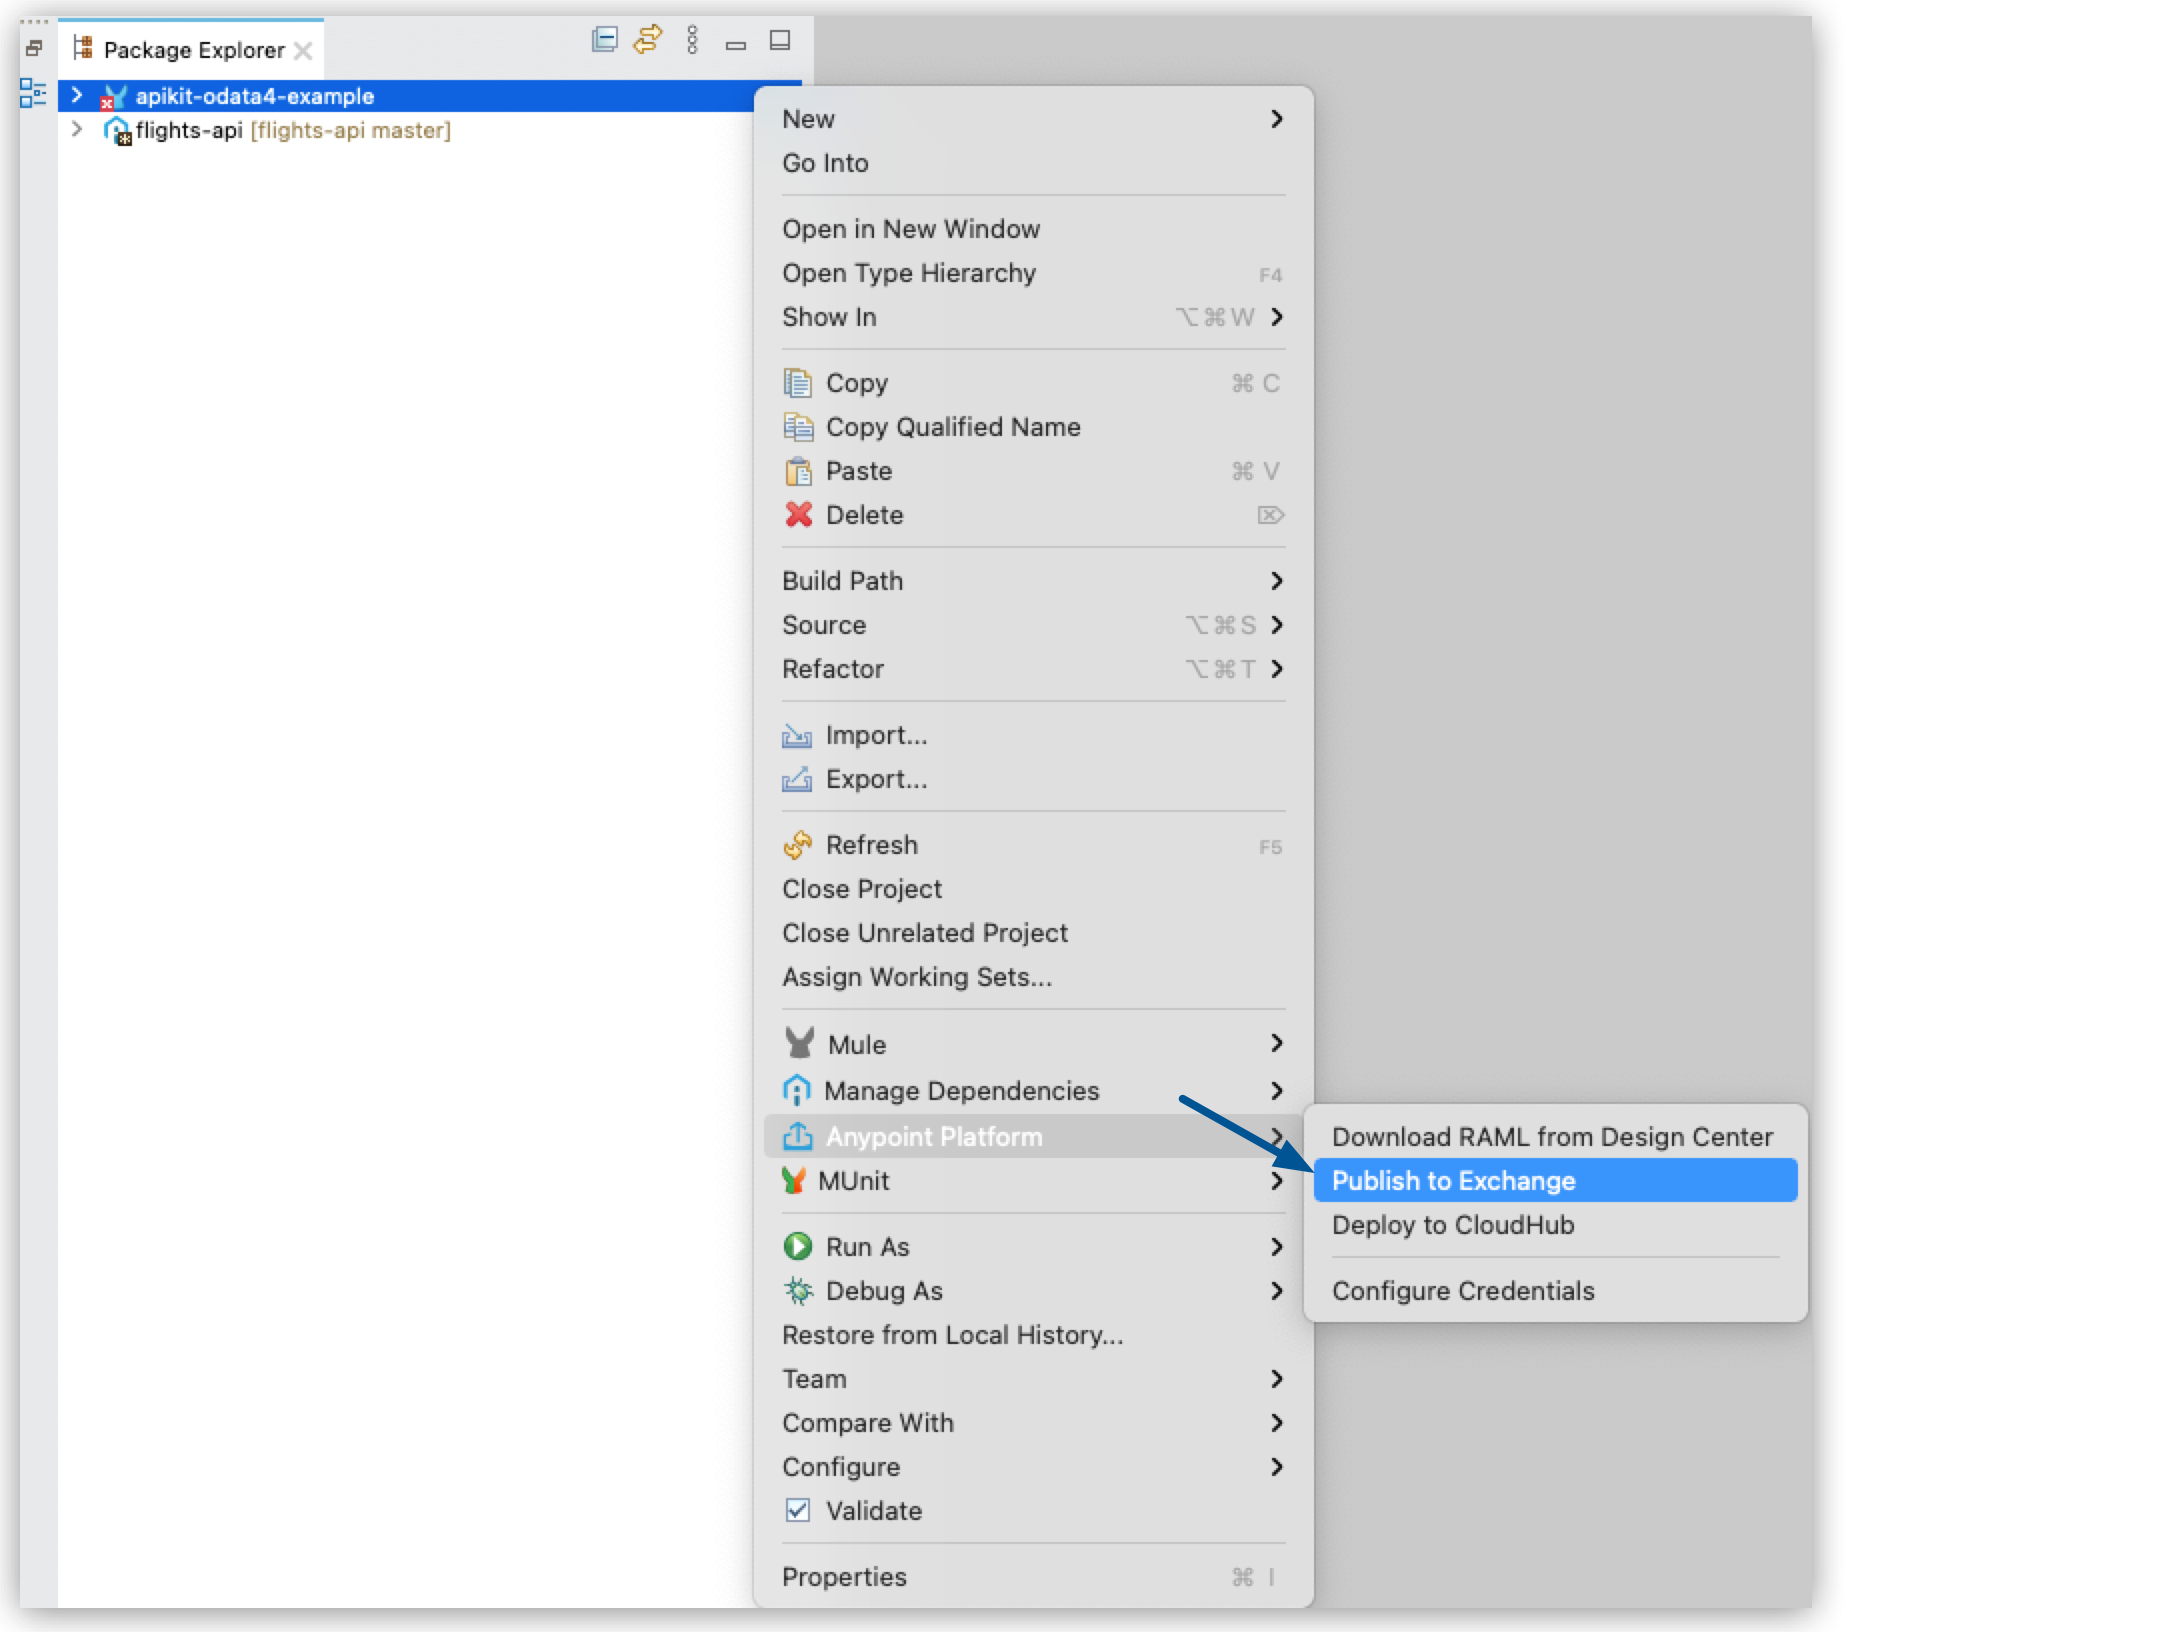
Right-click your project folder in your Package Explorer view.
-
Select Anypoint Platform > Publish to Exchange.
-
Either select your Anypoint Platform user and business group or create a new Anypoint Platform account by clicking Add Account.
Additionally, you can click the Add Account button to use a new Anypoint Platform account. -
Verify that the required identification and version information for your project is present and correct:
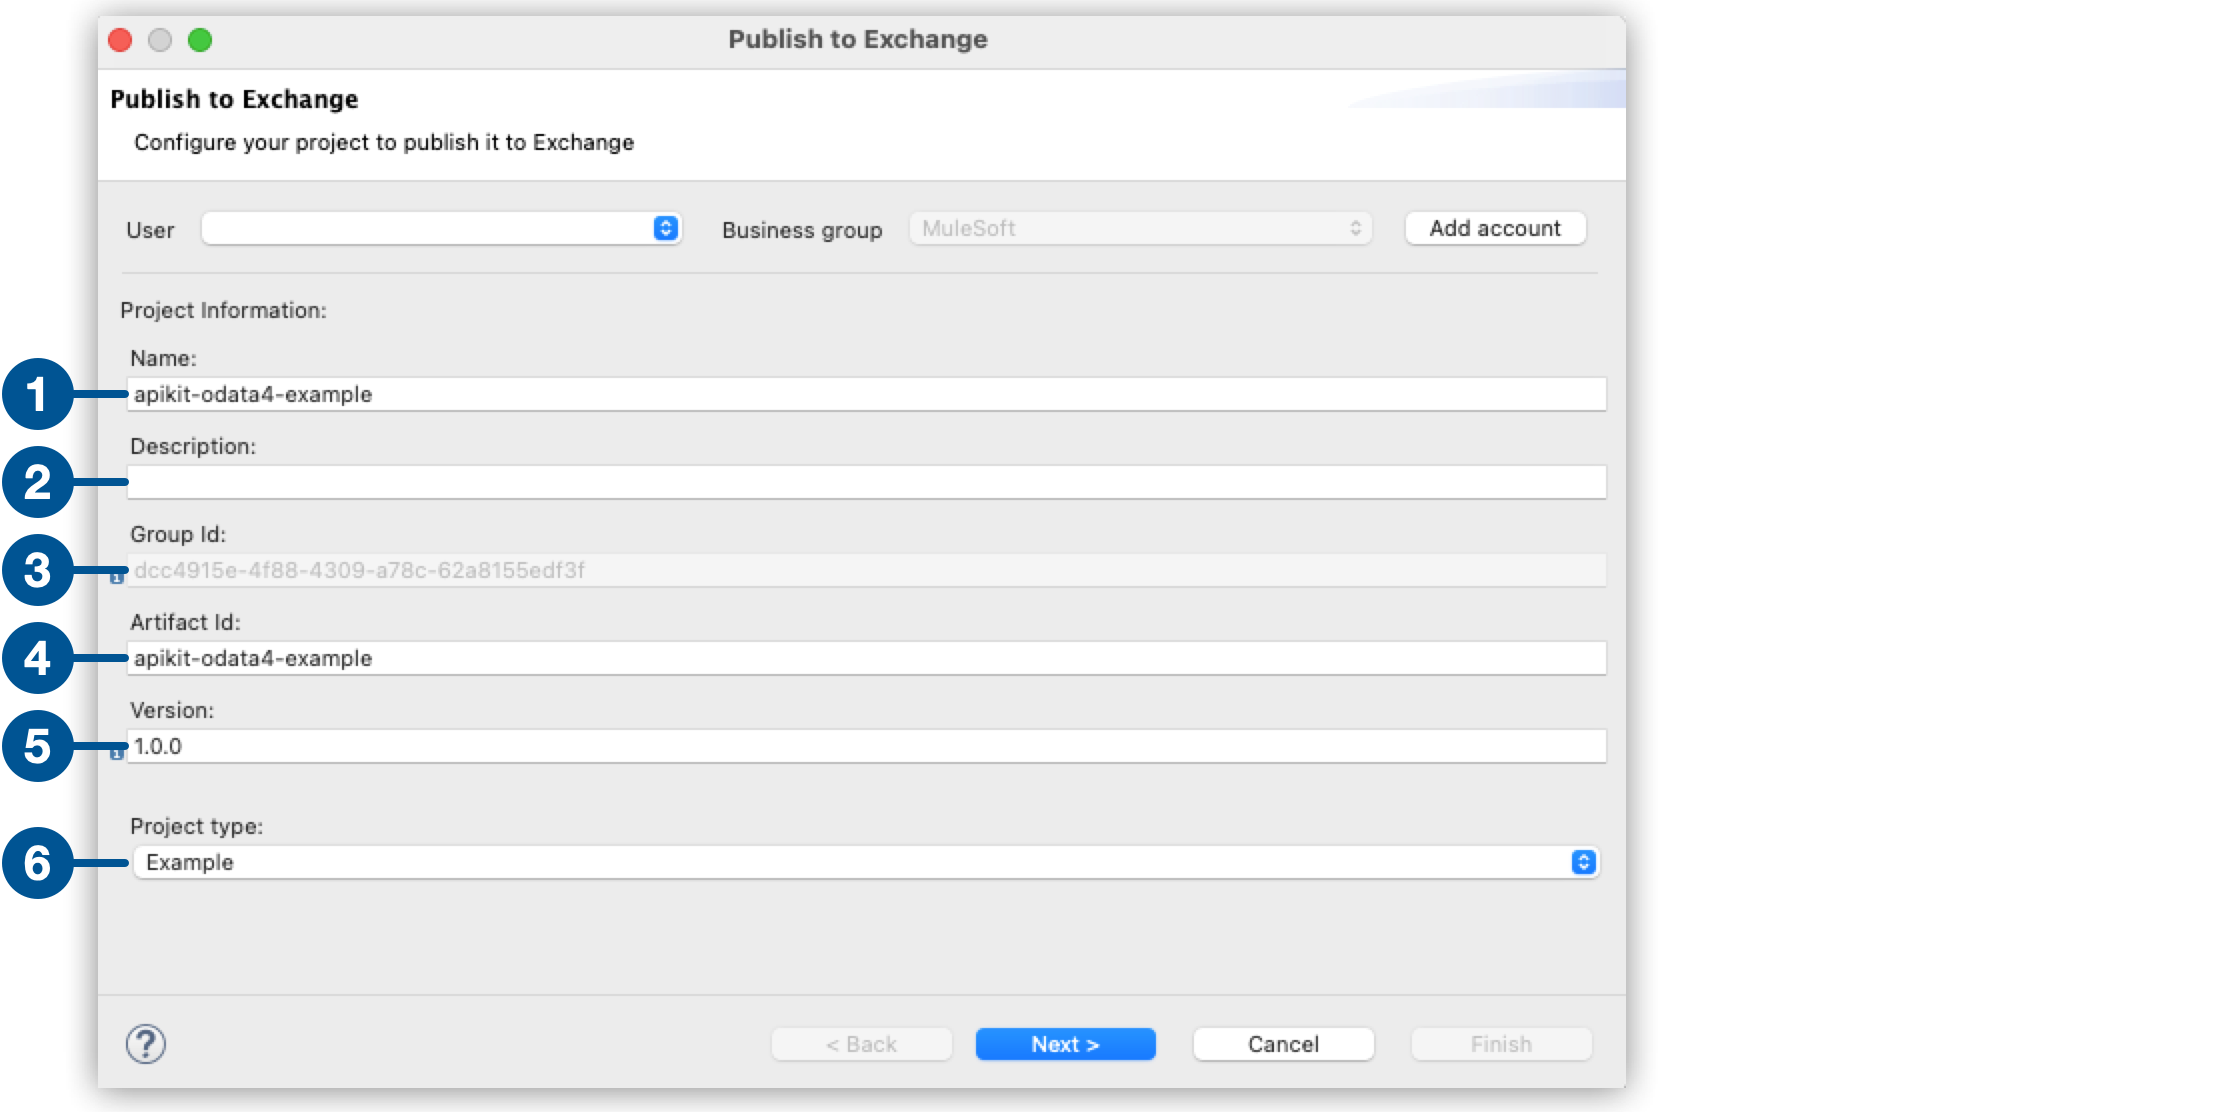
| 1 | Name: The name of your API specification. |
| 2 | Description: (optional) A description of your API specification. |
| 3 | Group ID The group ID for your project is the organization ID of your Anypoint Platform organization. |
| 4 | Artifact ID The artifact ID is the name of your project, minus its version. By default, Studio uses the artifact ID configured in your pom.xml file. |
| 5 | Version: The version of the asset you are publishing. |
| 6 | Project type: If you are publishing a new version of an already published asset, you cannot change the project type. |
-
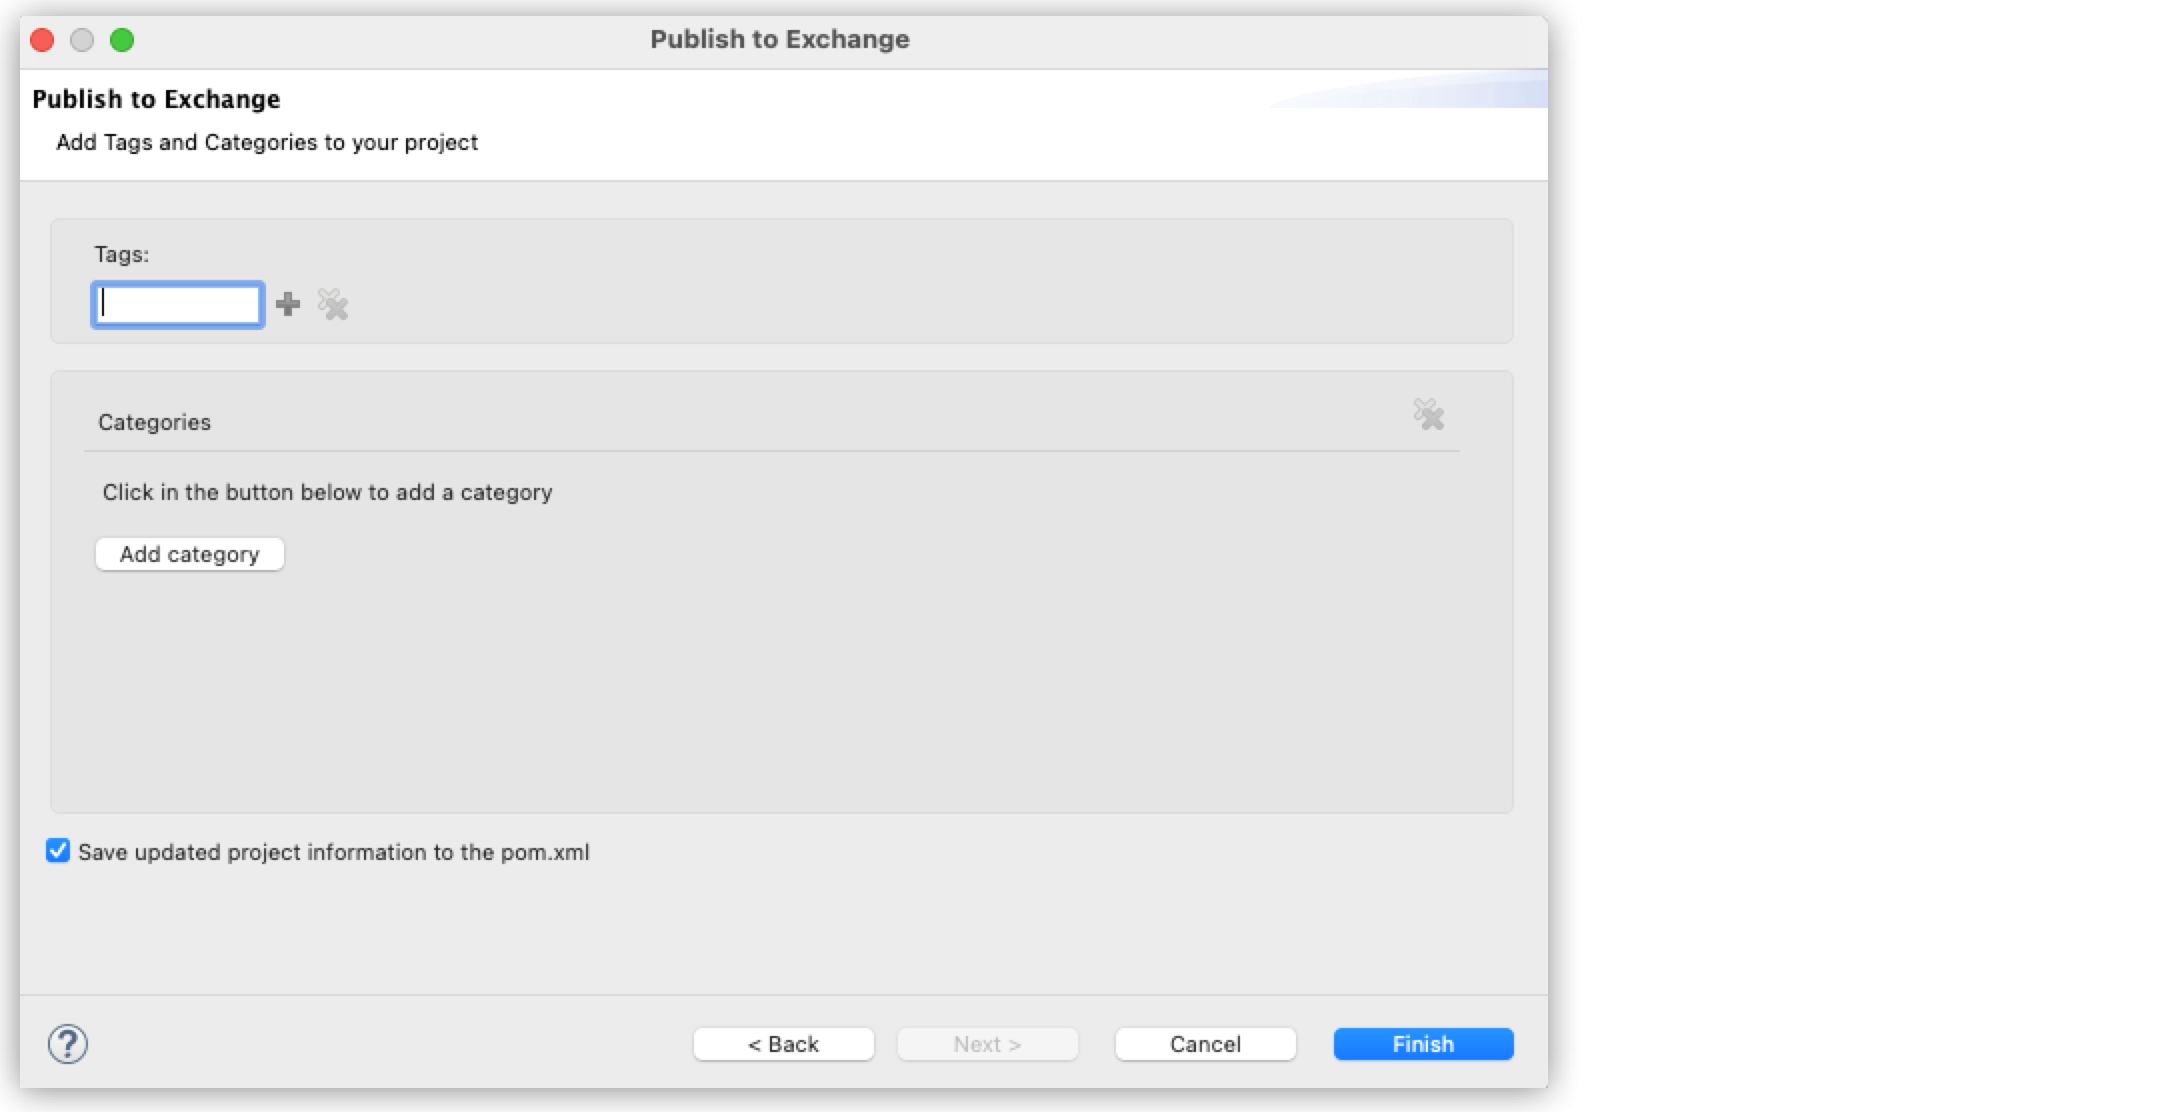
Select Save updated project information to the pom.xml if you want to update your
pom.xmlfile with the data you just provided.
This option updates your local project information with the data you just configured. If you do not select this option, the project is deployed with the configured data, but your local project information is not updated. -
Select Next.
-
Configure the tags and categories for your project:
-
Select Finish.
Once you select Finish, the publication of your project as a new asset in Exchange begins. You can follow the progress of this publication process in the Console view, but you cannot cancel it.