Configure Private Cloud Edition in Studio (Windows)
Anypoint Studio 7.12 only supports native integration with PCE versions 3.0.0, 3.0.1, and 3.0.2.
Configure Your PCE Certificates Into Studio
Follow these steps to integrate your Studio installation with the Anypoint Platform components in a PCE deployment:
-
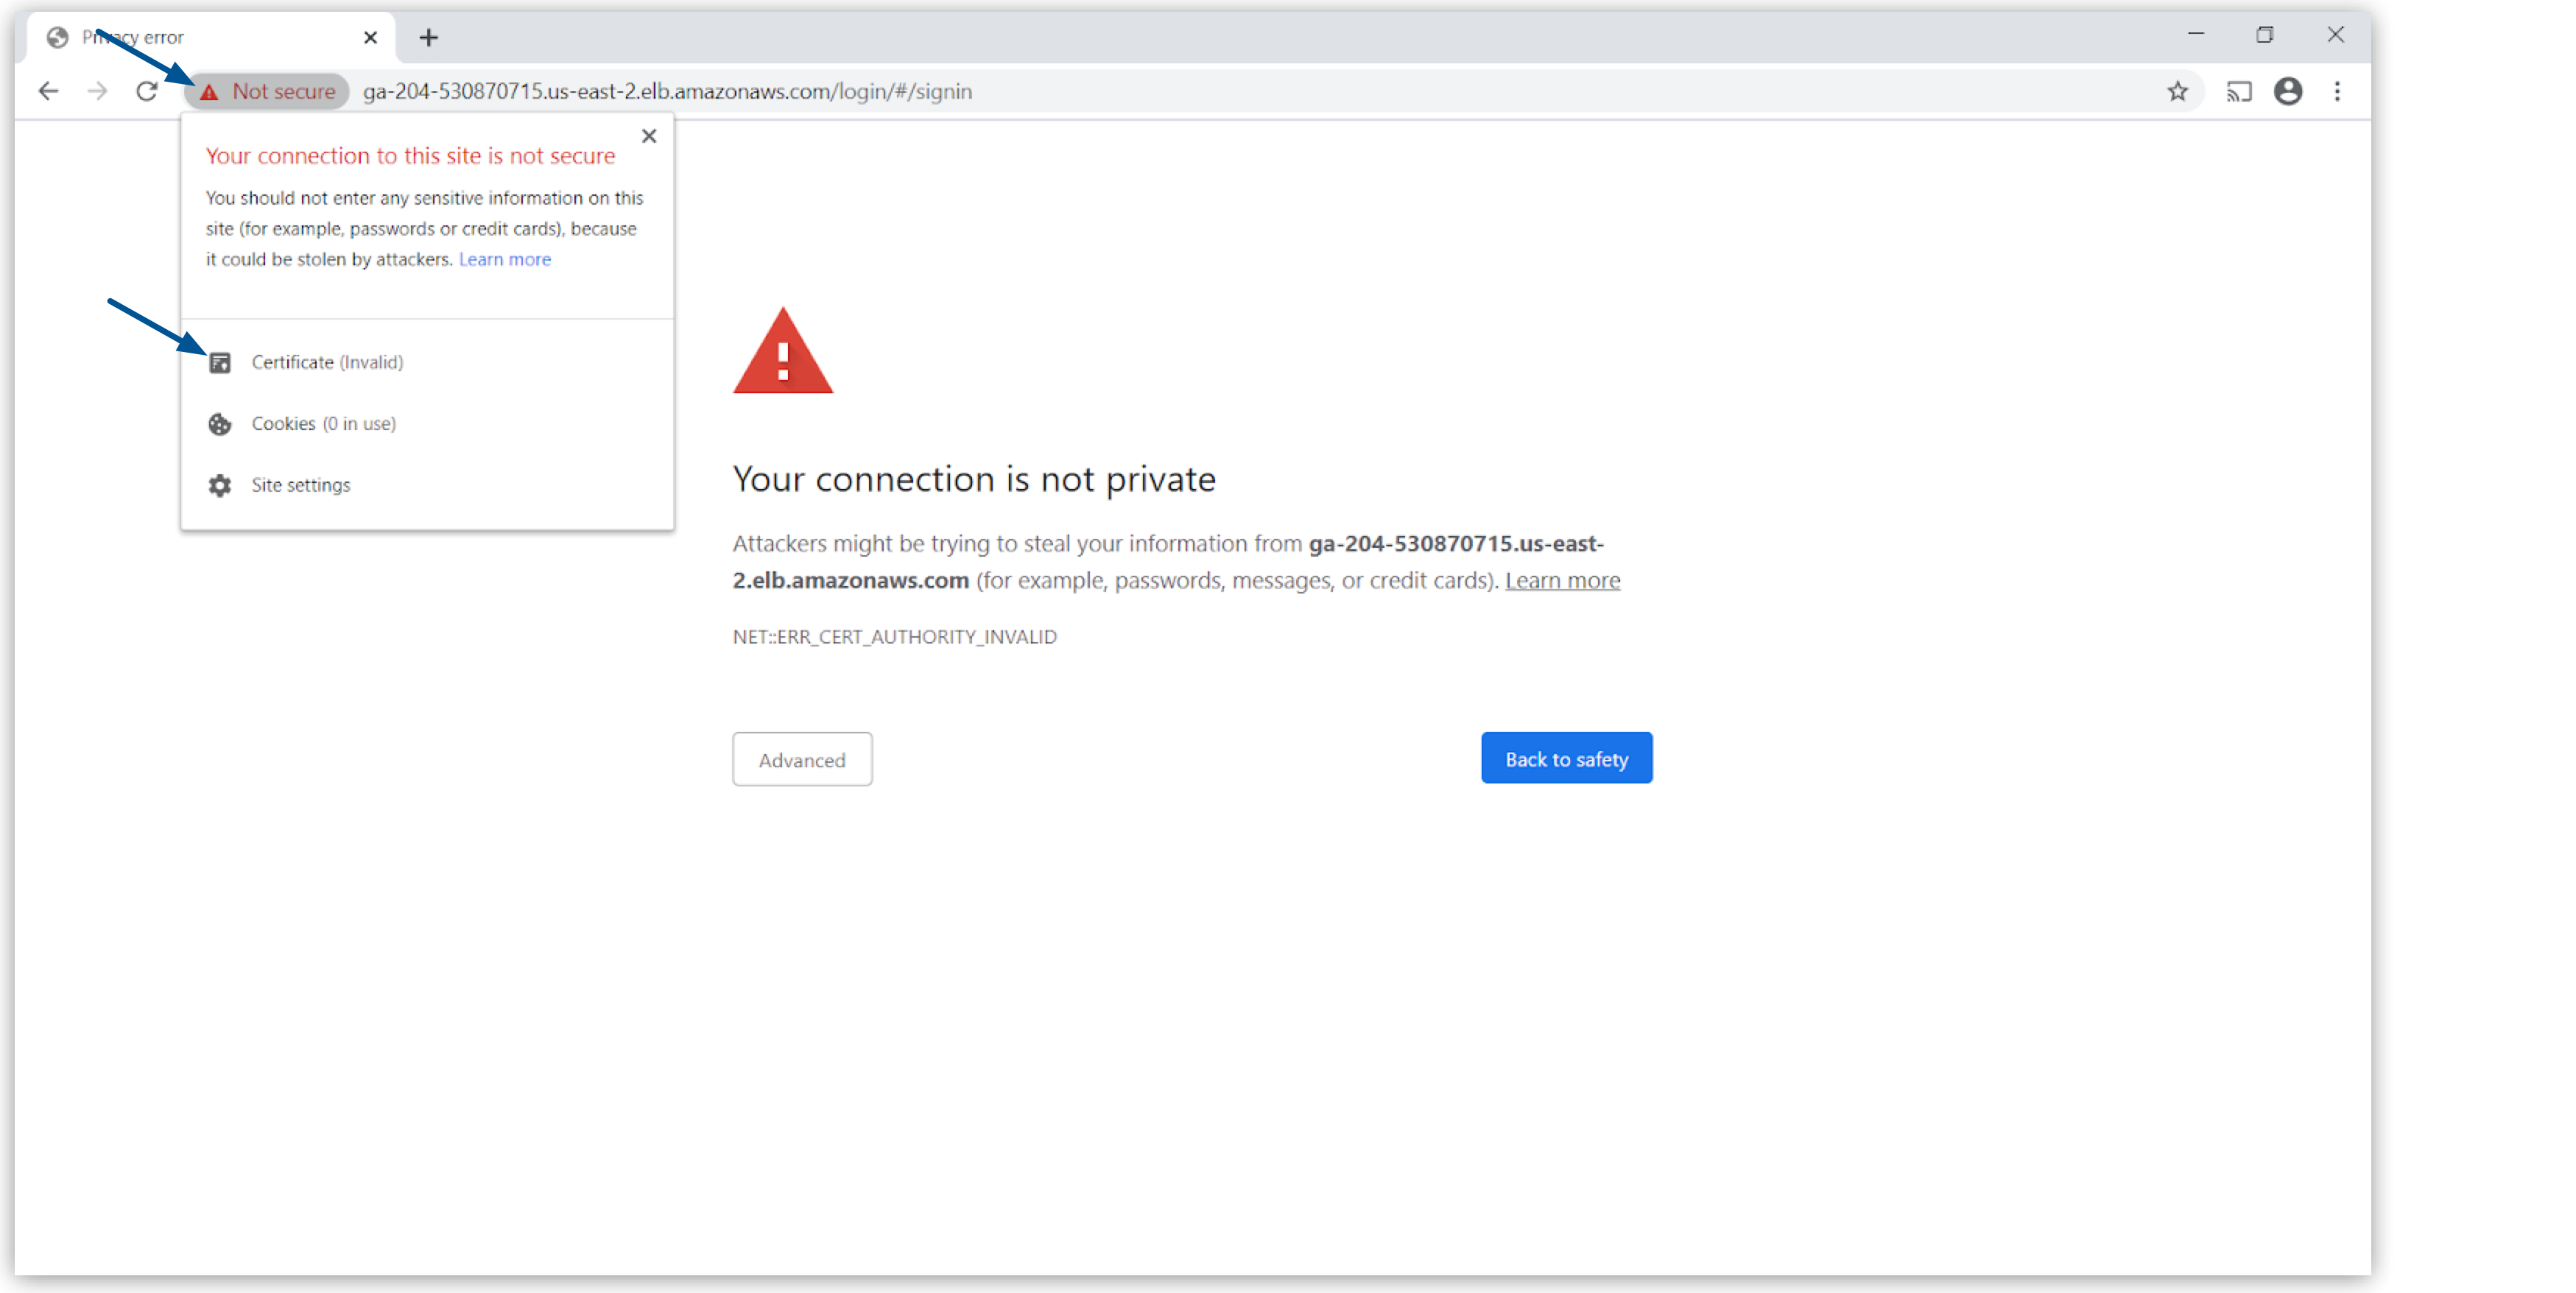
Open your browser and navigate to your PCE instance URL.
-
Your browser displays a Your connection is not private error.
-
Click the Not Secure section in your URL bar, and select Certificate.

-
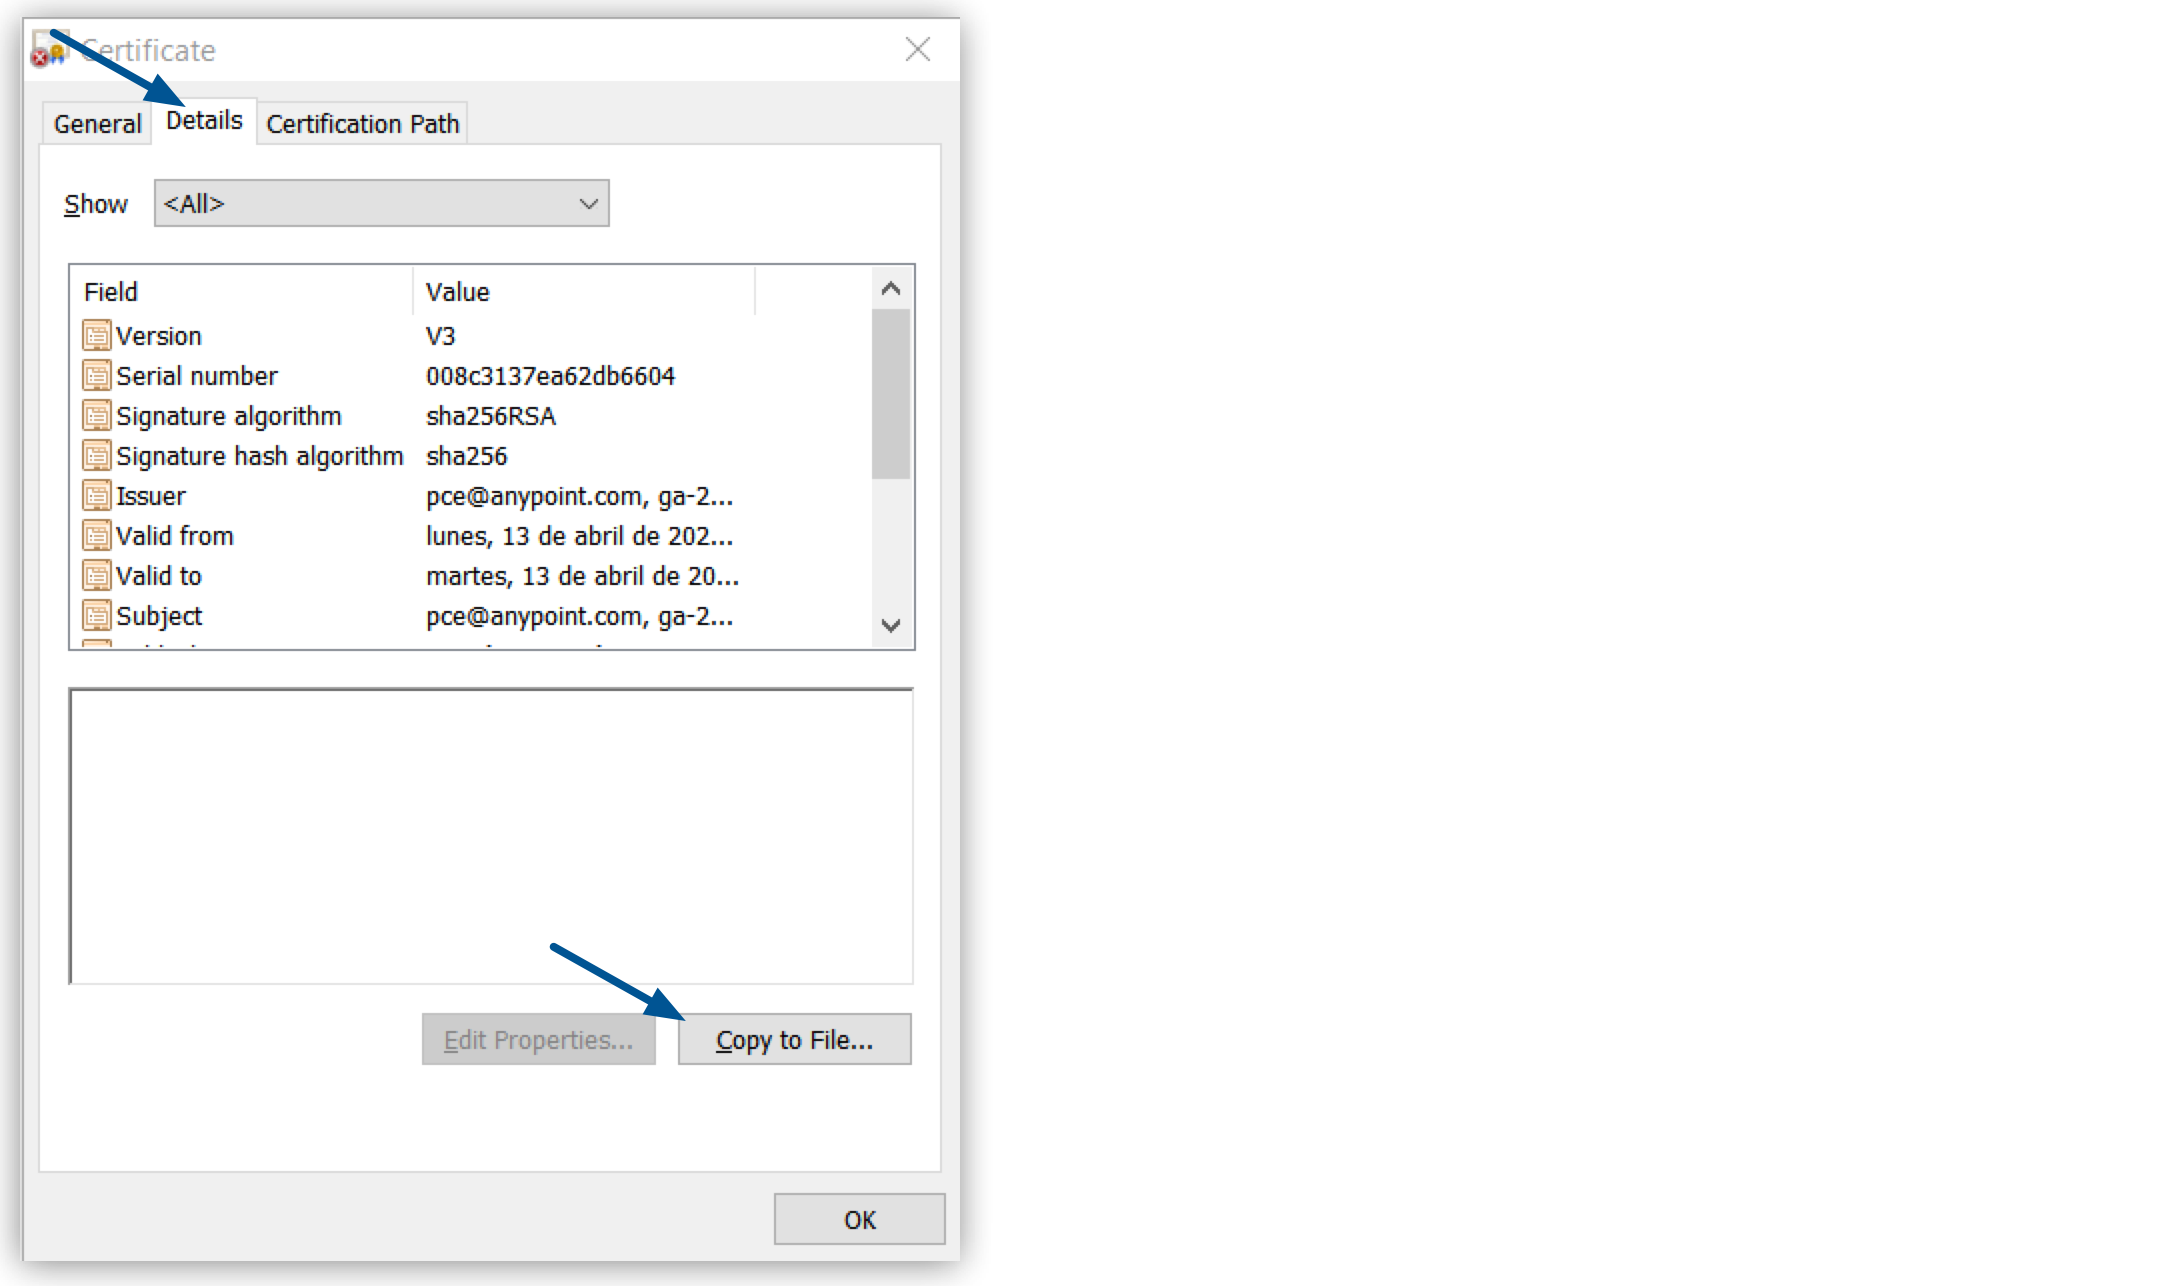
In the Certificate UI, navigate to the Details tab and select Copy to File….
-
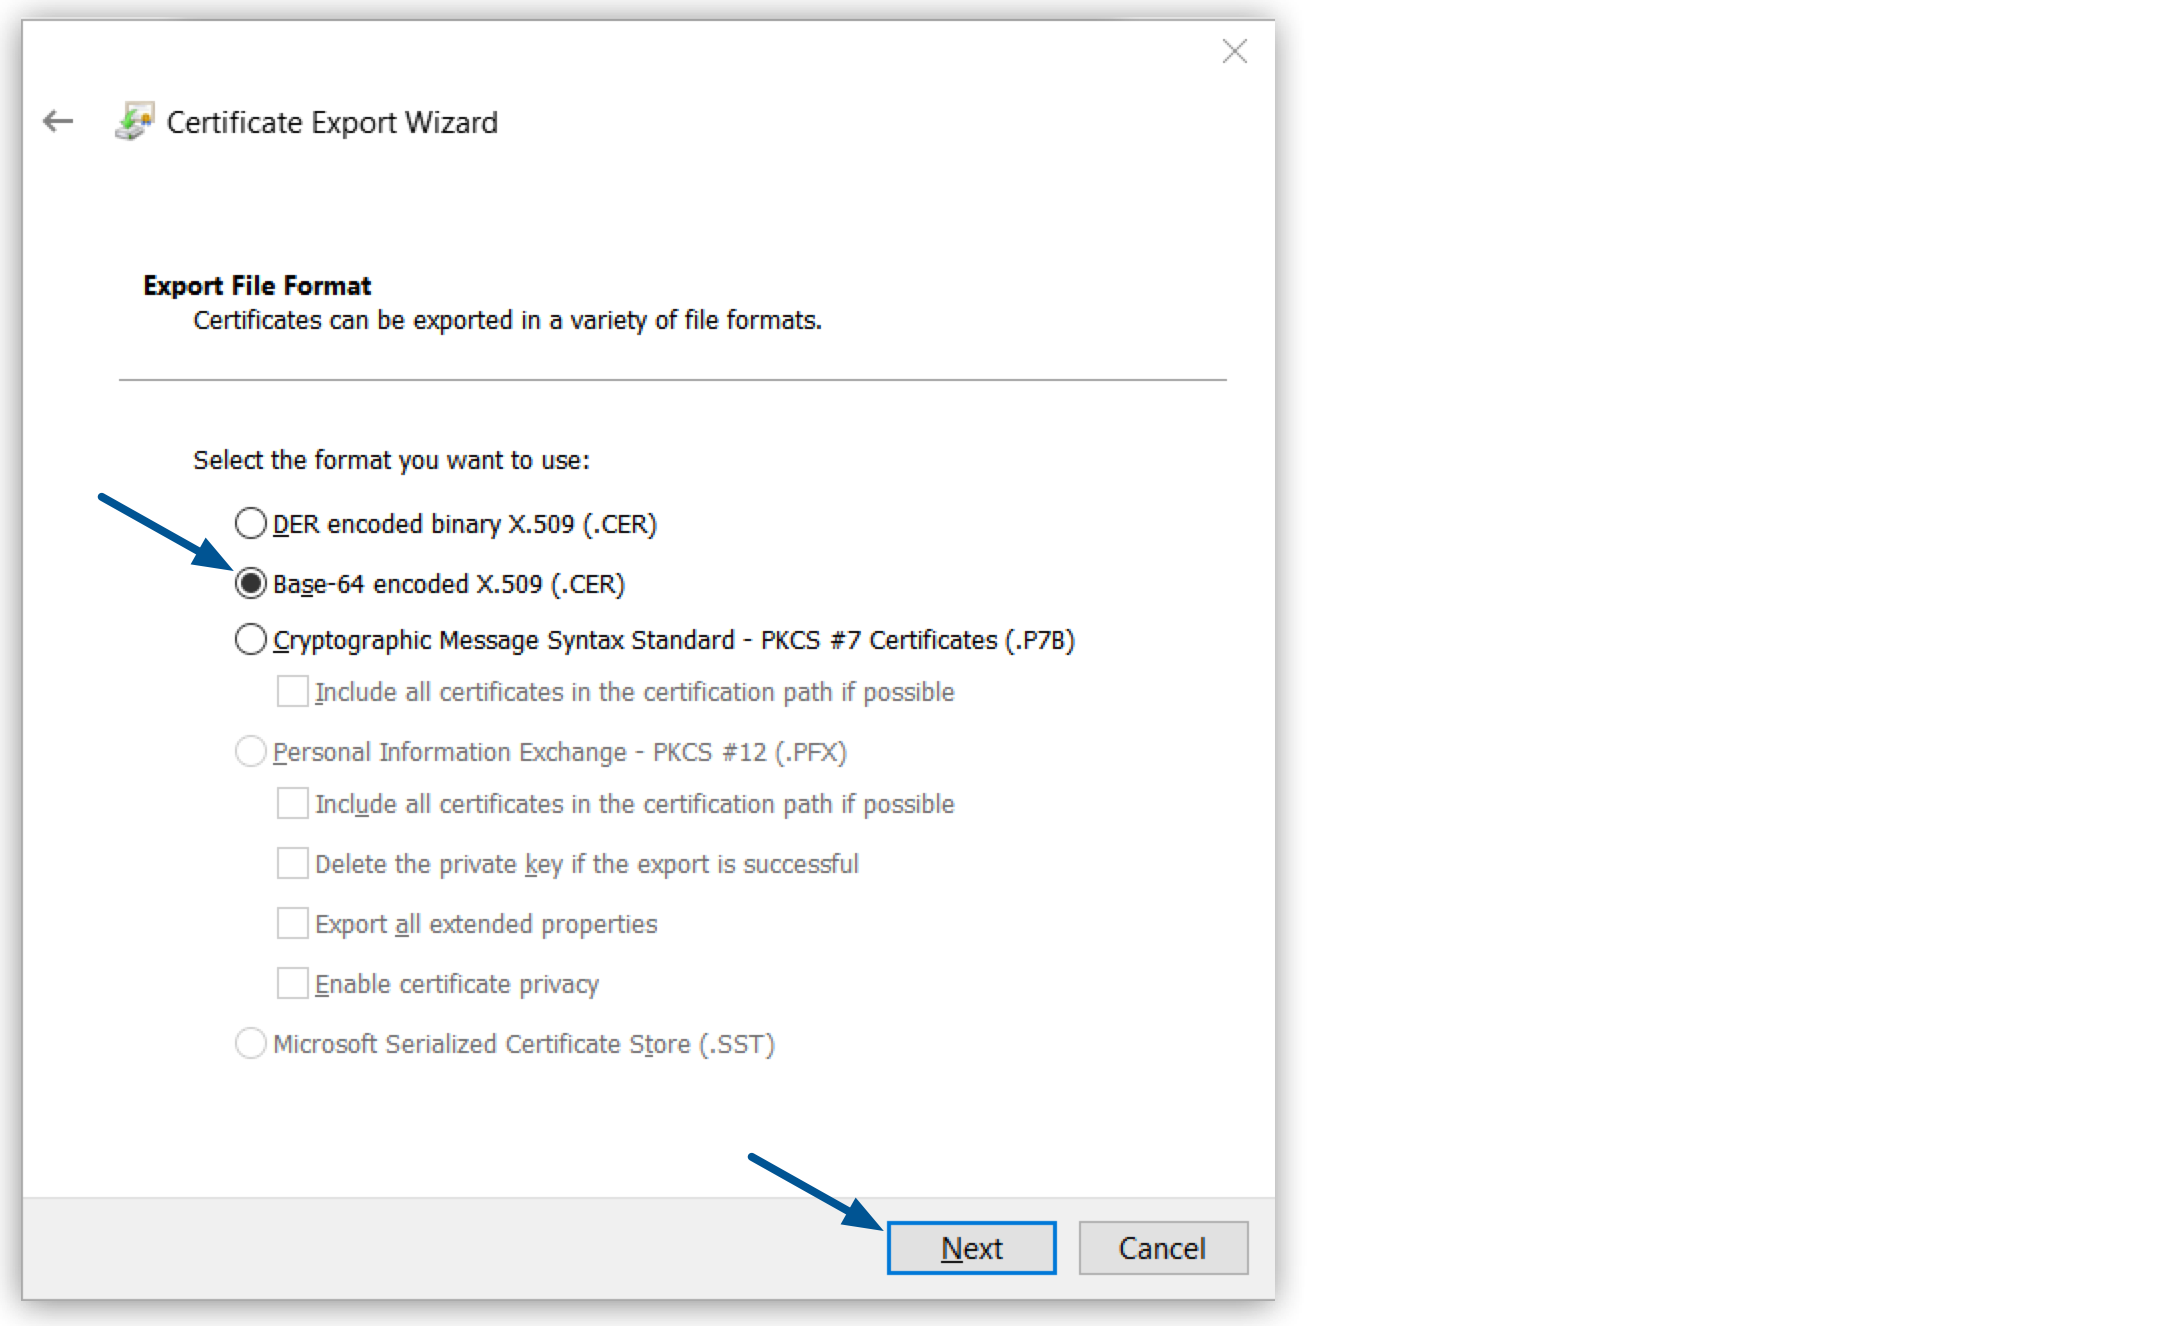
In the Certificate Export Wizard select Base-64 encoded X.509 (.CER), and click Next.
-
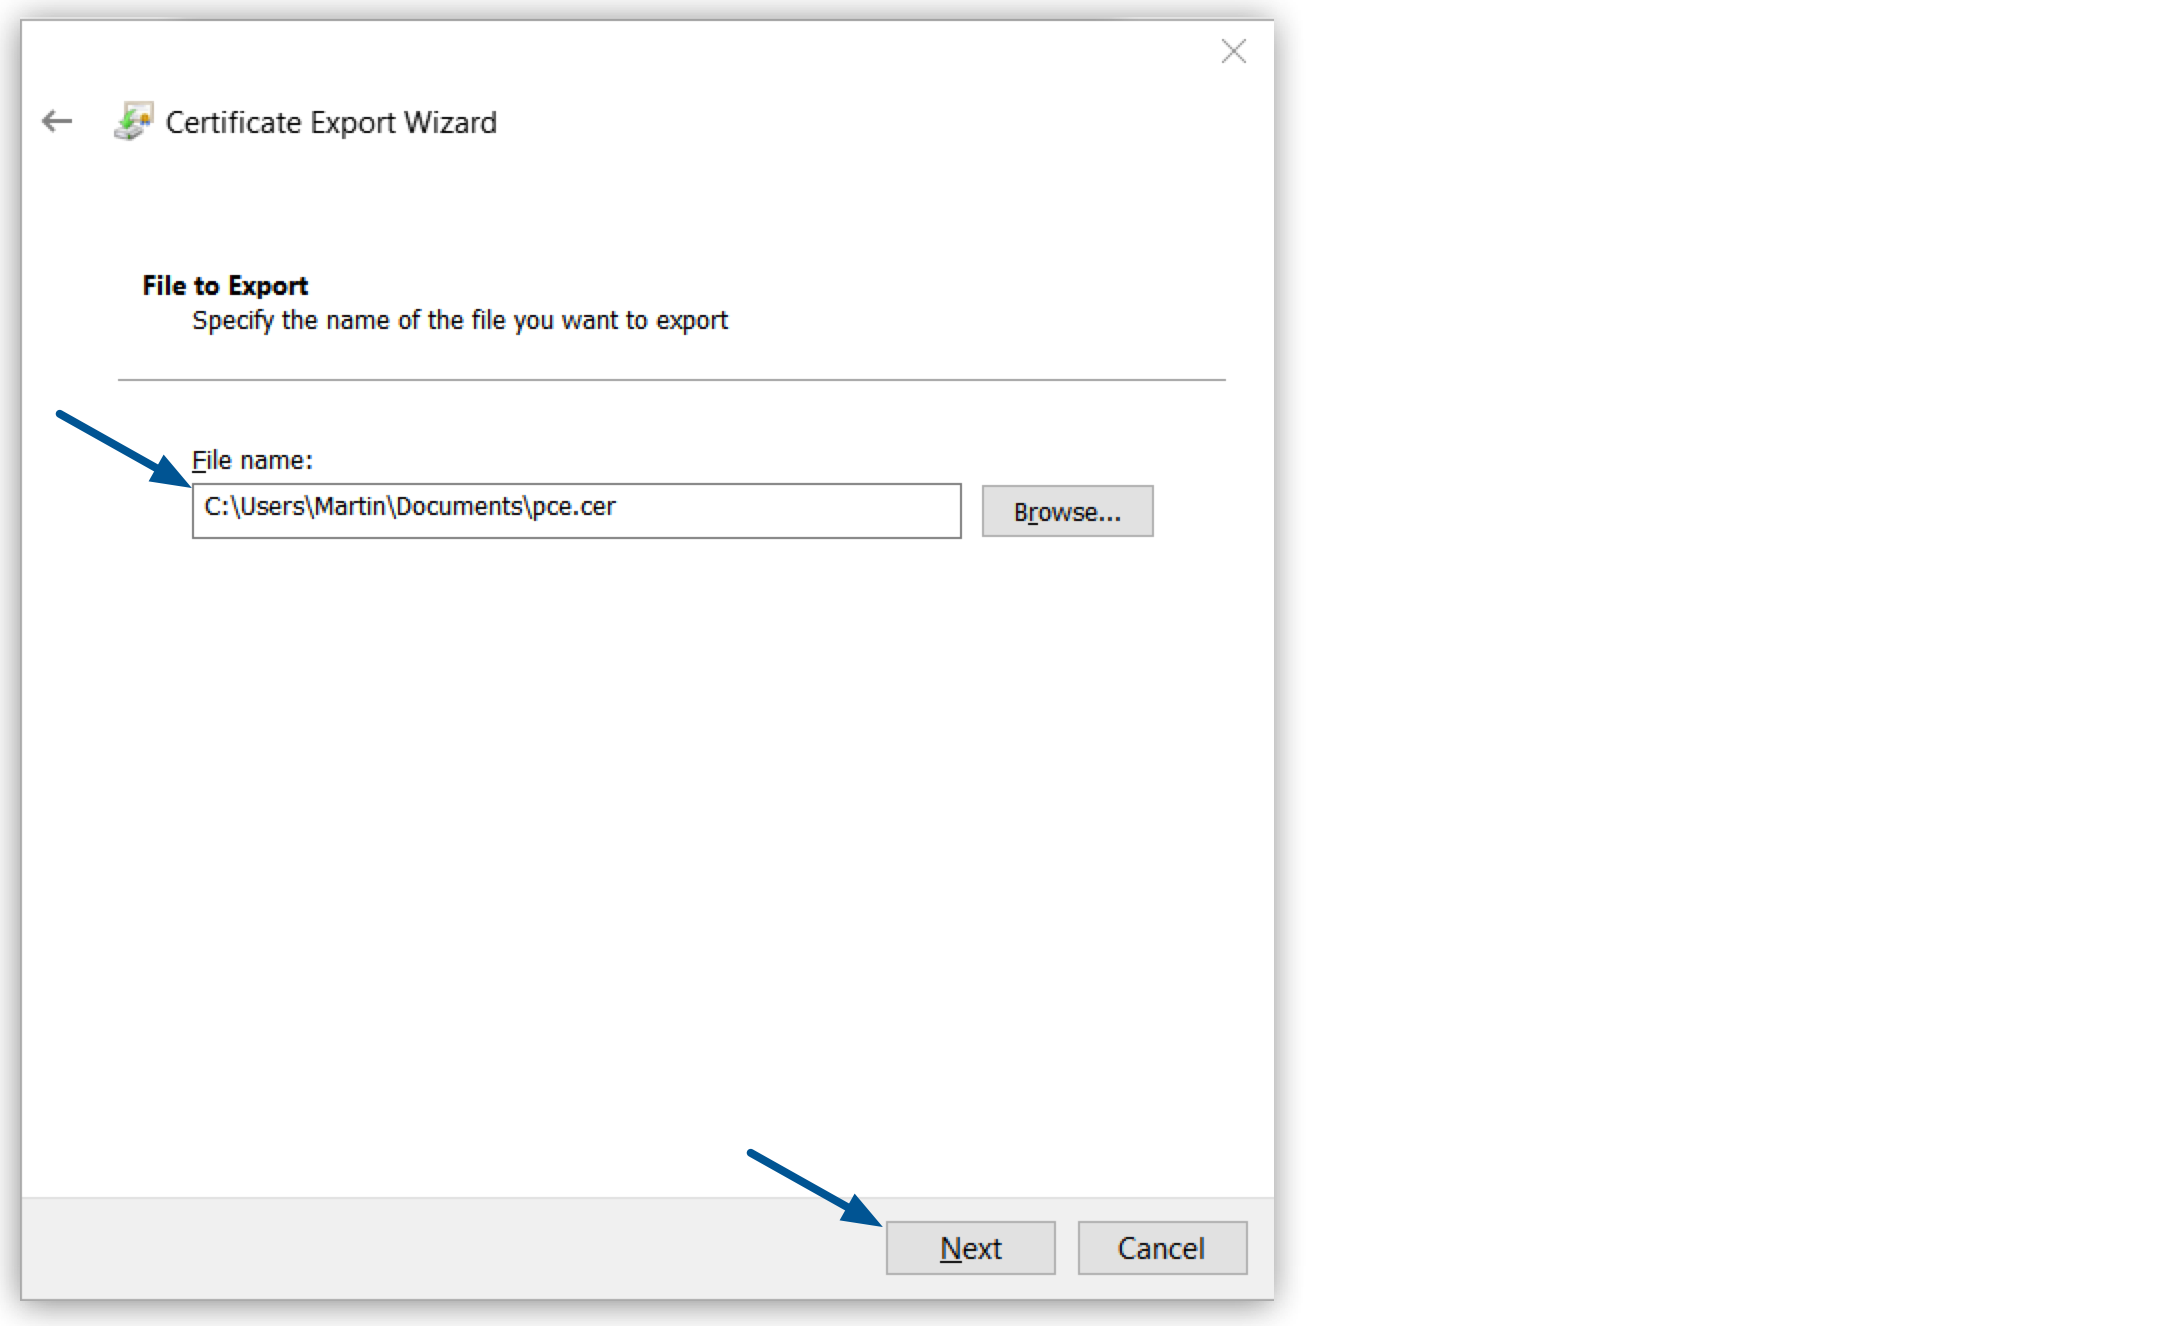
Select a destination folder in your computer and click Finish.
-
Navigate to your exported
.cerfile, double-click it, and select Install Certificate….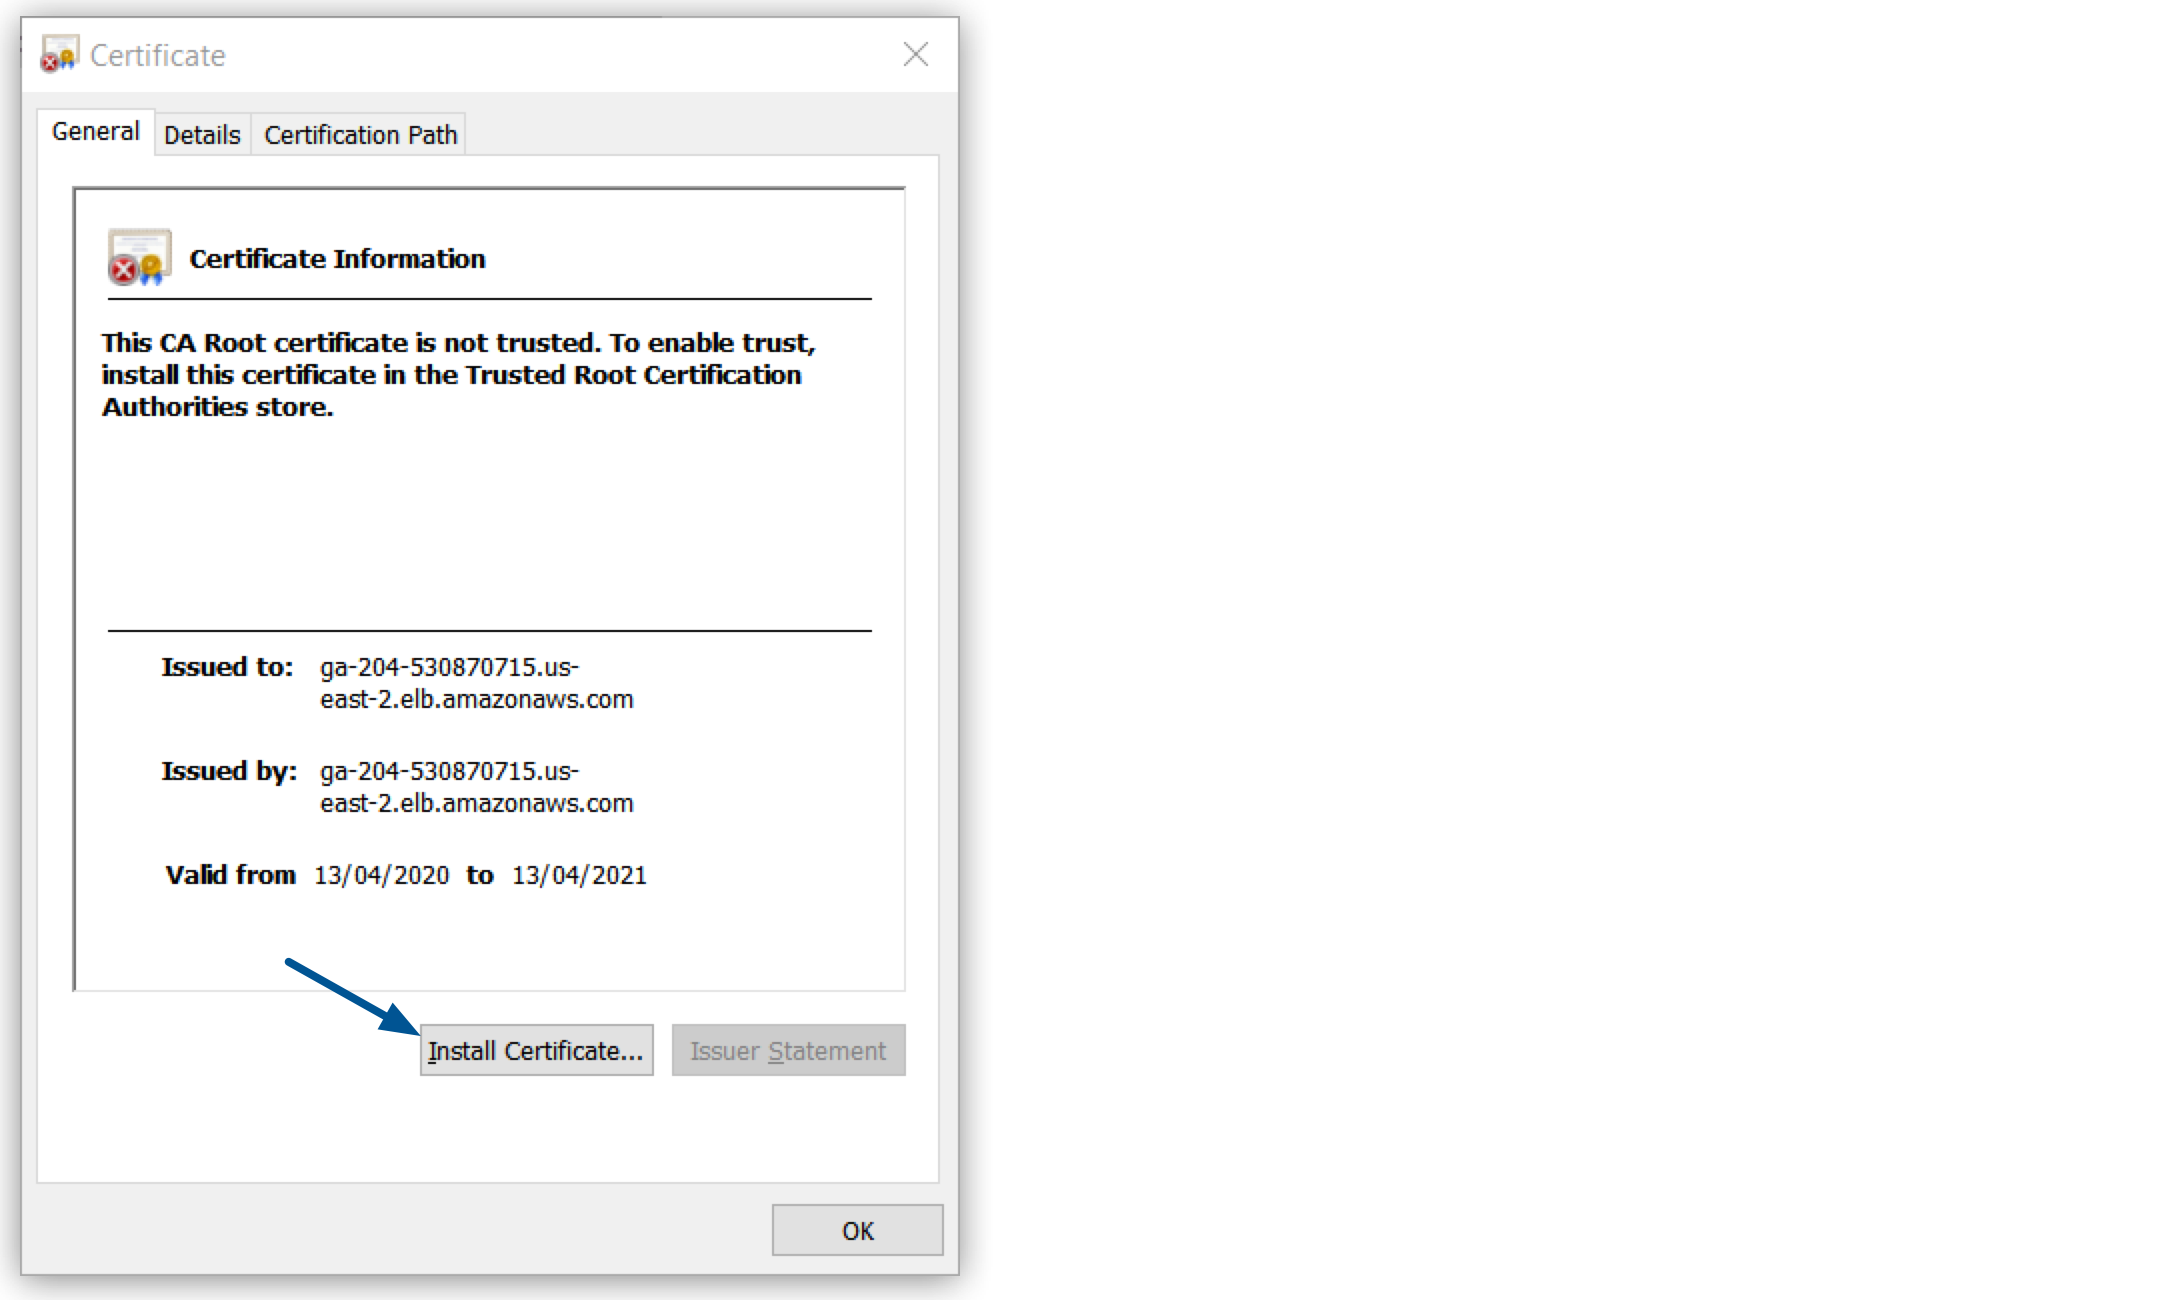
-
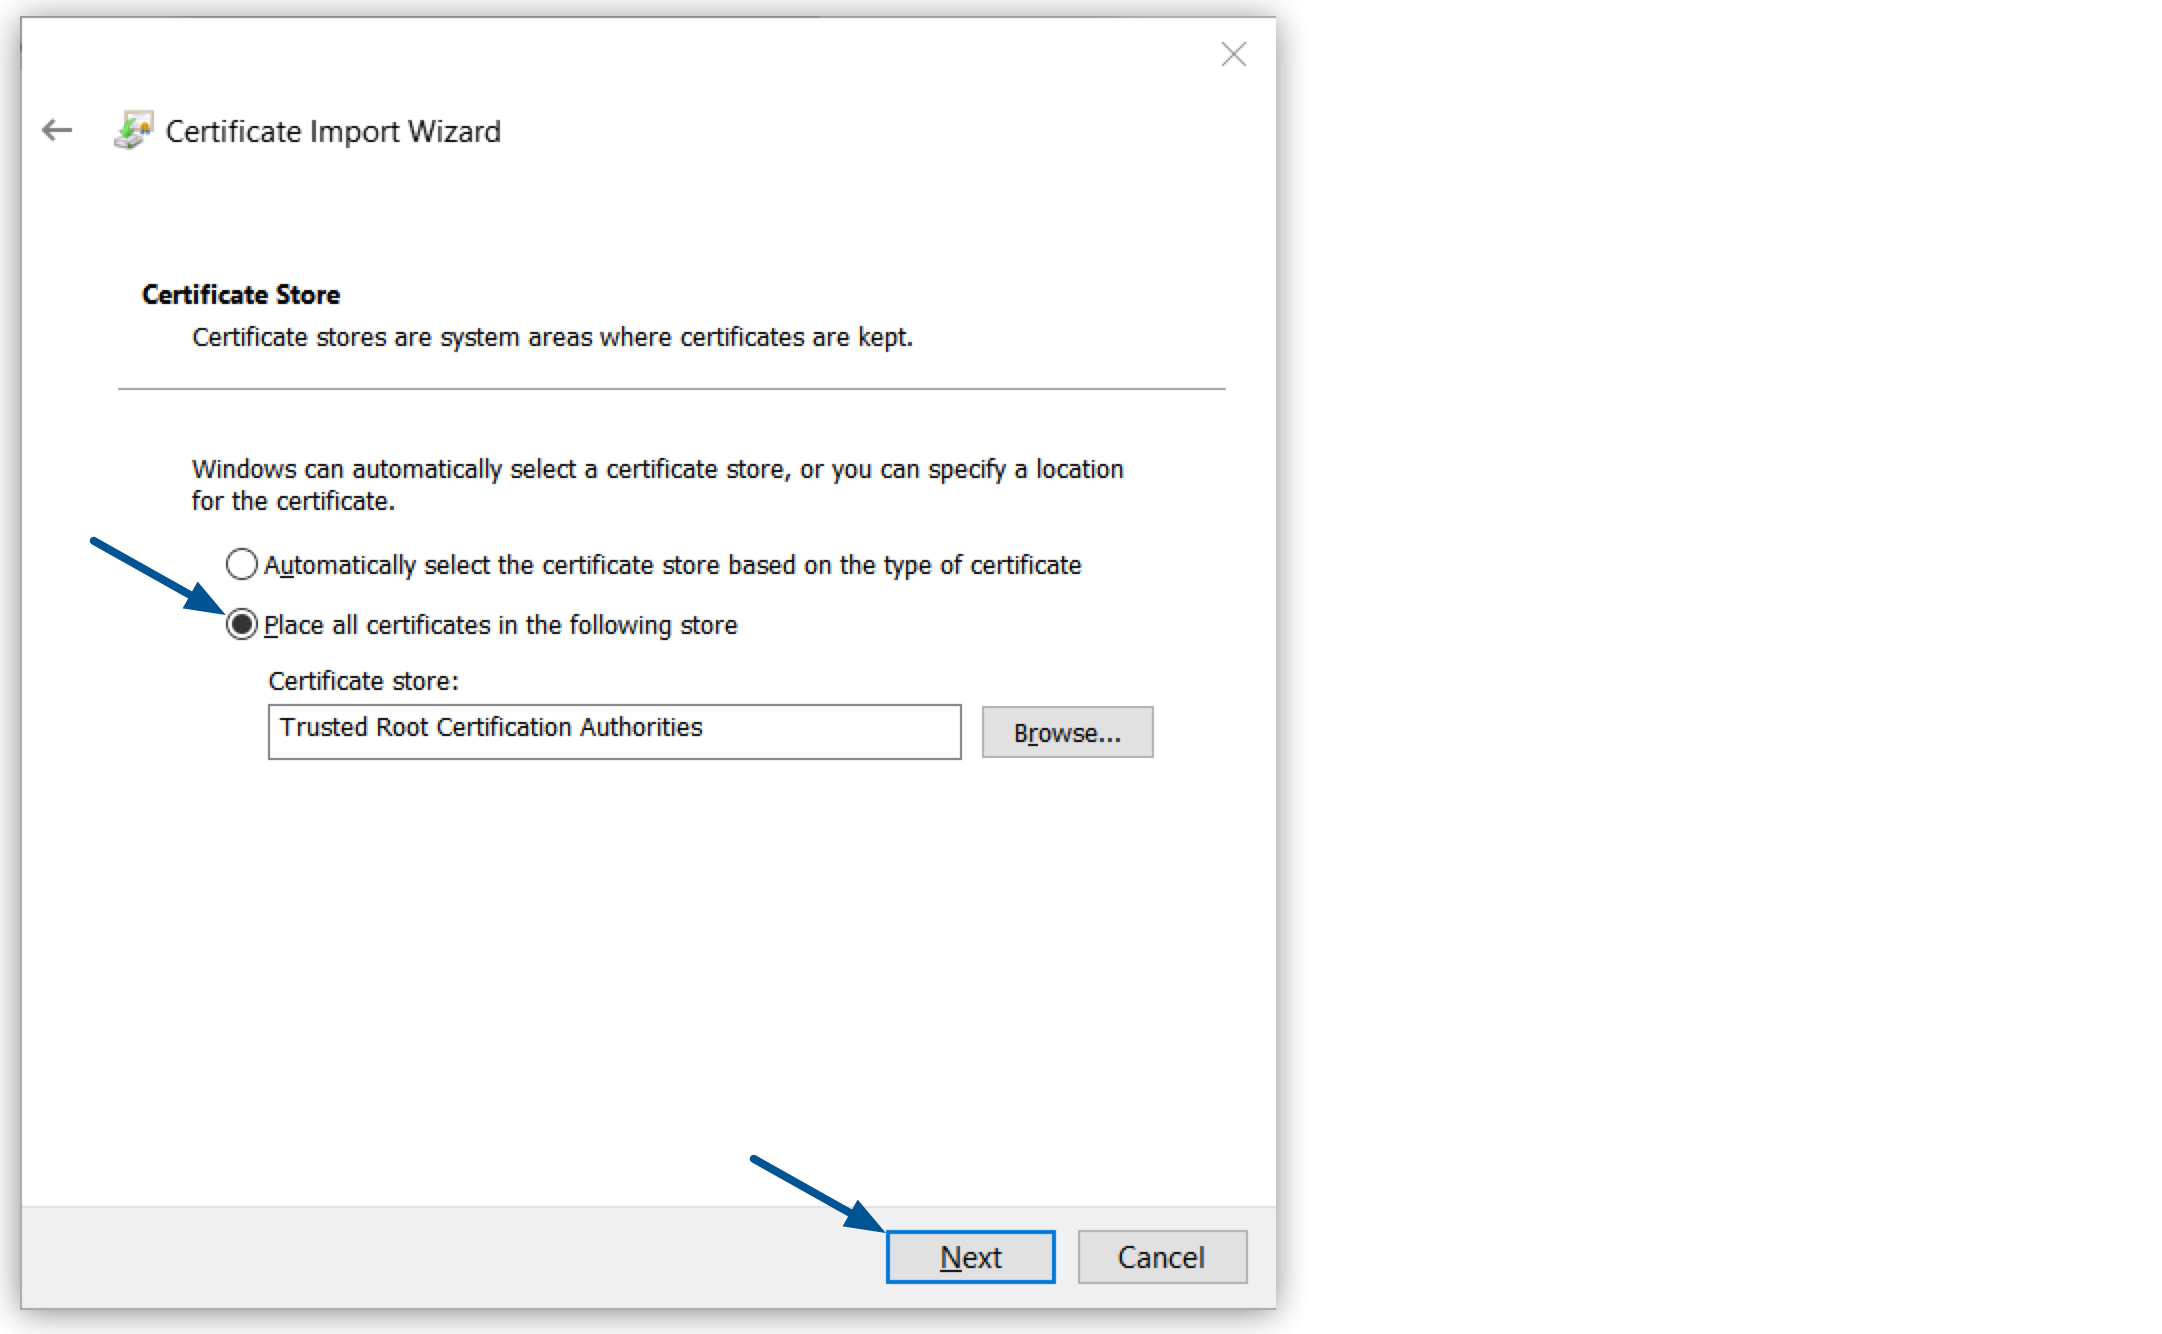
In the Certificate Import Wizard, select Place all certificates in the following store and type Trusted Root Certification Authorities.
-
Select Next and then Finish.
-
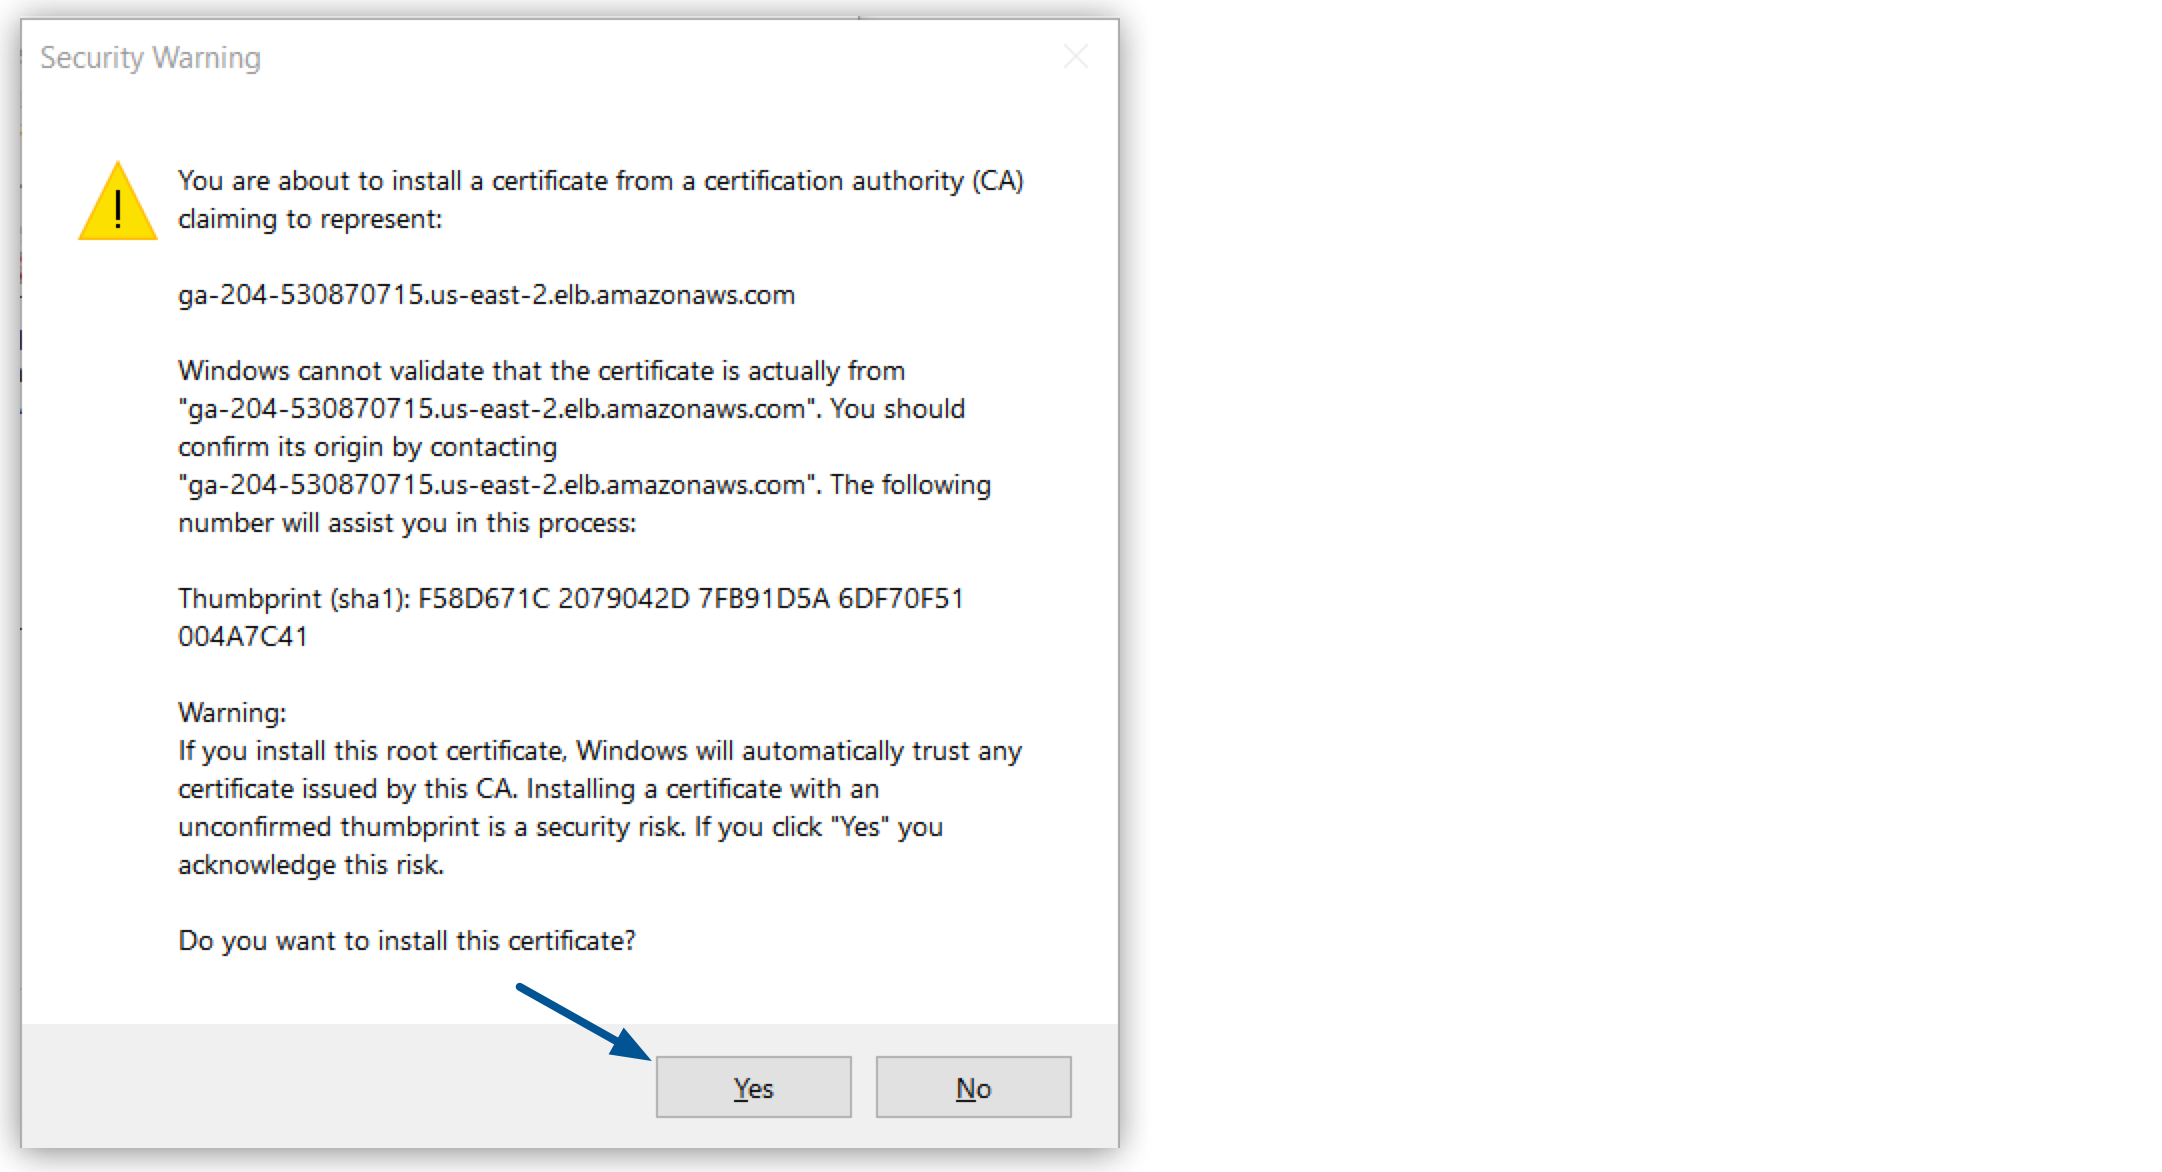
Select Yes when the security warning asks for confirmation to install the certificate.
-
Add your
.cerfile certificate to your Studio embedded Java cacerts keystore:Bin\keytool -import -trustcacerts -keystore [cacerts_path] \ (1) - storepass [pass] \ (2) - alias [alias] \ (3) -import -file [certificate_name].cer (4)1 cacerts_pathis your Anypoint Studio artifact.
For example:AnypointStudio.app/Contents/Eclipse/plugins/org.mule.tooling.jdk.macosx.x86_64_1.0.0.202002191445/Contents/Home/jre/lib/security/cacerts2 passis your certificate’s password.
If you don’t provide a password for this certificate, the keytool generates the passwordchangeitby default.3 aliasis the name you give to your certificate4 certificate nameis the path to the generated .pem file you saved in the previous step. -
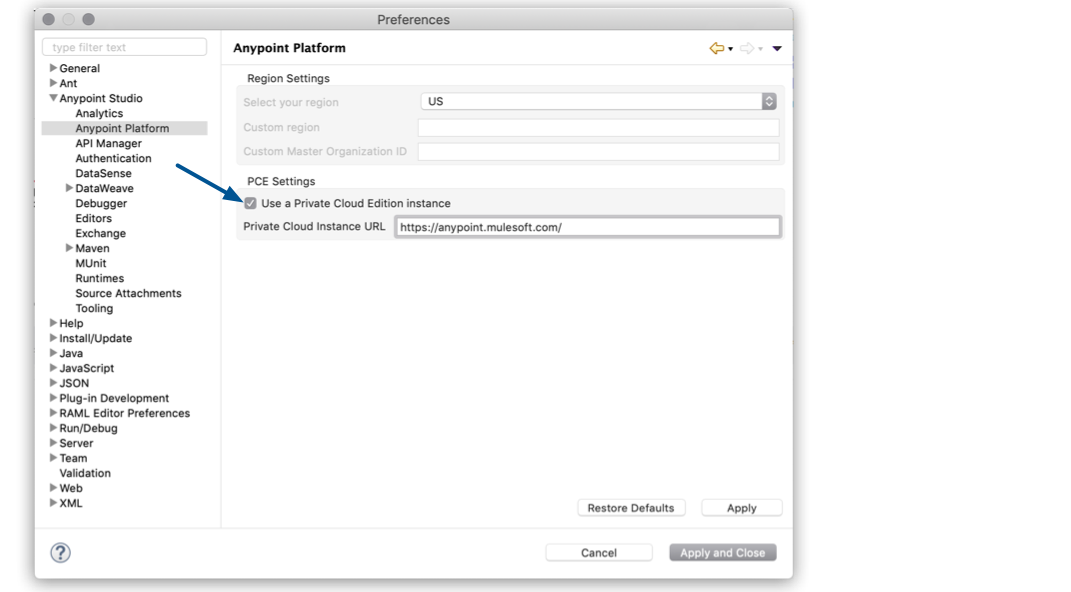
In Studio, open the preferences view.
Navigate to Window > Preferences…. -
Type the URL of your PCE installation in the Private Cloud Instance URL field.
-
Select Apply and Close.
-
Restart Studio.
Configure your PCE User Login
The first time you configure your user’s login, Studio asks you to confirm your PCE certificate:
-
Open the preferences view.
Navigate to Anypoint Studio > Preferences…. -
Expand Anypoint Studio in the left navigation bar, select Authentication > Add.
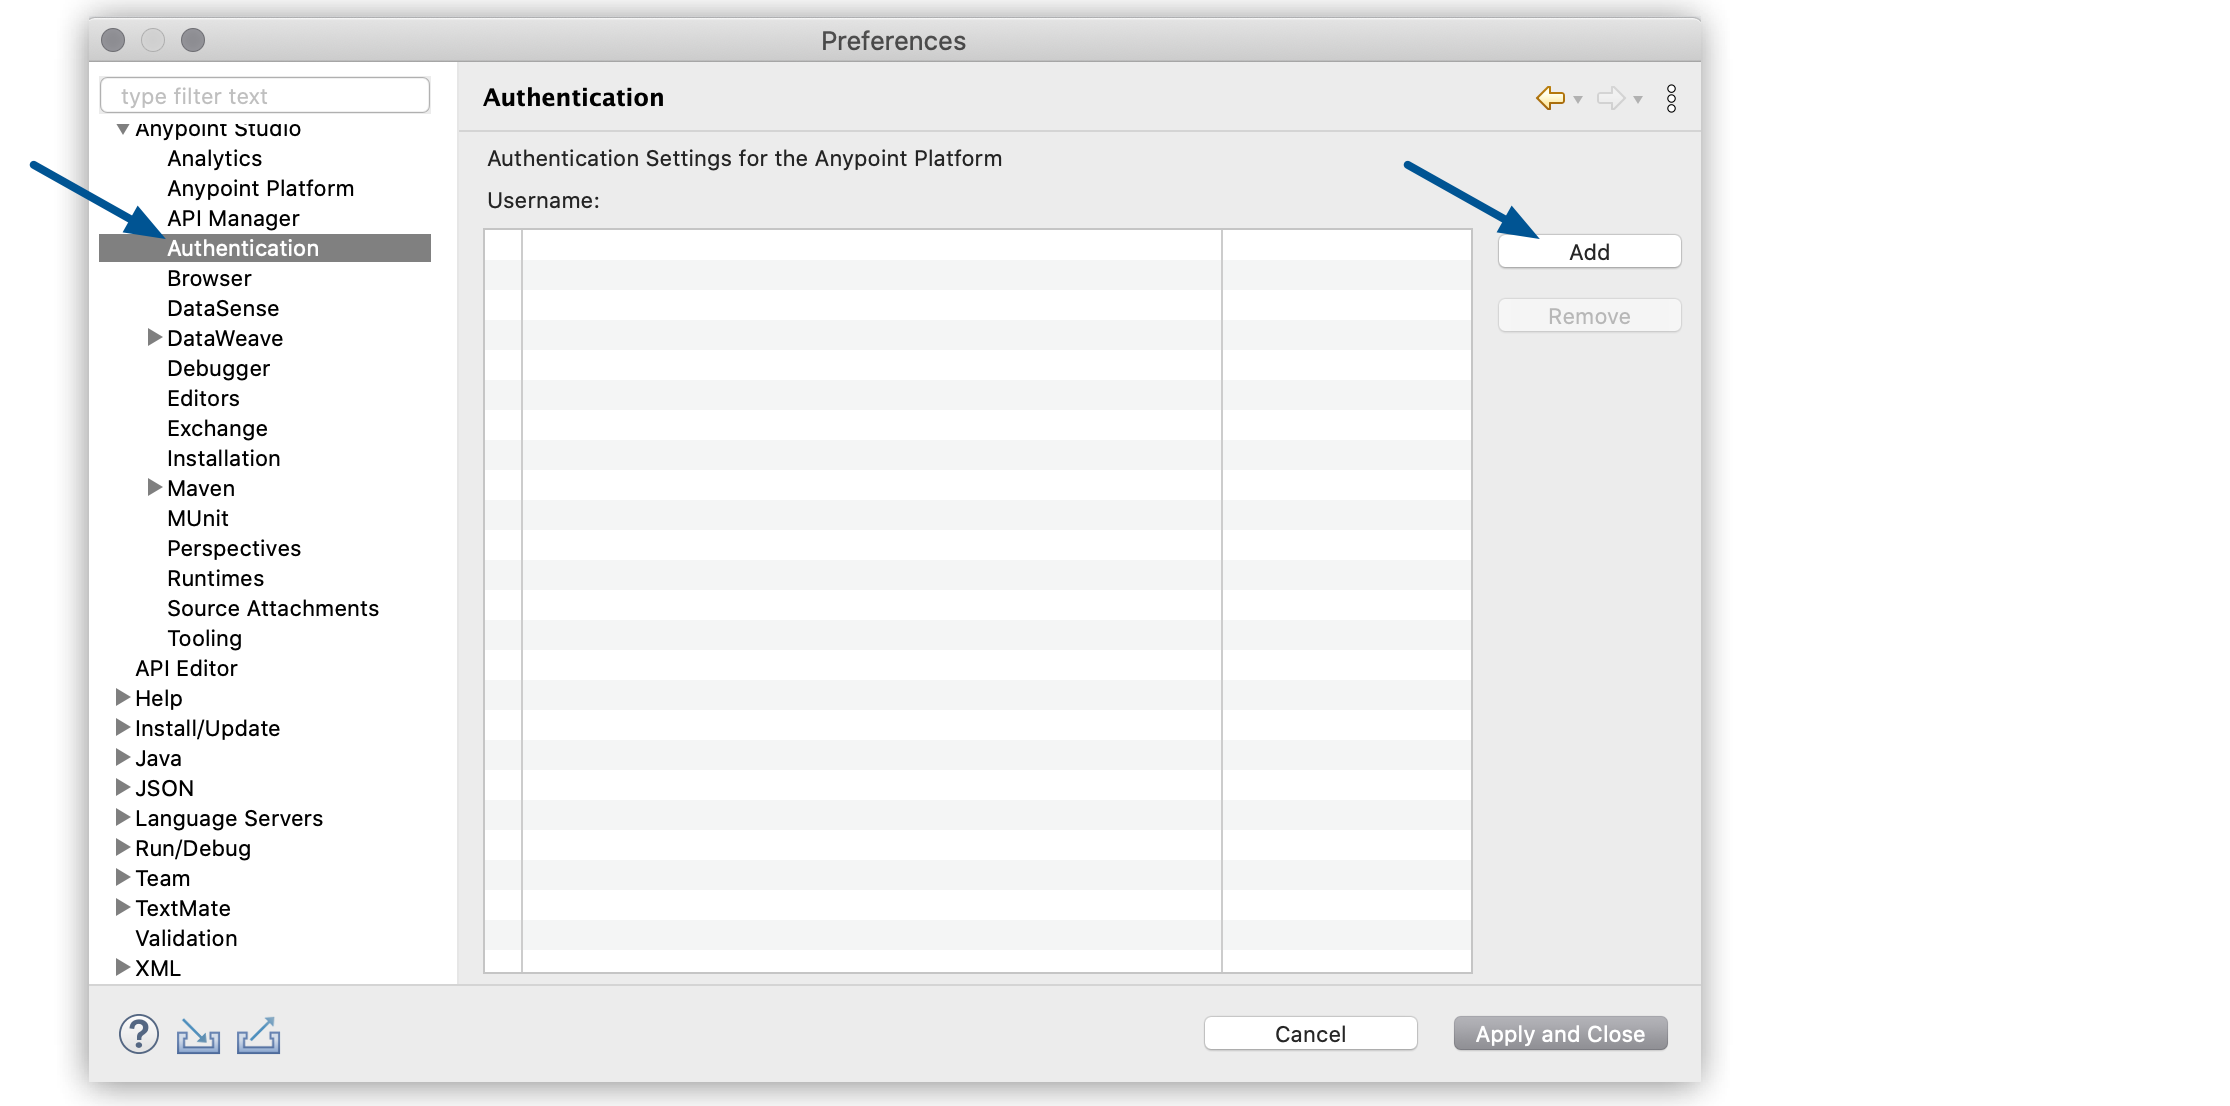
-
Add your PCE credentials and sign-in.
-
Select Apply and Close.


