Propagate Metadata to Other Flows
Studio enables you to propagate metadata in your source flow to other, target flows referenced within your application. Depending on metadata already in the target flow, you might need to configure the specific metadata to propagate from the source flow.
Propagate Metadata to a Flow Without Custom Metadata
When you add a Flow Reference component to your source flow and reference a target flow with no custom metadata configured, Studio automatically propagates the metadata in your source flow as custom metadata in your target flow.
-
In the taskbar at the top of the Anypoint Studio display, select File > New > Mule Project.
-
Type a name for your new project and select Finish.
-
Drag two flow components to your empty canvas and name them
flow-1andflow-2: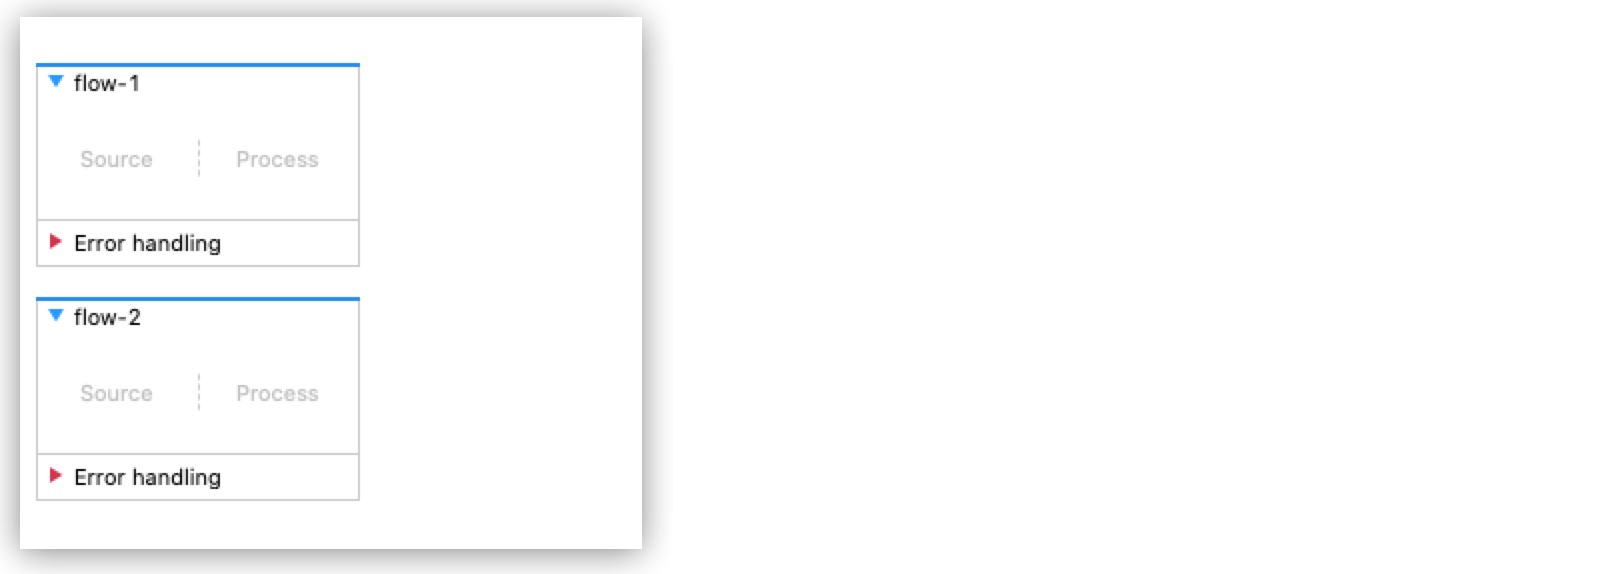
-
Drag a Set Payload component to
flow-1and configure the payload:{ "value": { "ID": 1, "departureDate": "2016/12/20", "emptySeats": 200, "plane": { "type": "Boeing 747", "totalSeats": 400 } } }JSON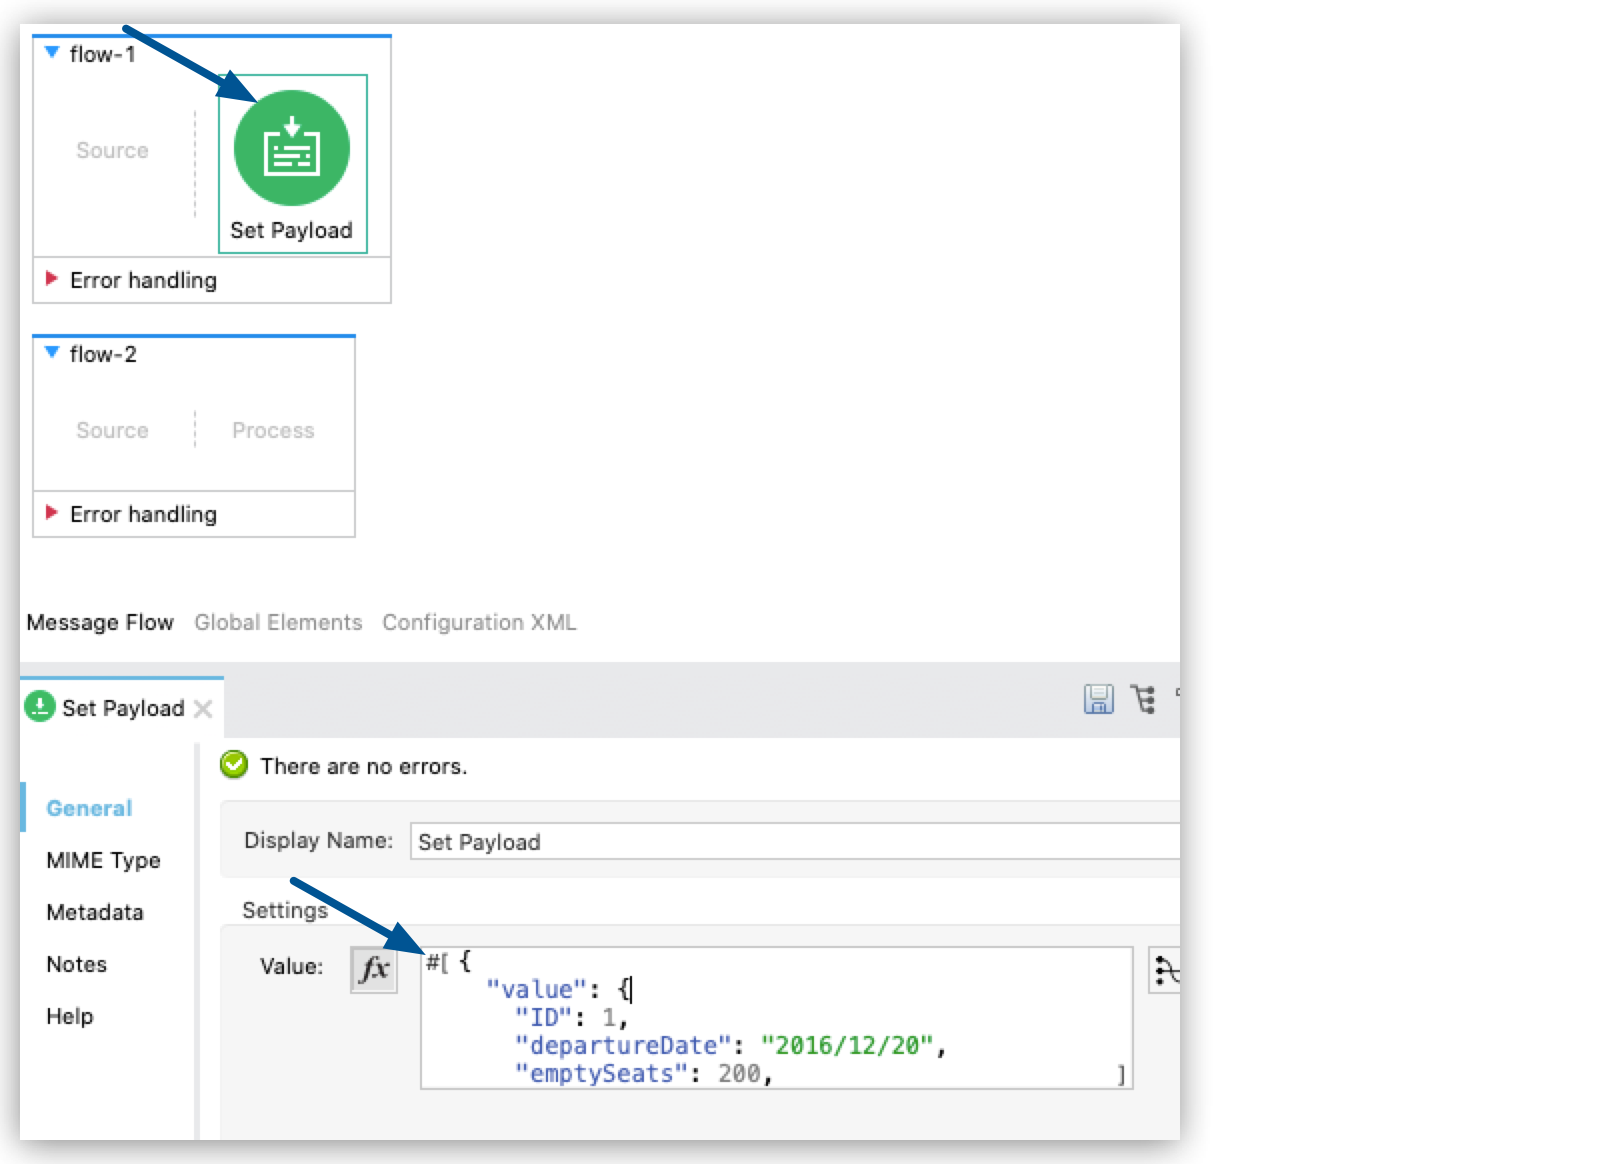
-
Drag a Logger component to
flow-2and configure it to logpayload: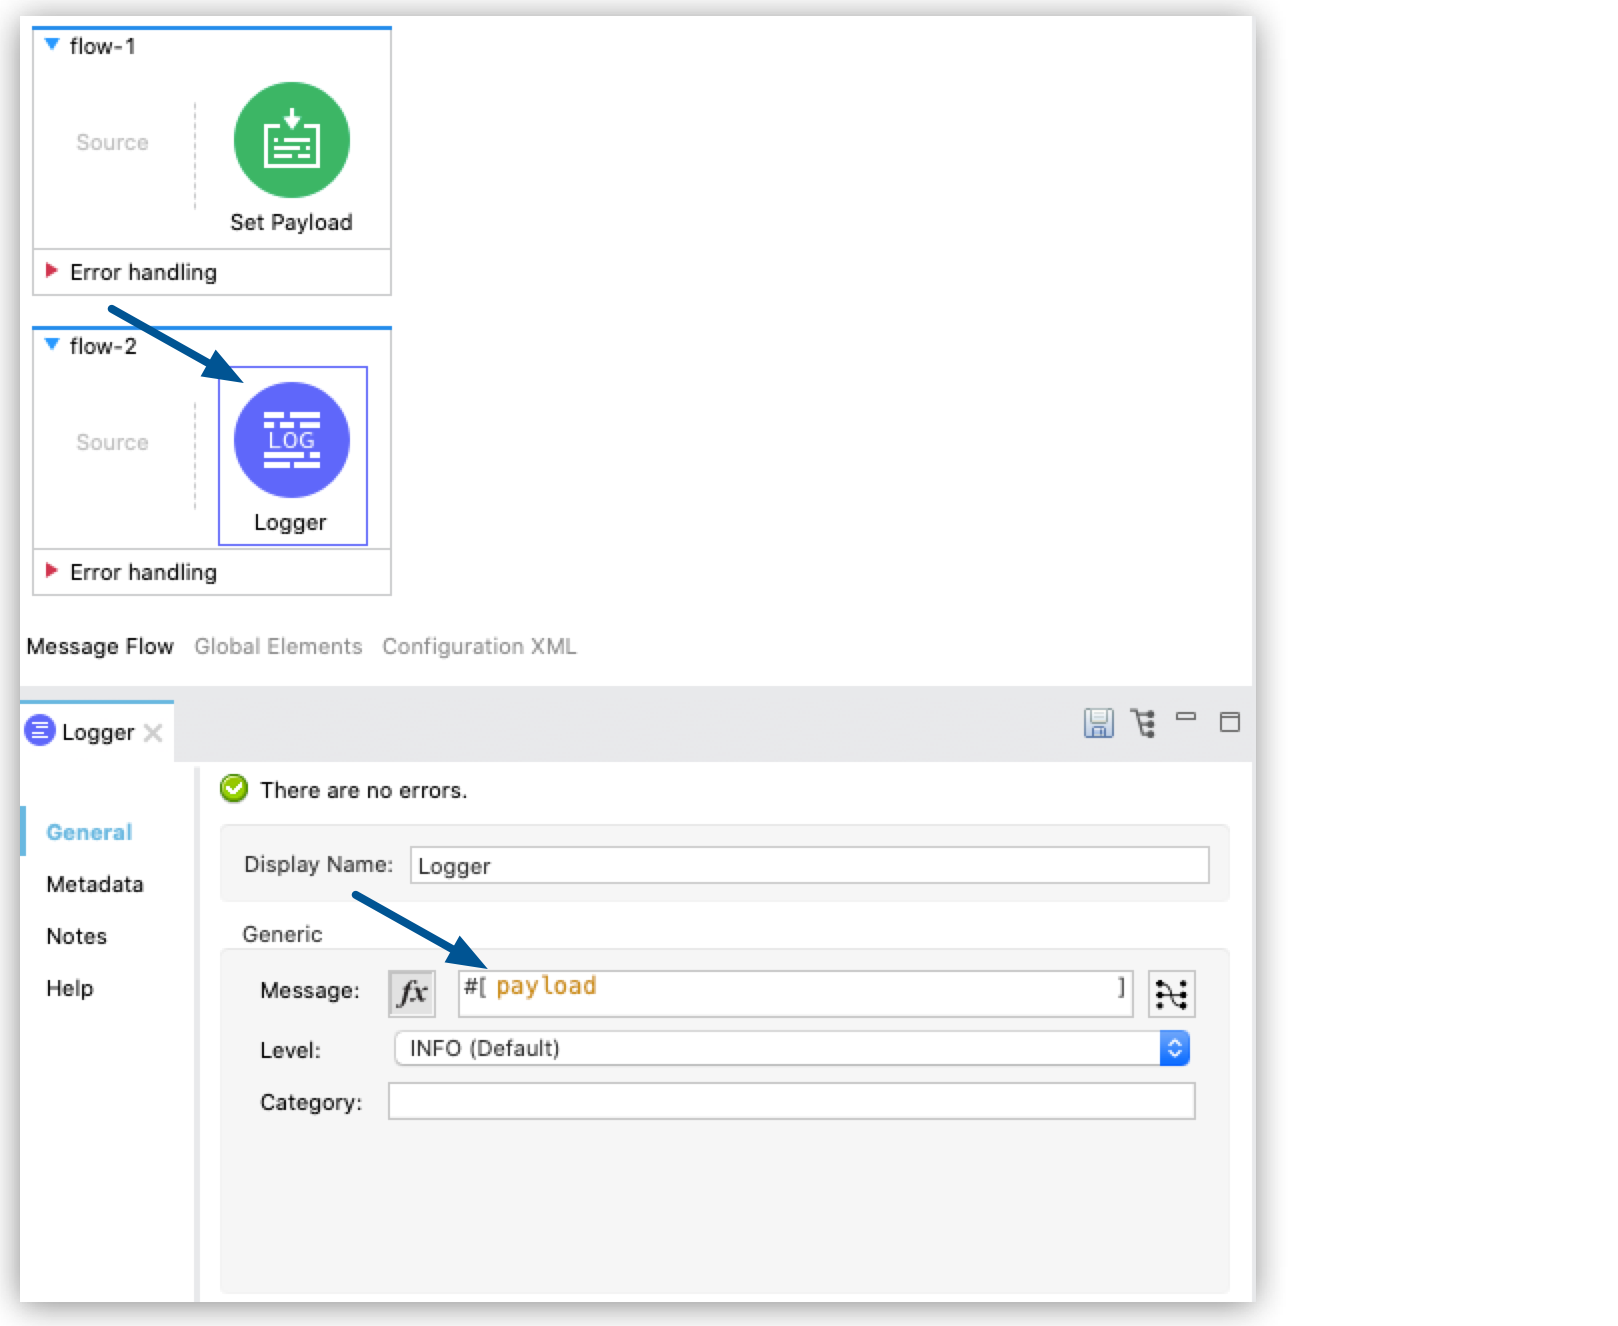
-
Drag a Flow Reference component to the end of
flow-1and configure it to reference `flow-2`: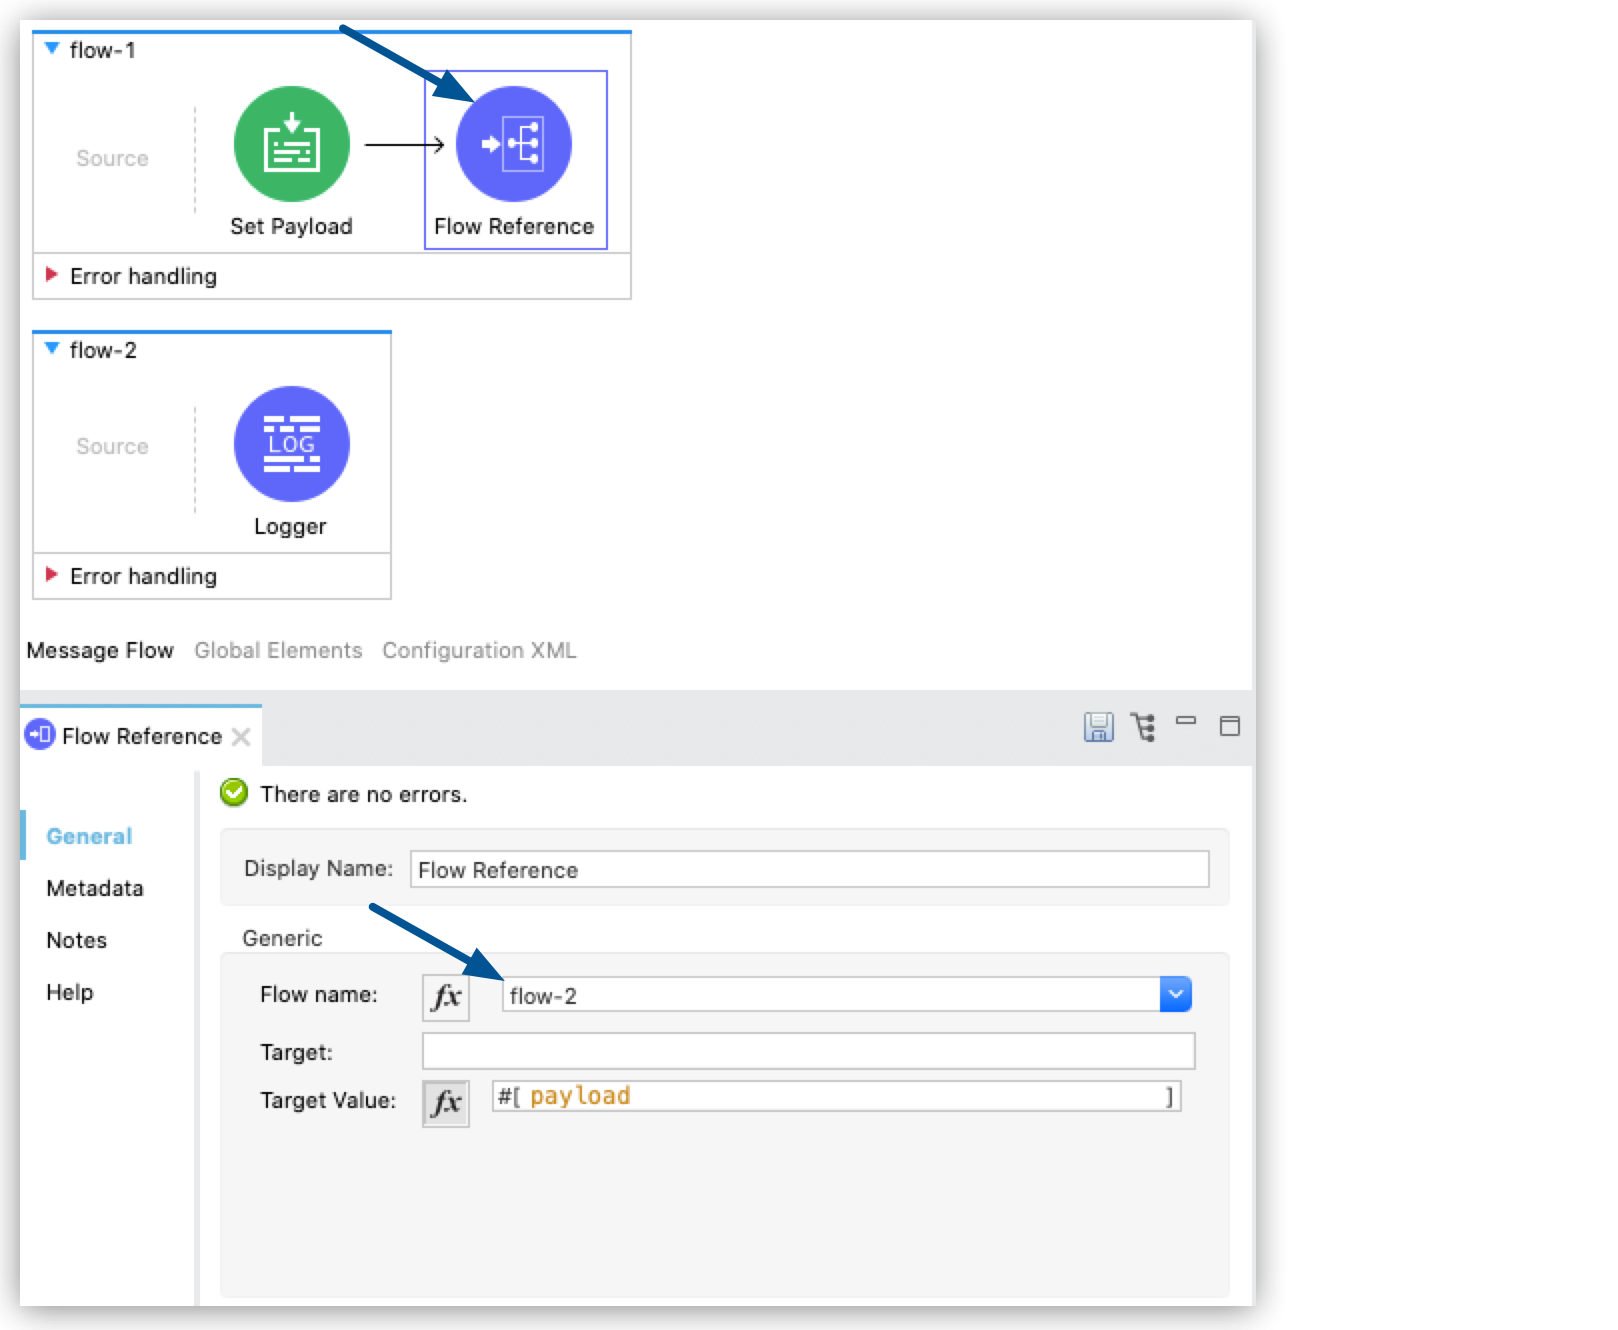
-
Note that the metadata tab in
flow-2is now populated with autogenerated metadata, and the input tab in the metadata explorer reflects the payload format that the Set Payload component determines inflow-1: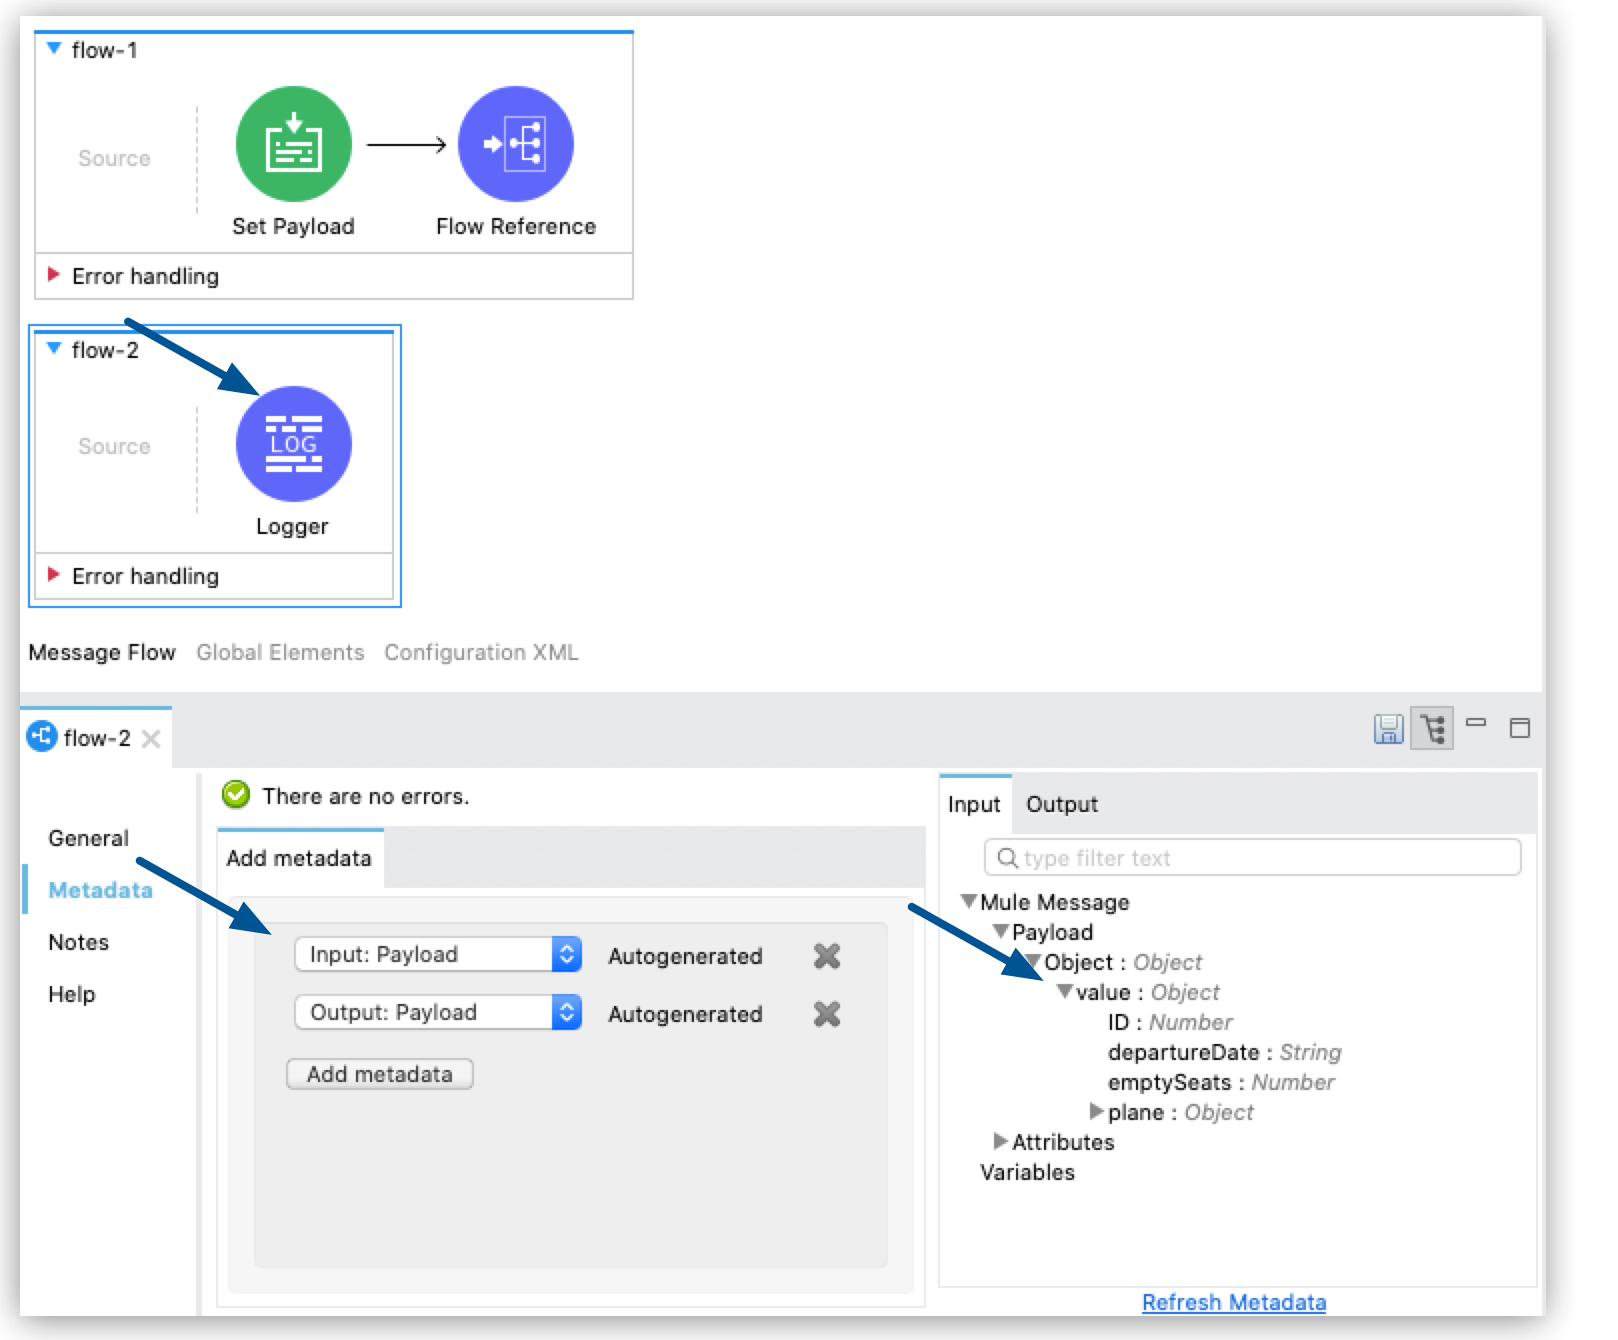
Propagate Metadata When Extracting an Operation From Your Flow to a New Flow
When you extract an operation from your source flow to propagate to a new target flow or subflow, Studio enables you to configure the metadata that you want to propagate to the newly created flow:
-
In the taskbar at the top of the Anypoint Studio display, select File > New > Mule Project.
-
Type a name for your new project and select Finish.
-
Drag a flow component to your empty canvas and name it
flow-1. -
Drag a Set Payload component to
flow-1and configure the payload:{ "value": { "ID": 1, "departureDate": "2016/12/20", "emptySeats": 200, "plane": { "type": "Boeing 747", "totalSeats": 400 } } }JSON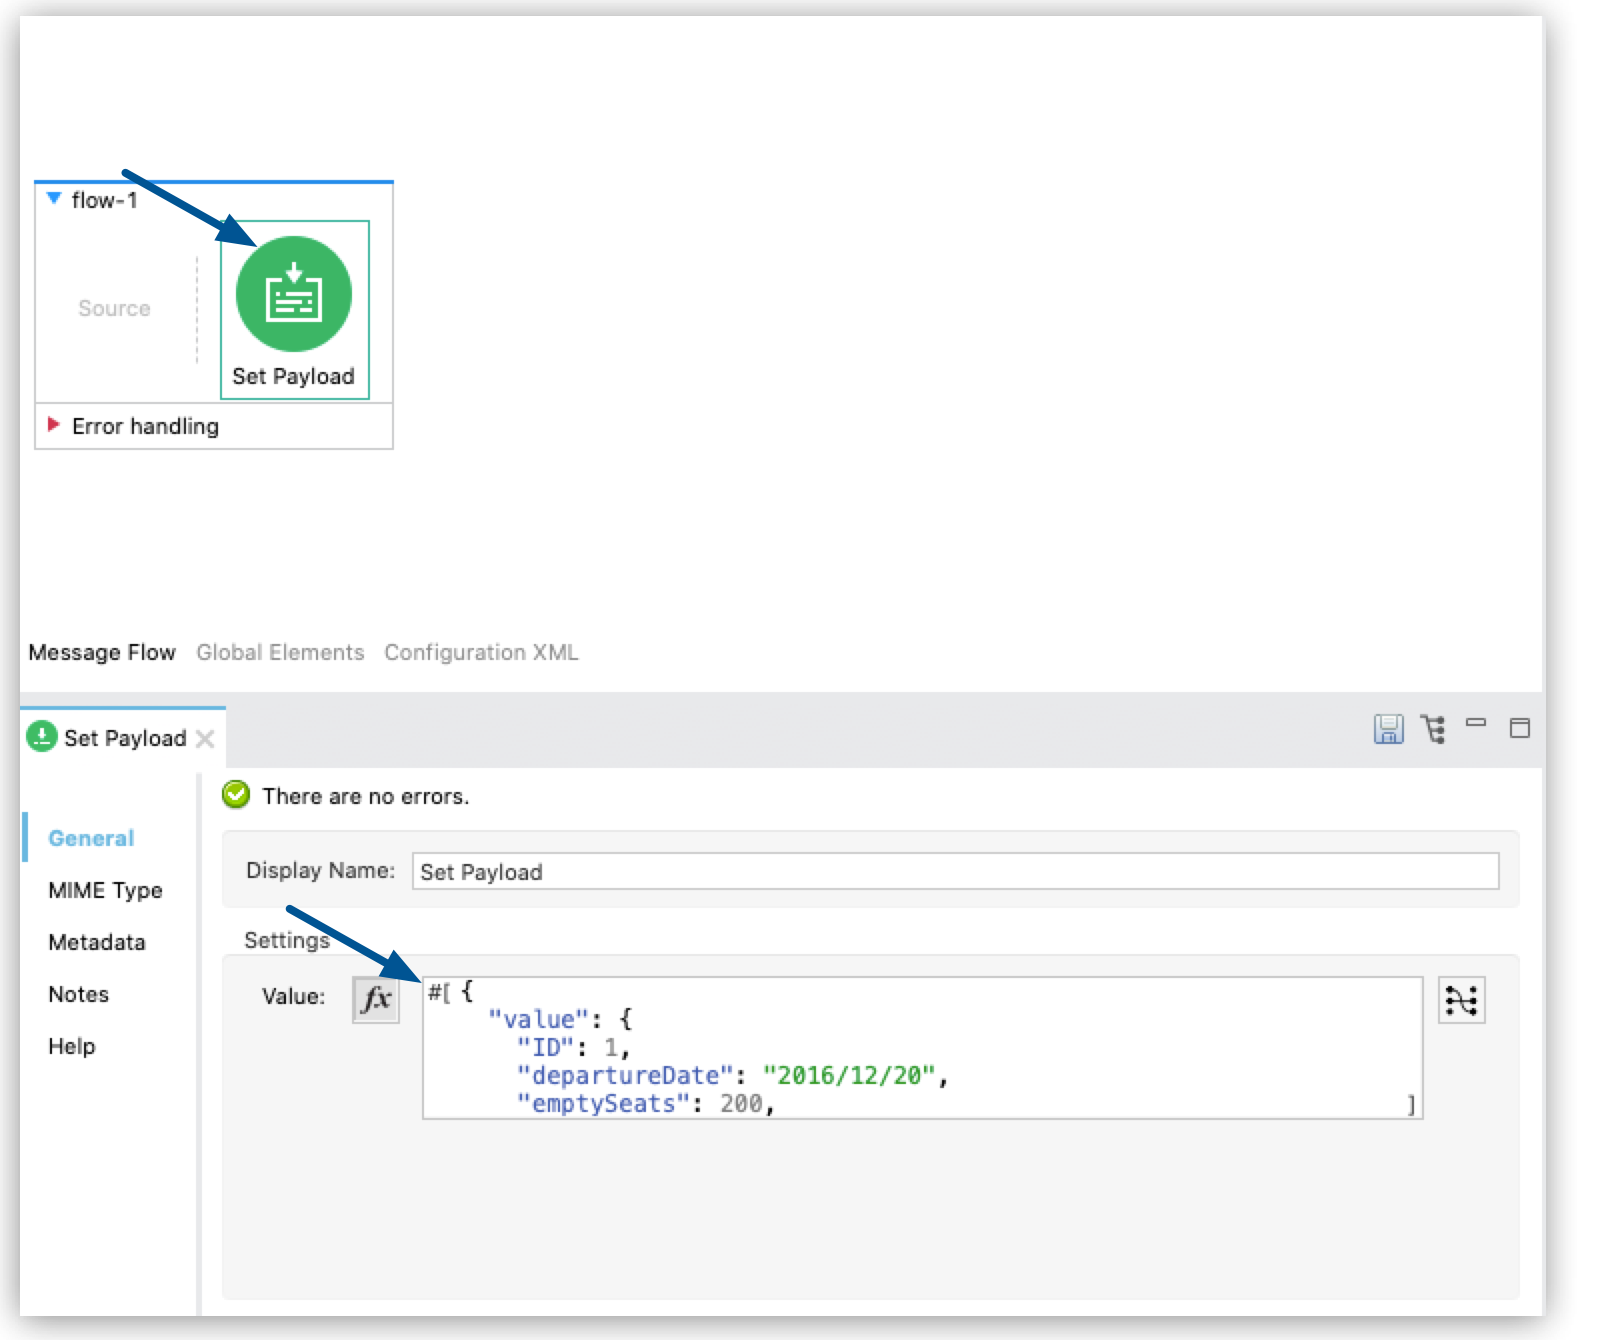
-
Drag a Logger component to the end of
flow-1and configure it to log#[payload.value.departureDate]: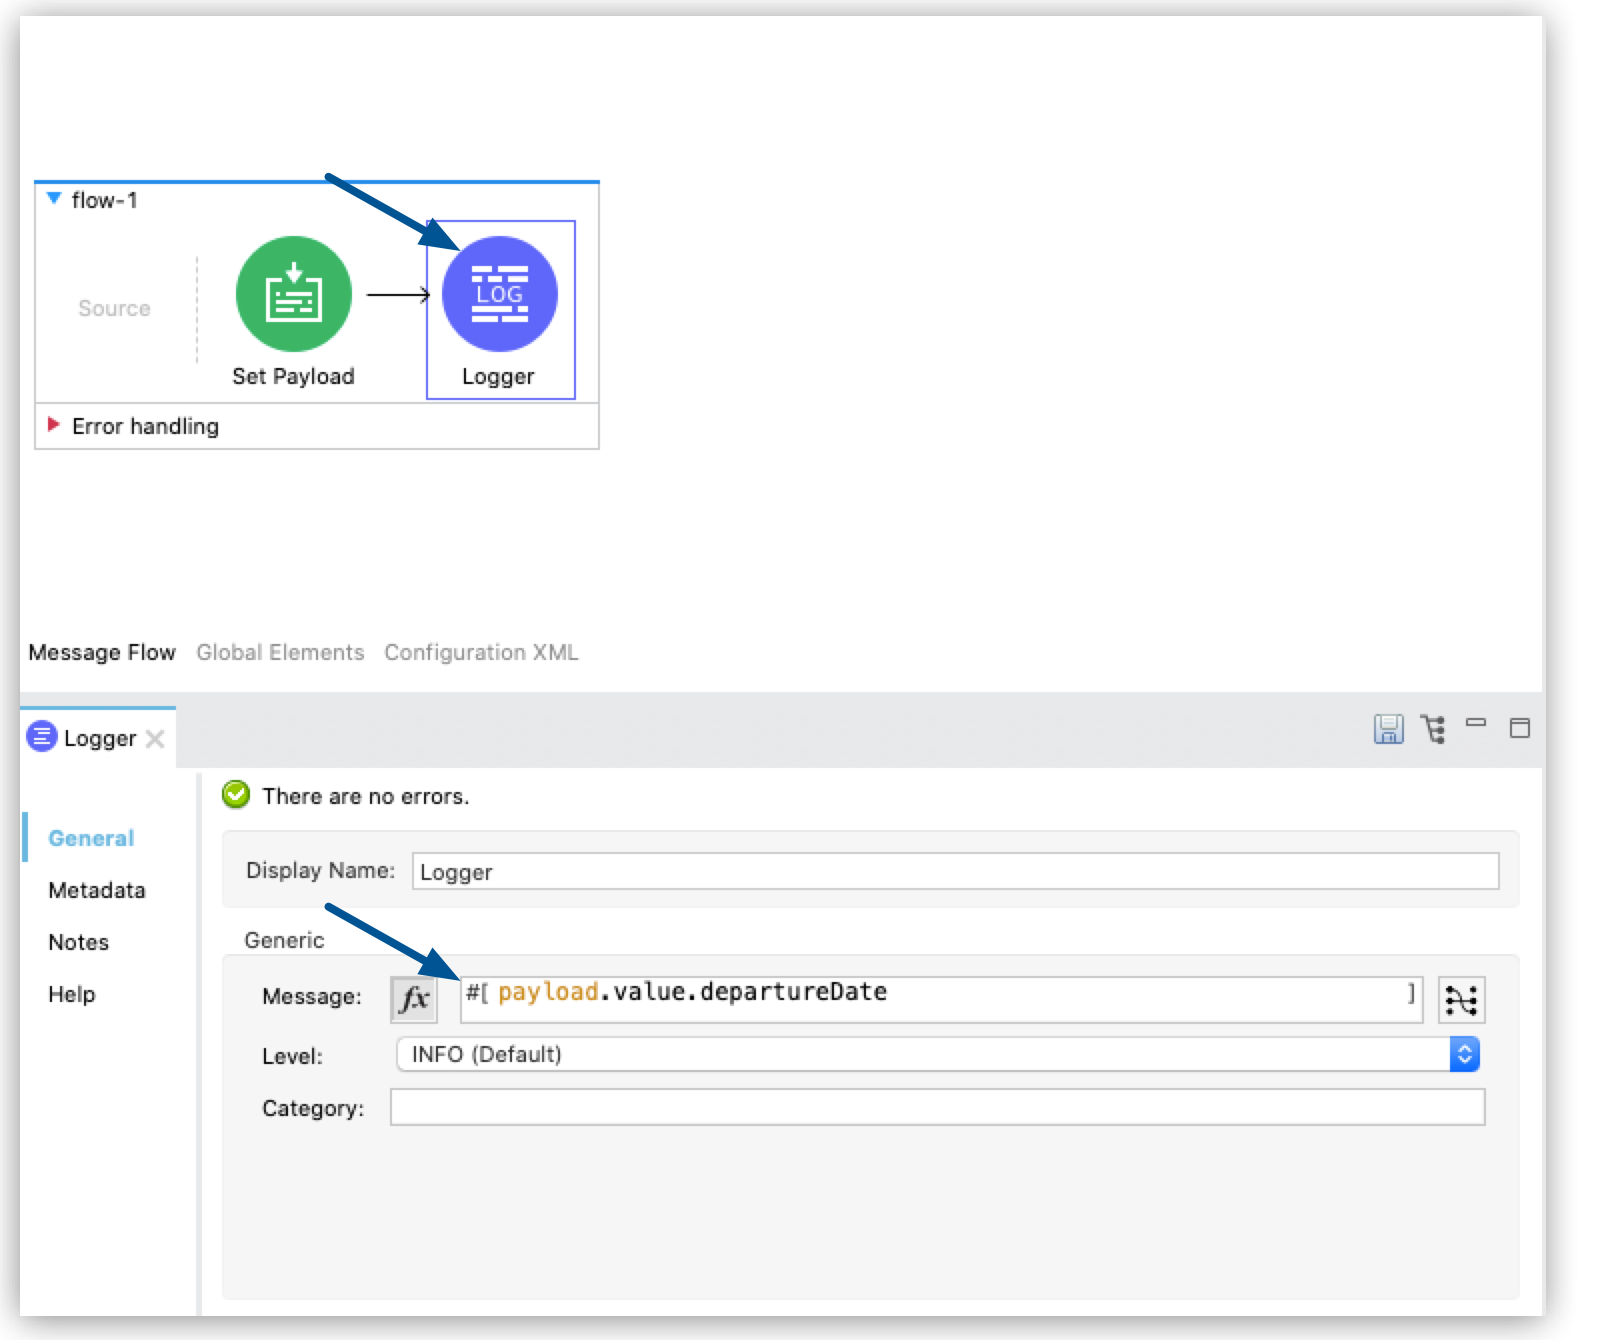
-
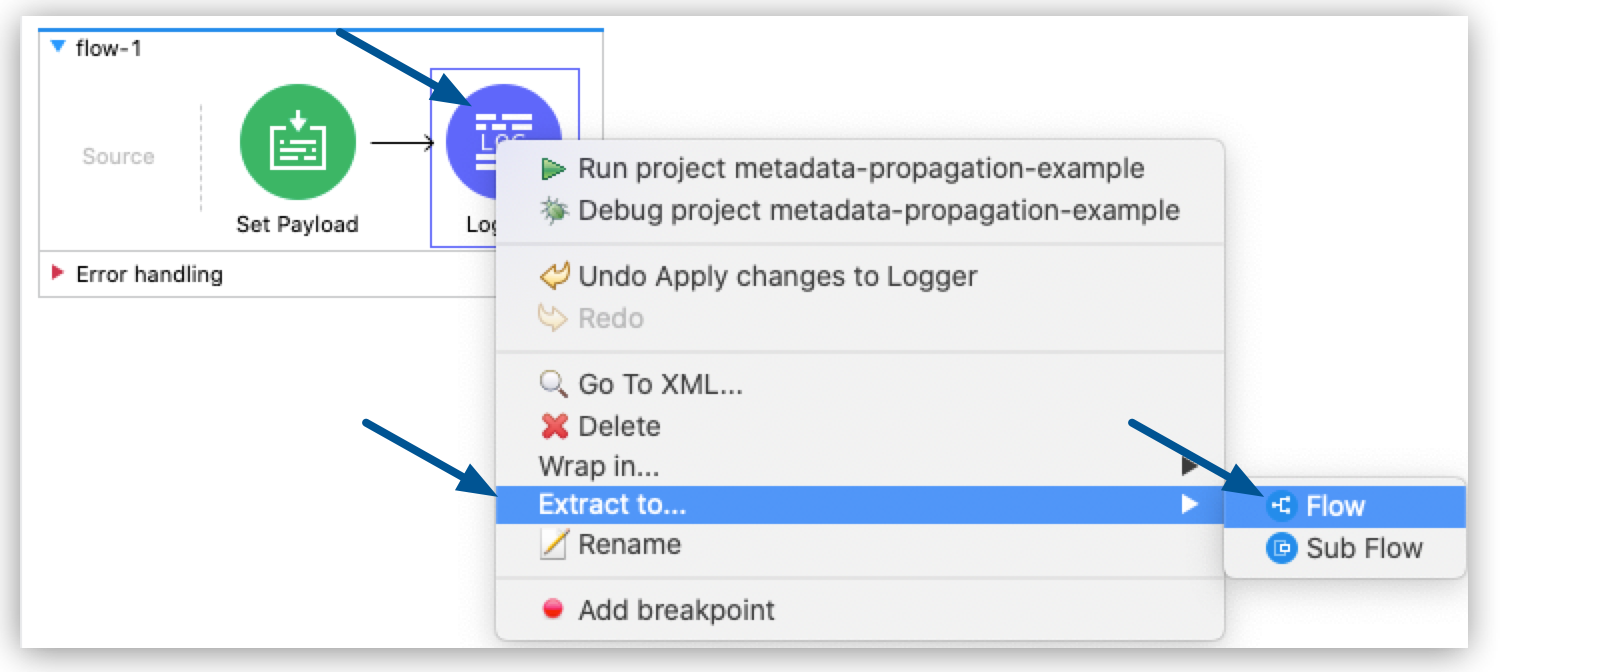
Right-click your Logger component and select Extract To… > Flow:
-
Name your target flow
flow-2. -
Select Metadata Preferences to configure the input and output metadata.
Note that Studio automatically recognizes the metadata of your flow.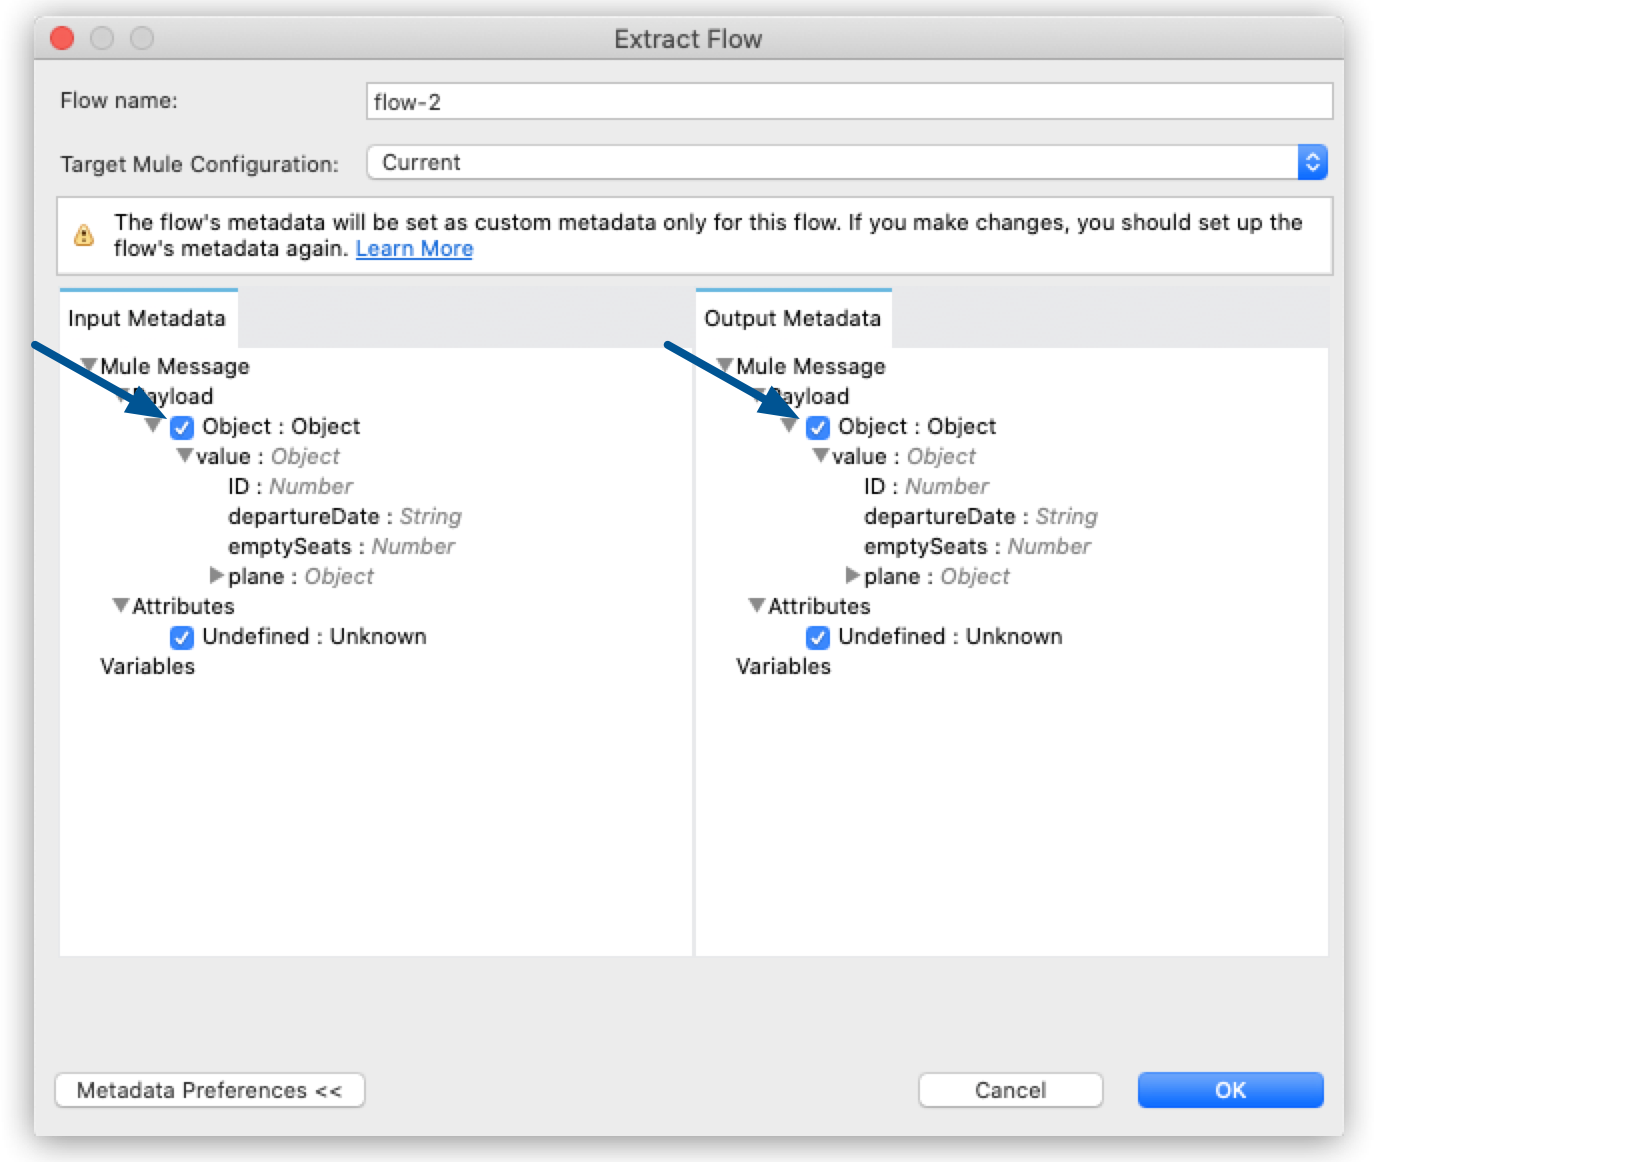
-
Select OK.
-
Your Logger component is now in
flow-2, the metadata tab is populated with autogenerated metadata, and the input tab in the metadata explorer reflects the payload format that the Set Payload component configures inflow-1: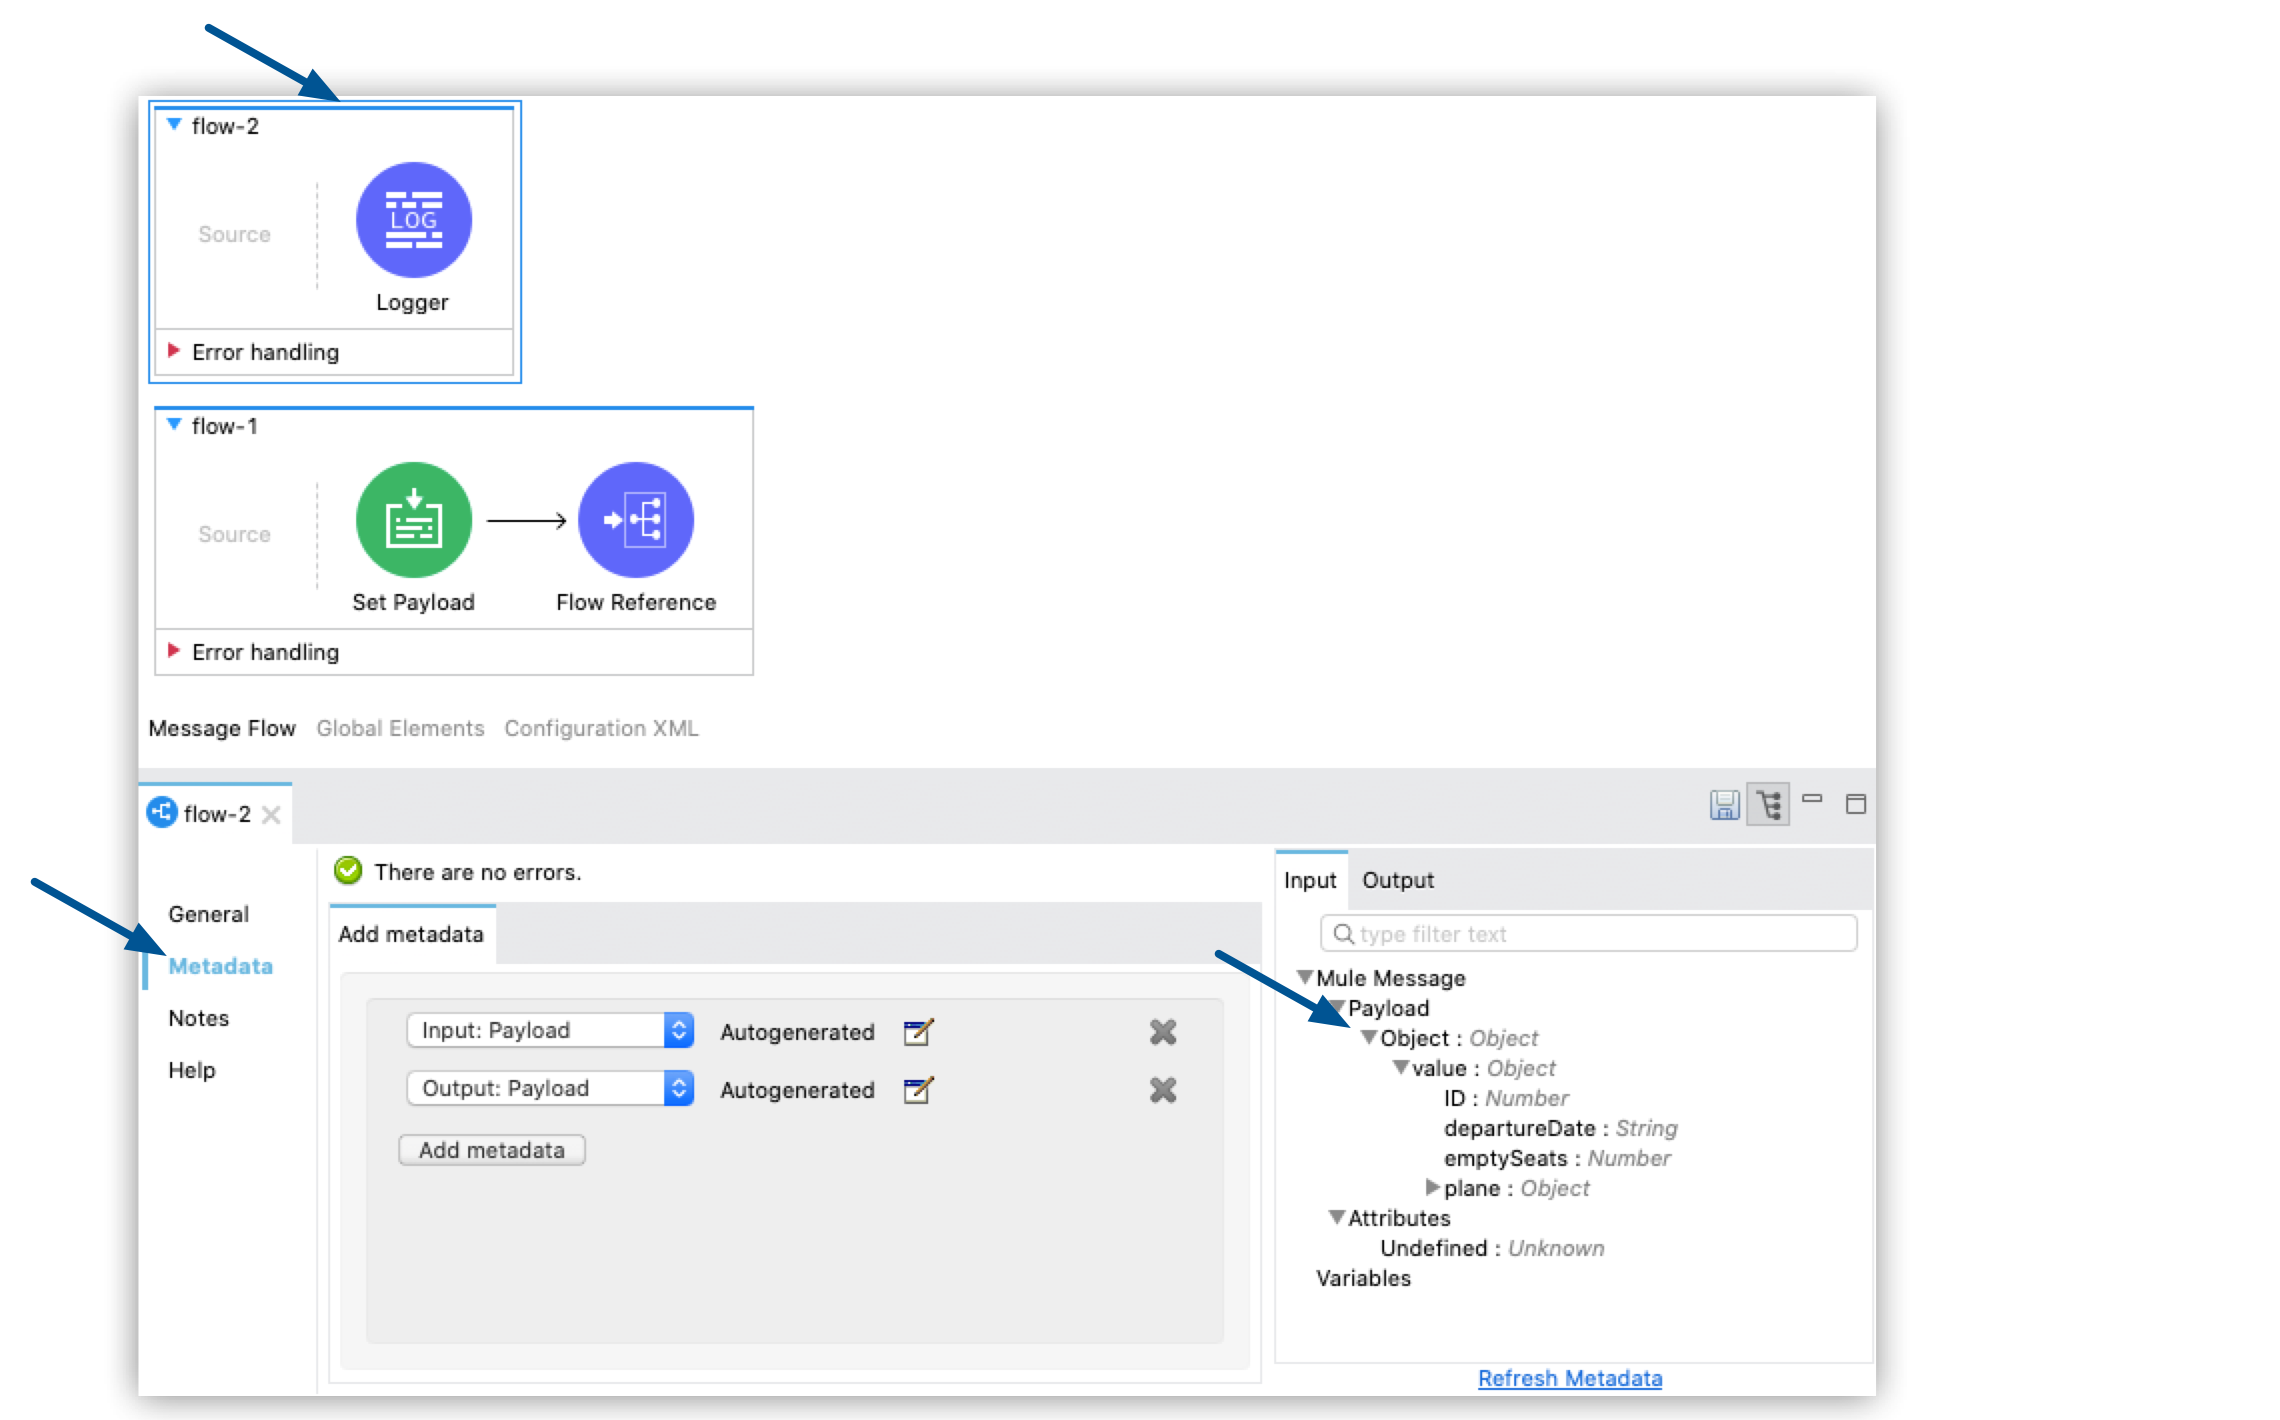
Propagate Metadata to a Flow with Custom Metadata Already Configured
When you add a Flow Reference component to your source flow and reference another, target flow that has custom metadata already configured, Studio prompts you to select the metadata that you want to propagate:
-
In the taskbar at the top of the Anypoint Studio display, select File > New > Mule Project.
-
Type a name for your new project and select Finish.
-
Drag two flow components to your empty canvas and name them
flow-1andflow-2:
-
Drag a Set Payload component to
flow-1and configure the payload:{ "value": { "ID": 1, "departureDate": "2016/12/20", "emptySeats": 200, "plane": { "type": "Boeing 747", "totalSeats": 400 } } }JSON
-
Create a JSON file with the name `arrival-type-example.json` in your
src/main/resources/examplesdirectory with the following format:arrival-type-example.json{ "value": { "ID": 1, "arrivalDate": "2016/12/20", "plane": { "type": "Boeing 747", "totalSeats": 400 } } }JSON -
Select
flow-2> Metadata tab > Add Metadata: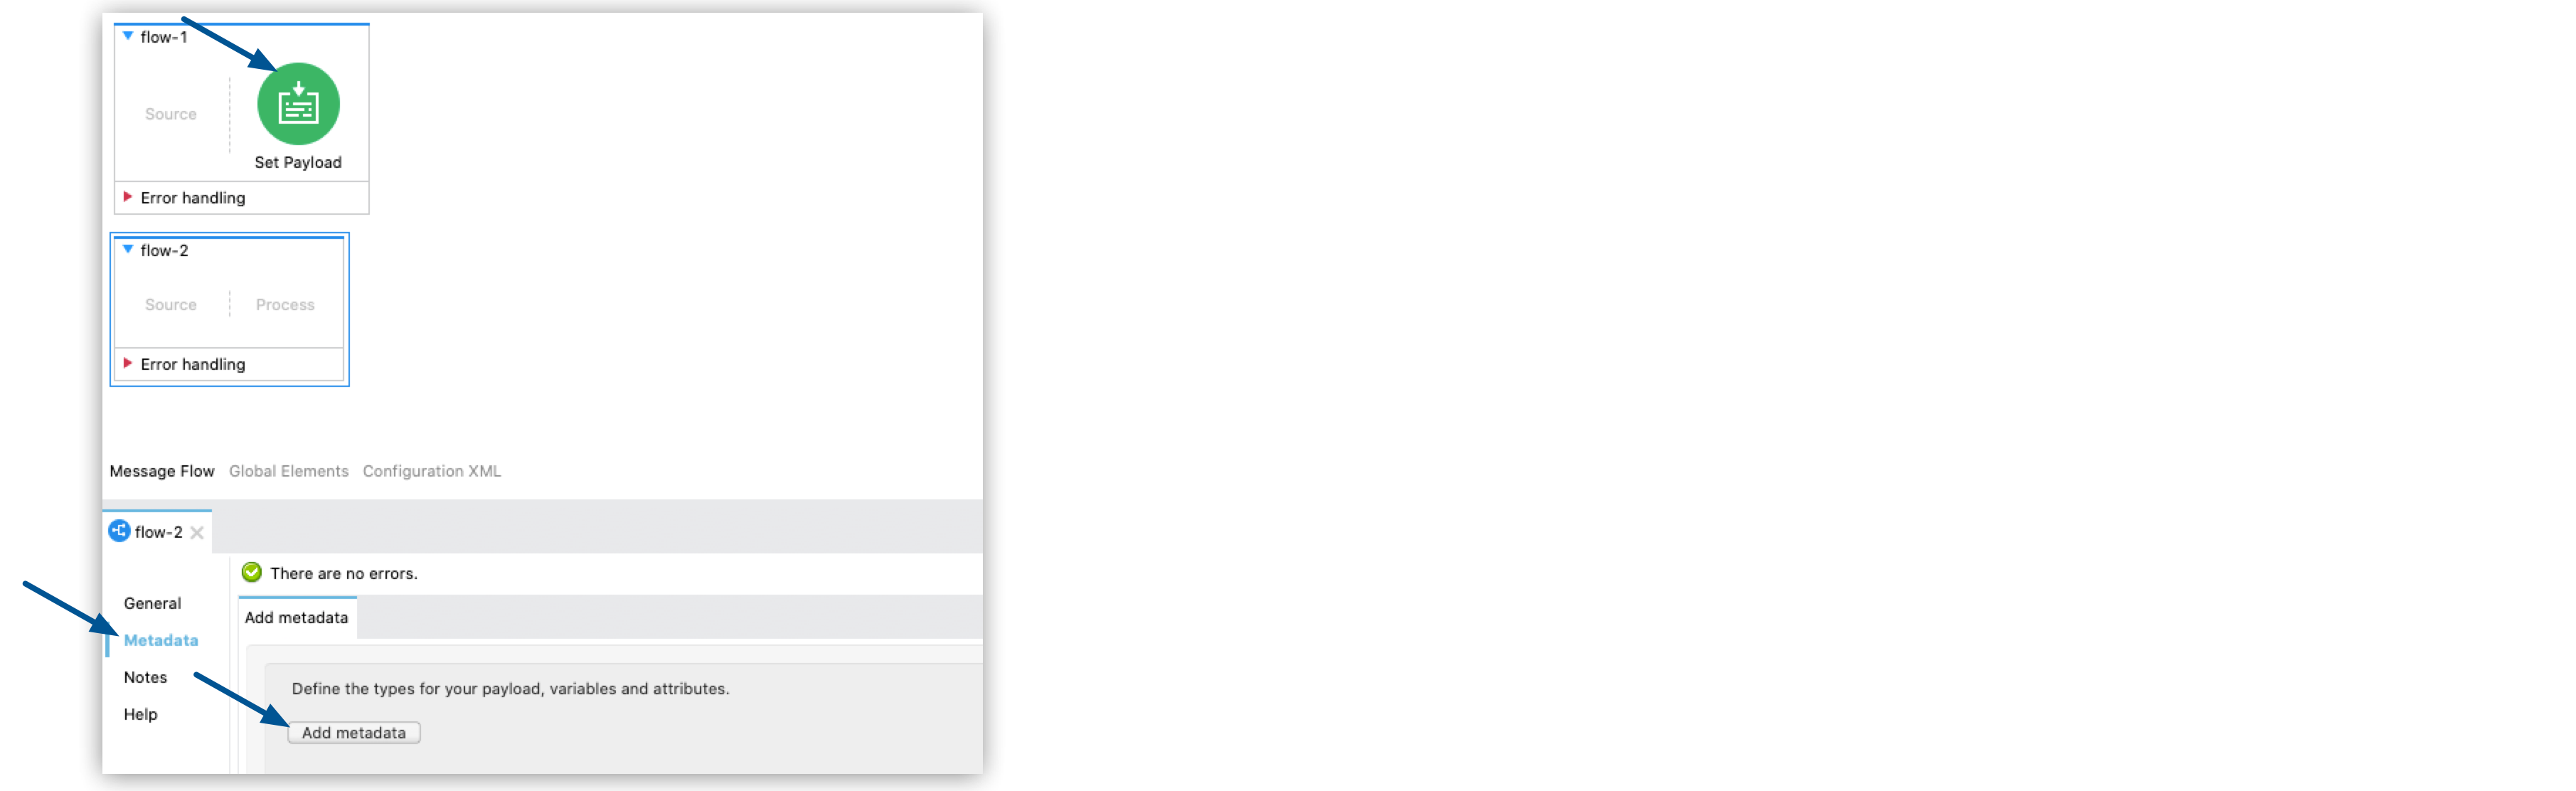
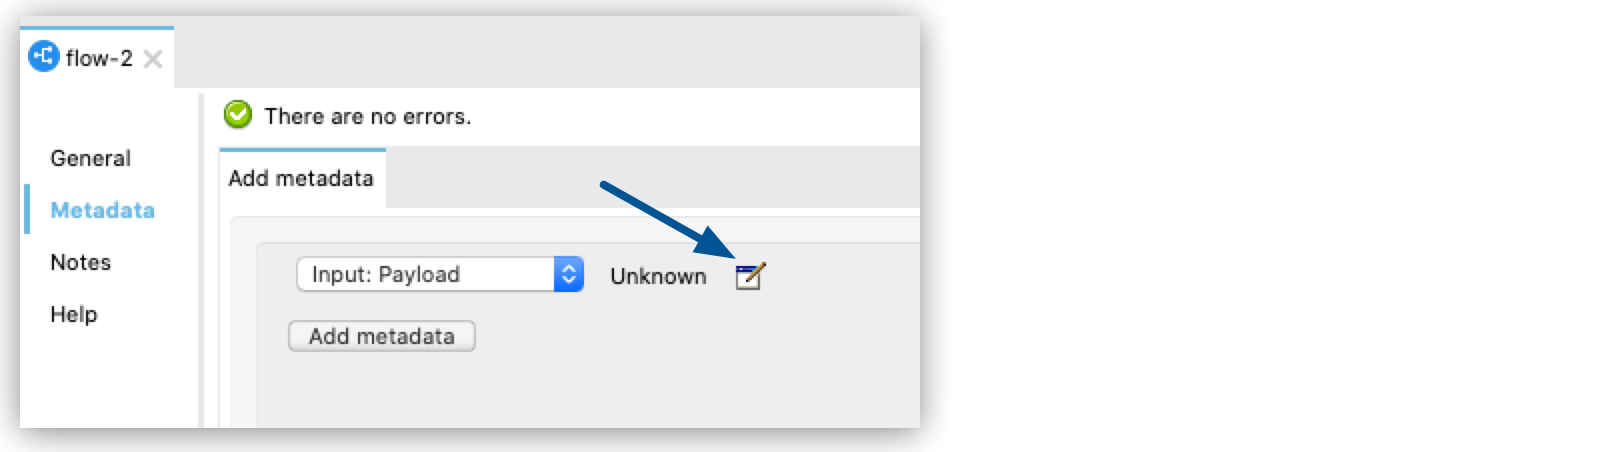
-
Select Input: Payload > Edit:
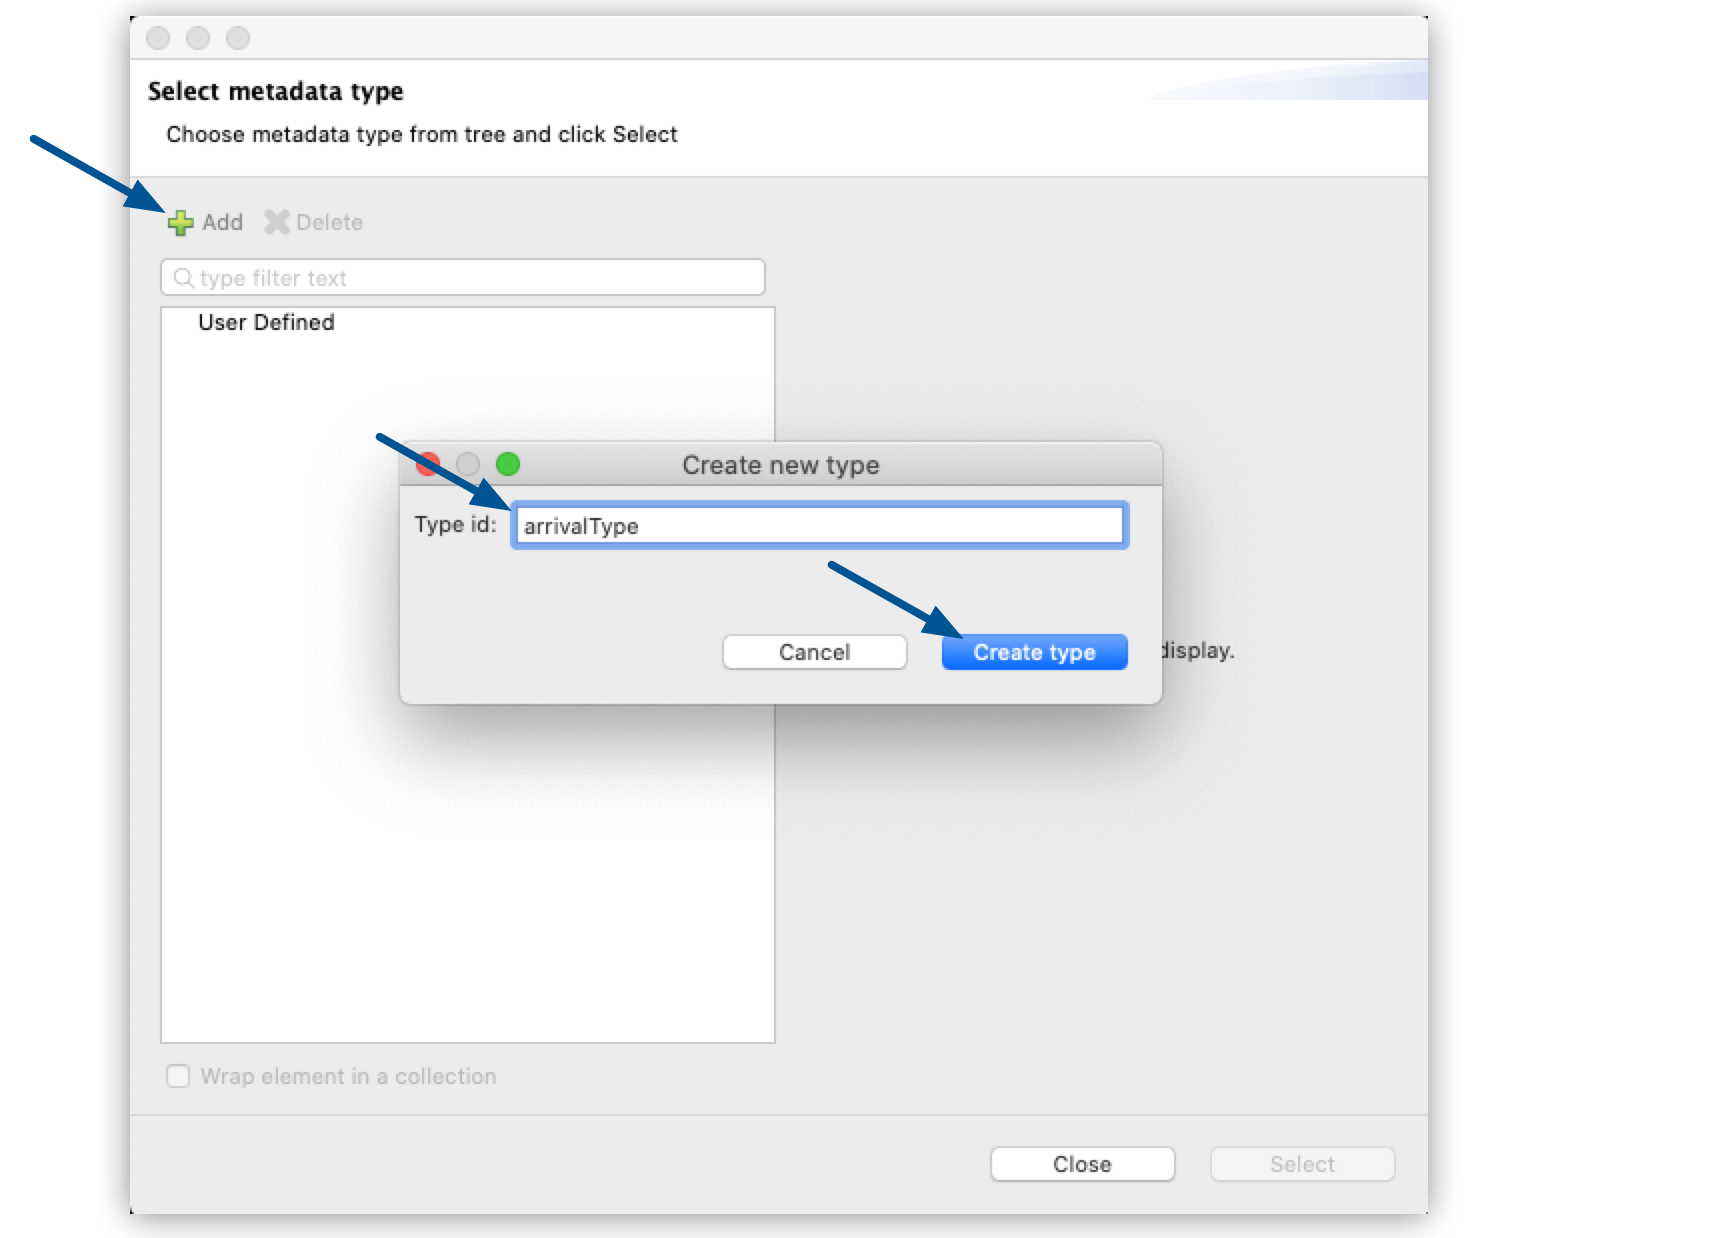
-
Select Add, create a new metadata type called `arrivalType`, and select Create type:
-
Select the type JSON > Example and select the … button to browse to
src/main/resources/examples/arrival-type-example.json: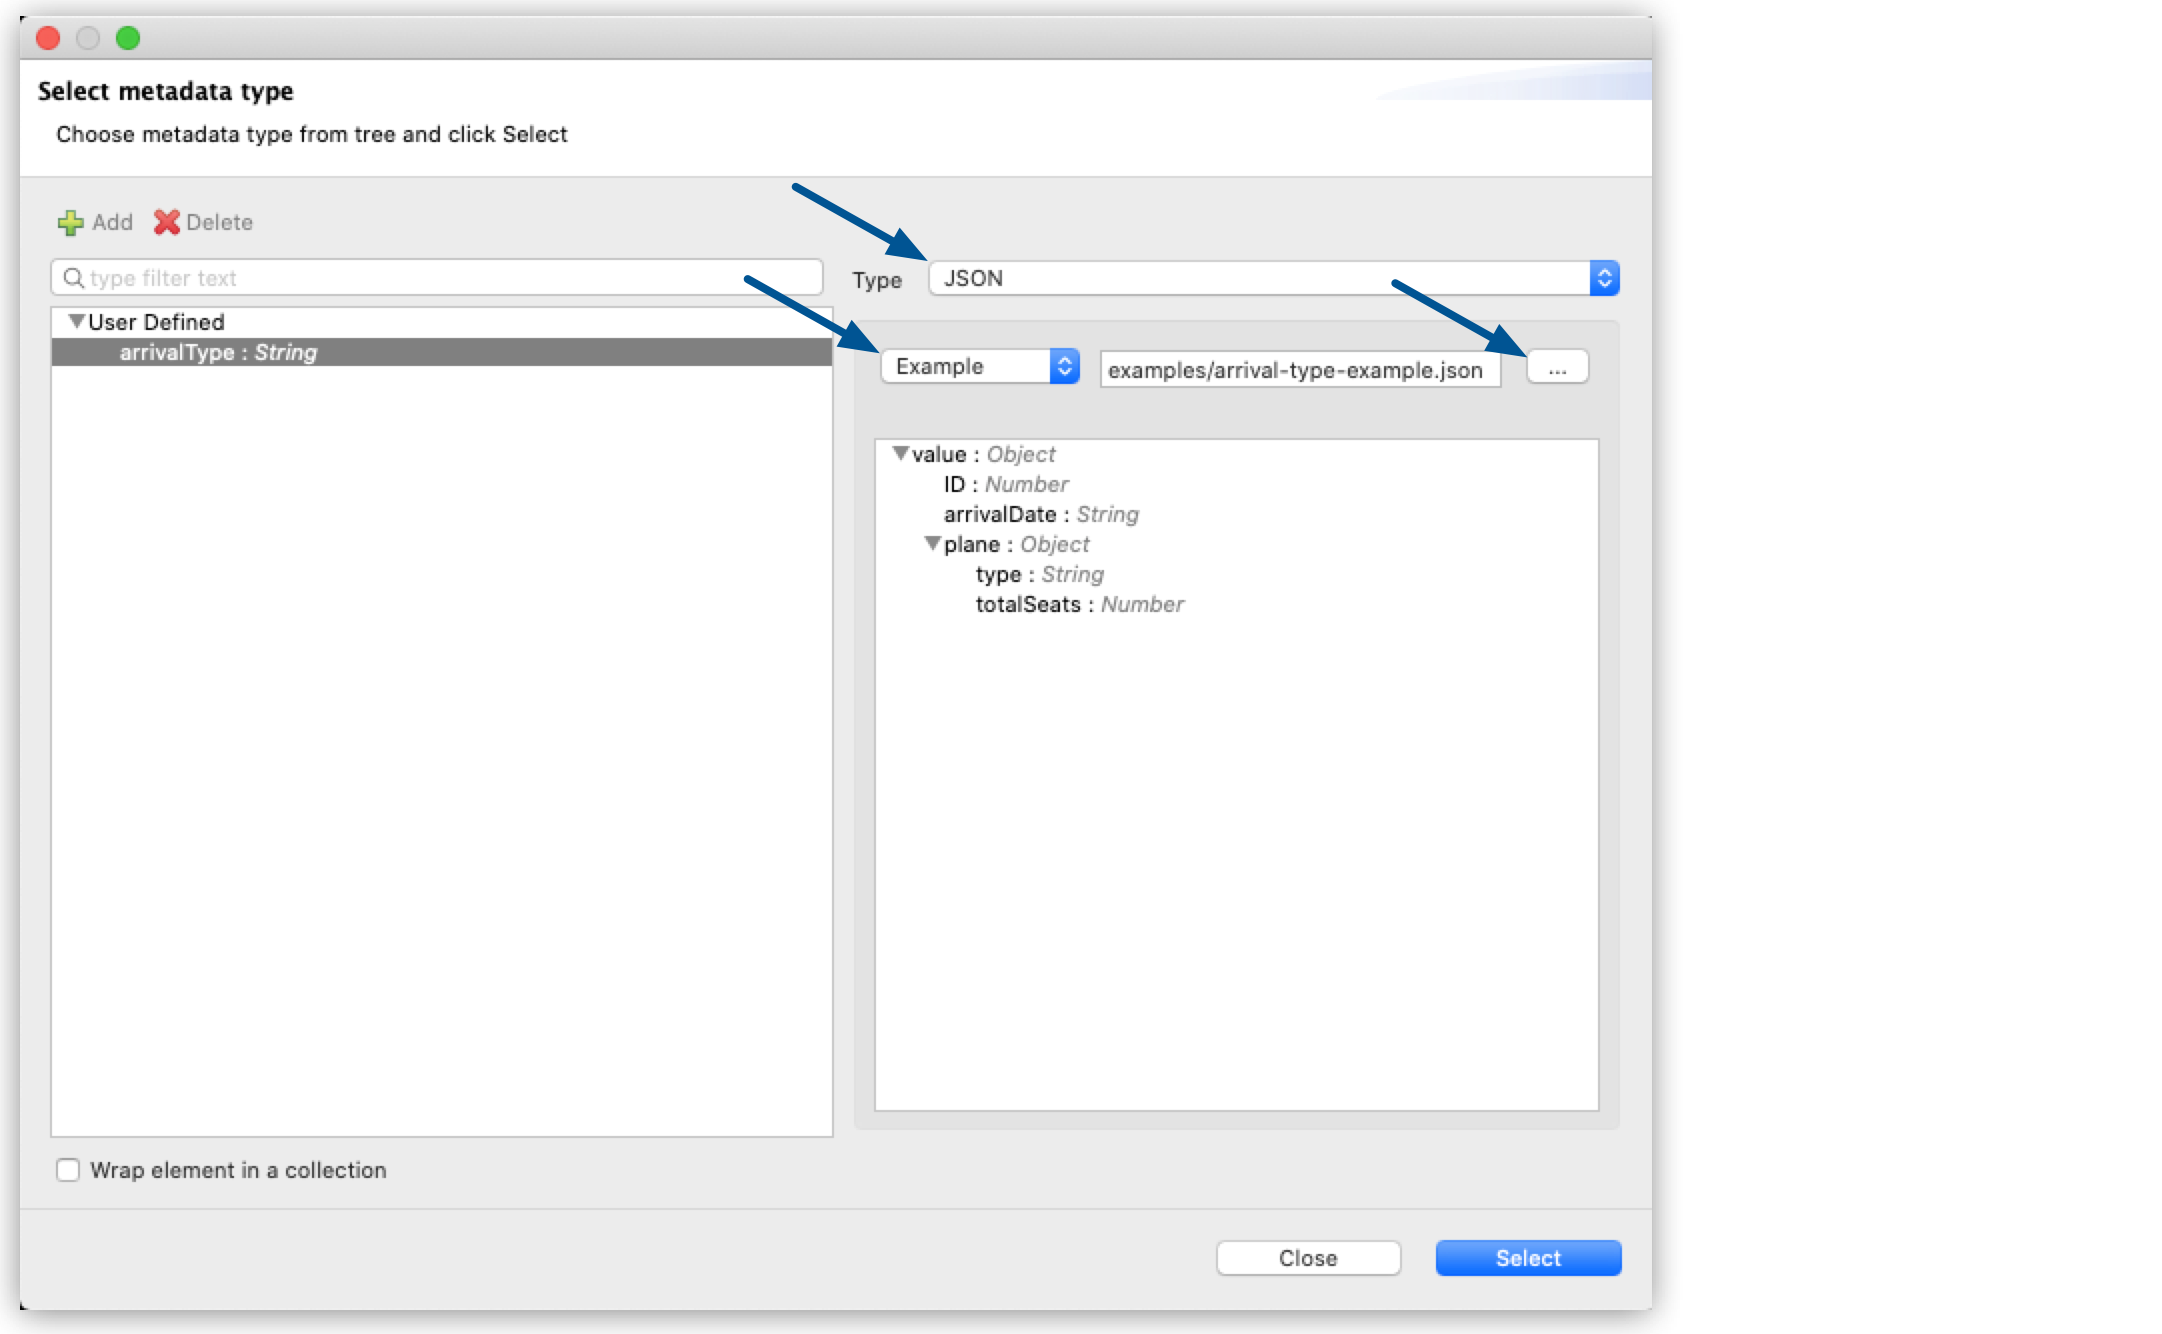
-
Click Select.
-
Drag a Logger component to
flow-2and configure it to logpayload:
-
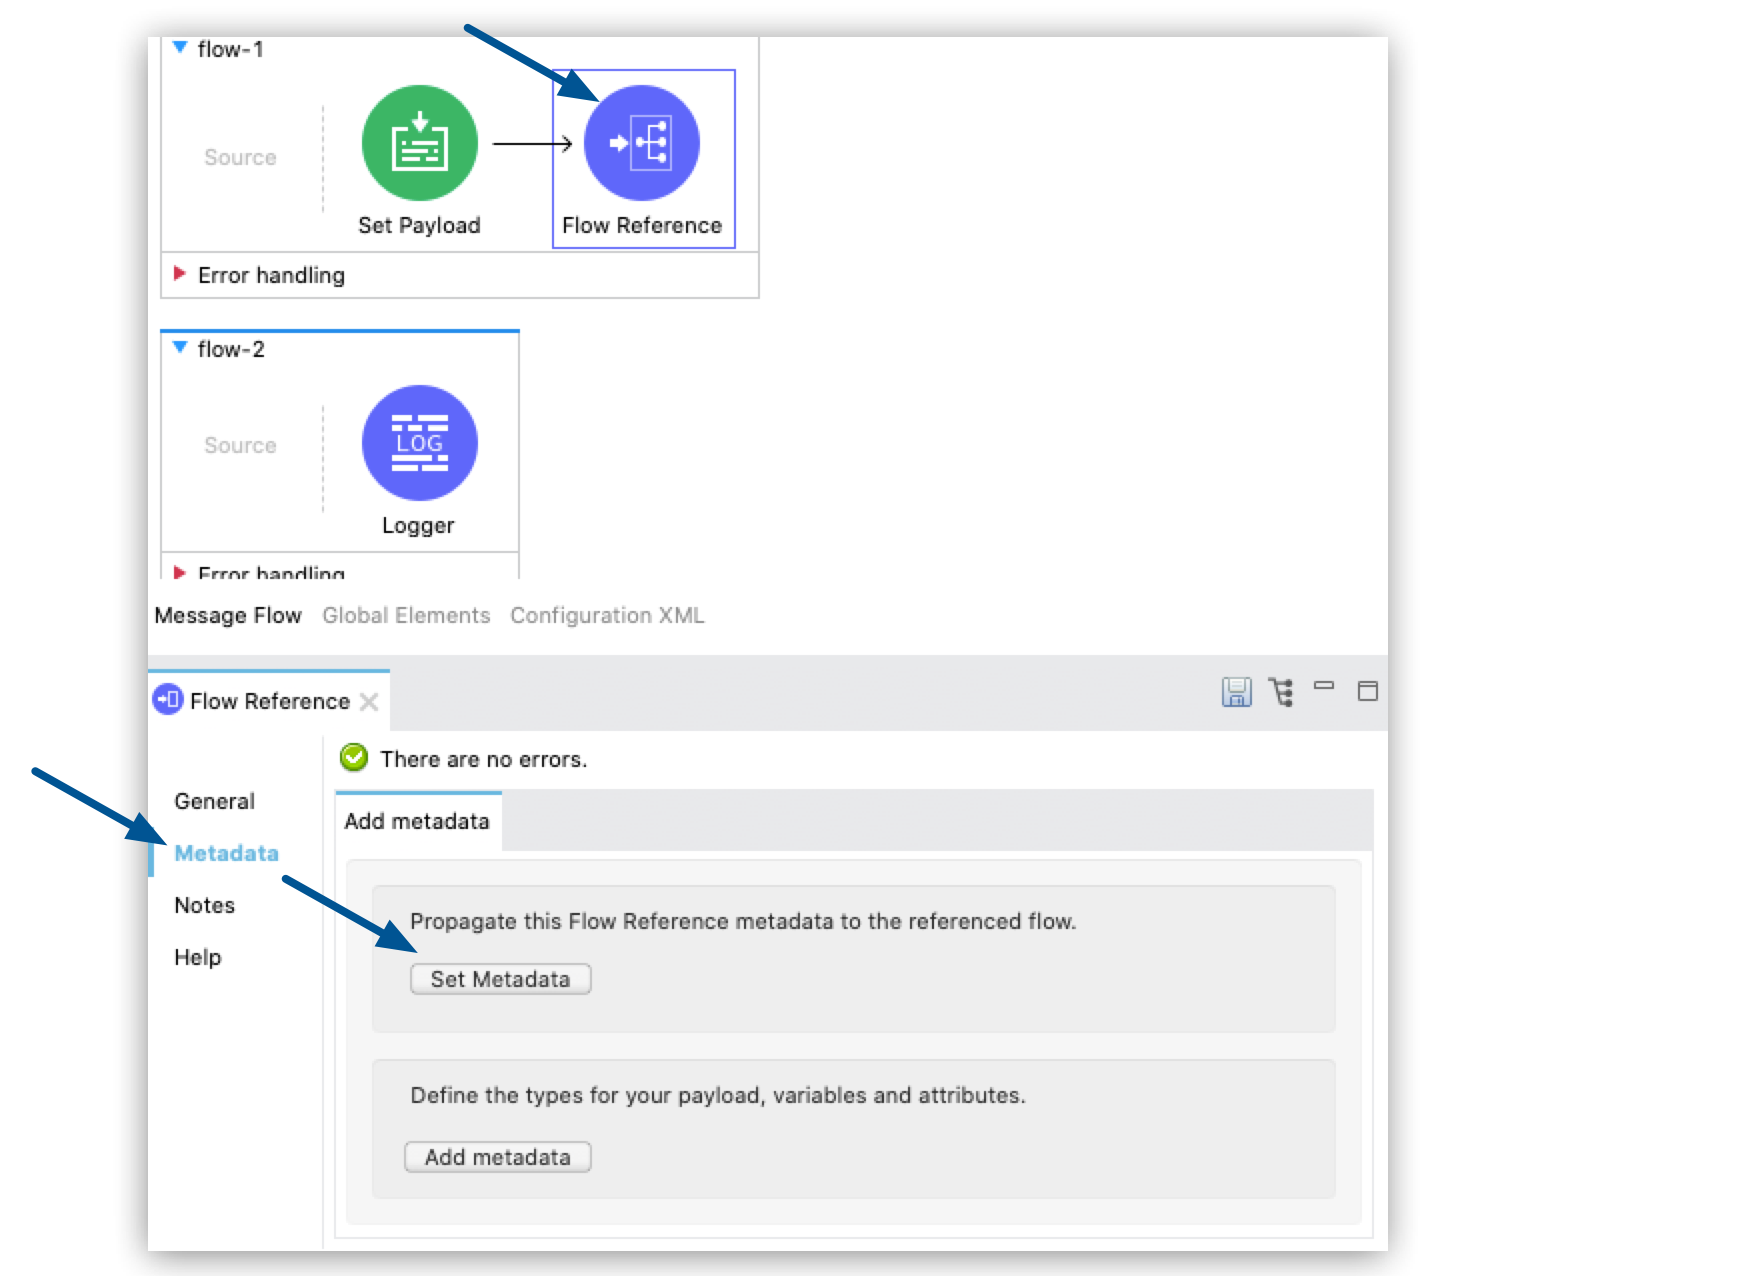
Drag a Flow Reference component to the end of
flow-1and configure it to reference `flow-2`:
-
Select the Flow Reference component Metadata tab, and select Set Metadata:
Studio warns you that setting the metadata from
flow-1will overwrite the existingarrivalTypemetadata type configured forflow-2: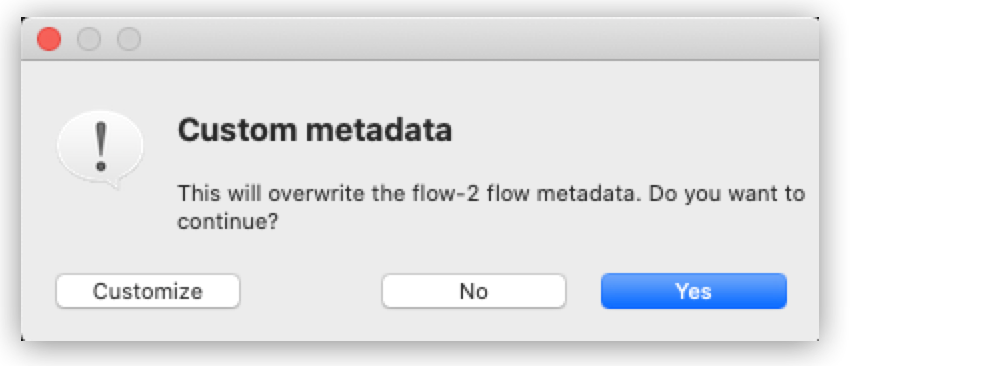
-
Select Customize to configure the desired metadata to propagate to the flow.
Note that Studio recognizes the actual metadata as that set in
flow-1, and the expected metadata as that configured inflow-2.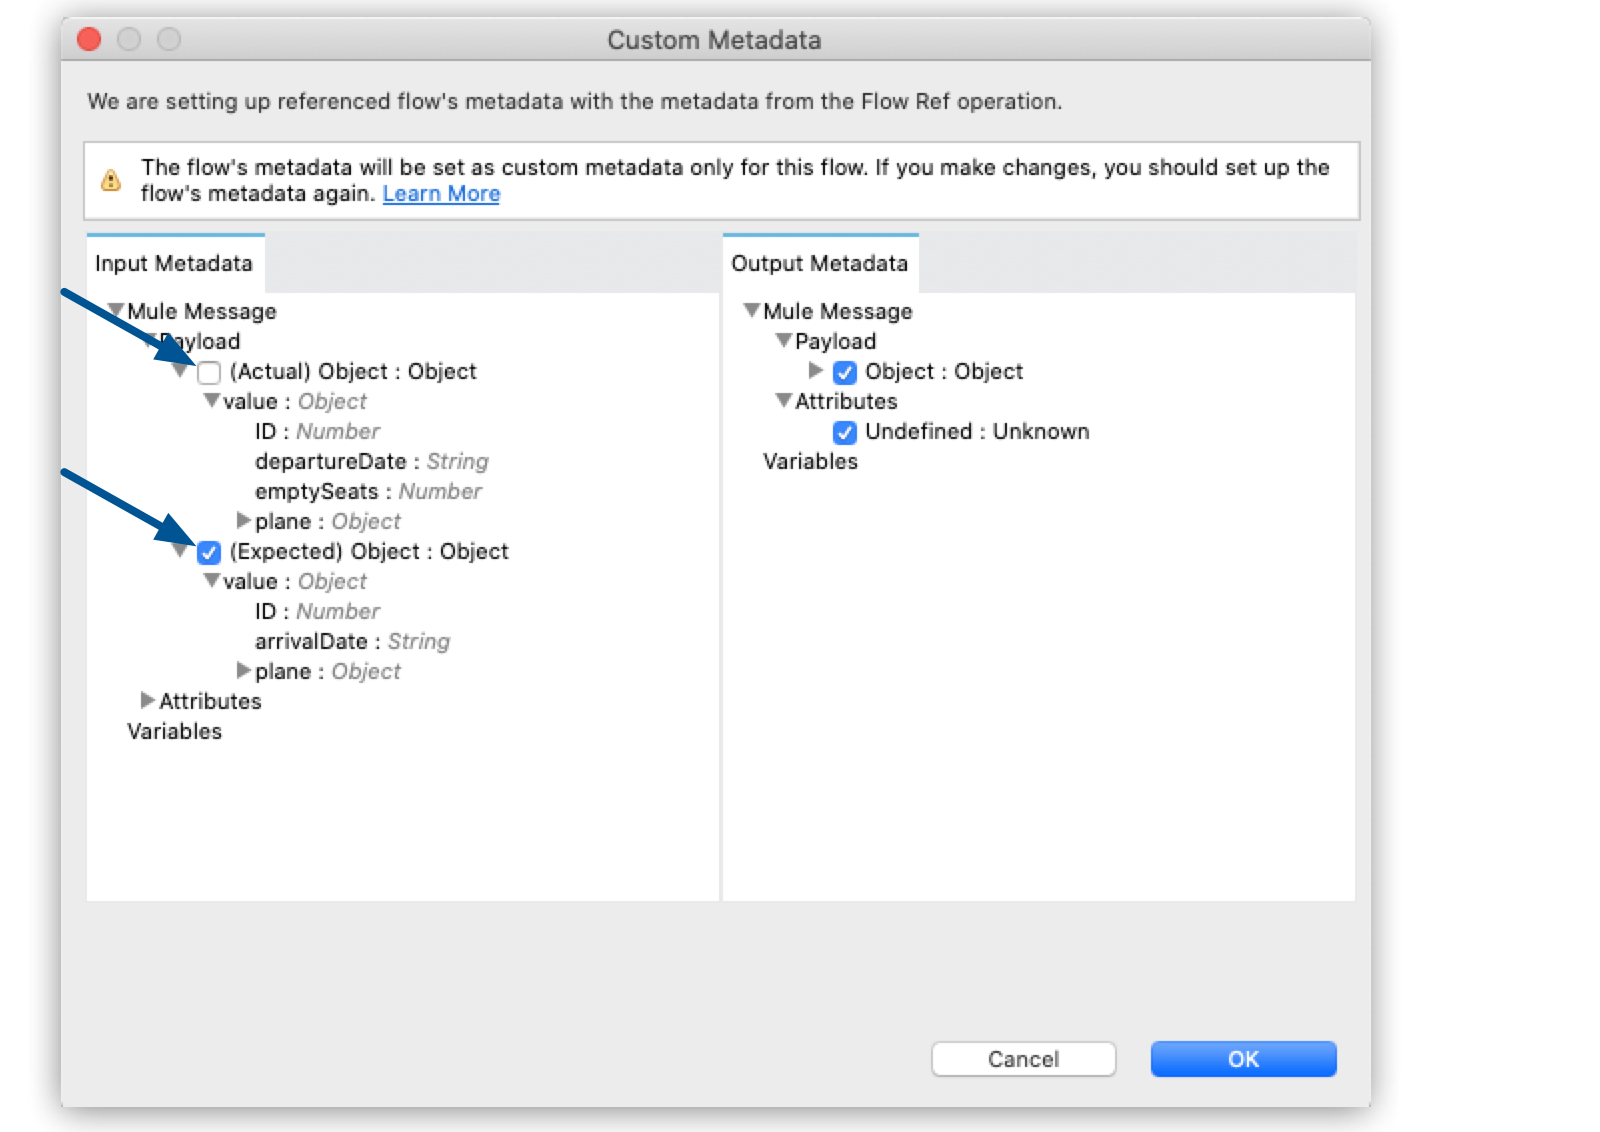
Customizing the actual and expected metadata for a referenced flow is helpful if you want to define a specific set of metadata to propagate.